

Introduction: Tombstone Making


Almost ready for Halloween, but you find an empty space in your yard you just can't fill? Add a foam tombstone! I'll show you how to make your very own hot wire foam cutter for cutting the shape, how to carve out the letters, and how to paint your creation!
Step 1: The HotWire Cutter

The first thing we'll make is the HotWire Cutter. You could try using a saw to cut the foam, but if you do that, you'll find yourself in a wonderland of statically charged snow. What you need is a Hotwire cutter! The one you'll make has a vertical wire and deep throat so you'll have no trouble carving even the most elaborate designs. You can vary most of the dimensions to fit your needs or preferences.
Materials:
- A short (about 6" long x 1.5" x 1.5") piece of wood
- A long (about 18" long x 1.5" x 1.5")piece of wood
- A plywood base (about 1' x 2')
- Thin craft wire (24-gauge or smaller, I think)
- Electrical wire
- Rubber feet
- 2 small eyelet screws
- Power supply (mine is 12VDC, 1.2A)
- Ruler
Step 2: Build the Frame


Now, we will begin to build up the frame. Start by screwing in the 6" piece into the base from the bottom. You will likely need more than one screw to keep the wood from swiveling. Next, screw the 18" wood into the top of the 6" wood. Again, more than one screw will be necessary. Try to keep the arm parallel to the base (when looking down upon your creation). Mine isn't.
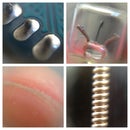
Step 3: Adding the Small Components


The next thing we will do is add the smaller parts, such as the eyelets and wire. Screw the eyelets into the top first, then drill a small hole directly below the eyelet using a 90-degree rule as a guide. The second eyelet must go underneath the base, so as not to interfere with your cutting. Once you're hole is drilled, screw in the second eyelet to the side of the hole. It doesn't really matter where, as long as it's not too far away (a waste of wire). If you can, put a heat-insulating insert in the hole because the wire tends to burn the wood. Feed the craft wire up through the hole in the base and wrap it around the top eyelet. Then pull the wire tight and wrap it around the bottom eyelet. Once you're happy with the positioning of the wire, cut the end off the spool.
Step 4: Electrical Wiring

There are two ways to wire the cutter up - permanent and temporary. The permanent way begins with cutting the connector off of your power supply. Next, solder and heat-shrink wires to your supply, long enough to reach the top and bottom eyelets.
The temporary way is, well, temporary. First, get a small length of thickish multi-strand wire. Strip about 3/8" off one side and 1/4" off the other. Bend the longer end up (zig-zag) and shove it into the power connector of your power supply. Attach one alligator clip to the wire from the inside, and another to the outside connection. One alligator clip will go on one eyelet, and another on the other. The next step is to try out you cutter.
Step 5: Testing

Congrats, you've (most likely) finished! If your creation is all wired up, put some safety glasses on and plug it in. I say to put safety glasses on for a fairly obvious reason. If you have super thin wire and a high-amperage power source, a lot of heat is created. If all that heat goes into the wire at once, it could explode. It didn't happen on mine, but if you have thinner wire or a more powerful power supply, it could happen on yours.
Have a small piece of foam ready to test. When you first use the hotwire, it is likely that it will smoke a bit. This is normal, as the heat is just burning off whatever is on the wire. However, if it smokes a lot, turn it off and check things out.
Troubleshooting
-My cutter doesn't cut; Hook up a multimeter to both the leads. If there's no voltage going through the wires, check your electrical connections. If there is voltage, your power supply may be too weak. Get one with more amperage.
-The wire gets red-hot when I turn it on; This happened to me. Your power supply is likely supplying too much amperage to the wire. If you leave it like it is, it will not cut as precisely as a lower-powered unit would.
If everything works, congratulations! You are now ready to make stuff. Next up: lettering your tombstone-in-progress!
Step 6: Lettering Your 'stone


Very few materials are needed to create and carve the lettering for a tombstone.
Materials:
- Foam tombstone in progress
- A computer with a word-processing capabilities (very hard to find)
- A printer with paper
- A marker for stenciling
- Craft knife
- A hot glue gun (no glue necessary)
To start off, you'll need to create an epitaph (the lettering), preferably on the computer, and scale it to fit your styrofoam tombstone. Then, use the printout as a stencil and draw the lettering onto the foam. I've already used the hotwire cutter to cut the shape of this one.
Next, plug in your hot glue gun and let it warm up. Then press the metal tip of the gun into the spaces where you want the letters to be, following their paths. The deeper you press, the deeper and wider the letters will be. Additionally, different hot glue guns have different angled tips, and will therefore give different results. When lettering, go slowly and evenly. After you have finished lettering, go ahead and pick off the stringy bits of melted foam left by the glue gun. Now all you have to do is paint your tombstone!
Step 7: Painting


Paint in the letters with black paint. I used tempera paint (but acrylic is longer lasting). You don't have to stay inside the letters, since the main grey color will go on top. A small paint roller or large paint brush is useful for getting the main grey painted on evenly and without slipping into the letters. If you're using a paintbrush, make your strokes diagonally for this reason. I made my grey paint with some old white house paint and a bottle of black tempra.
Detailing time! There are thousands of ways to bring a little more life into these tombstones. Here, I speckled black and white paint using an old toothbrush (you know, when you pull back on the bristles with your thumb)...
On Baron's tombstone, I put small blobs of black paint at the top, below the letters, etc., and wiped it down with a paper towel. Straight, downward strokes are key.
Horray! You've finished your tombstone! To show it off, you can hot glue a PVC pipe section to the back and stab a stake into the ground (or something similar). Happy haunting!
Participated in the
DIY Halloween Contest


