

Introduction: Will It Conduct Electricity? With Arduino


Oh no! The power conduits that sustain the station's oxygen supply have been severed. A rogue asteroid crashed and cut clean through the wires! We could lose life-support in pod 6 if you don't act quickly. The room you're in is close to the damage and is full of all sorts of materials you could use to repair the disconnection. Create a connectivity testing device and go through items to find which one will be the best to use to fix the power lines. We're all counting on you!
Read more lessons like this at https://www.ardusat.com/lessons/155
Step 1: Gather Materials
You'll need:
- 1 Arduino UNO
- 4 Jumper Wires
- 1 Breadboard
- 1 10k Resistor (Brown, black, orange, gold)
- 1 USB B CableMisc materials to test (Paperclips, pencil and paper, plastic, coins, wood, etc)
Step 2: Wire the Leads
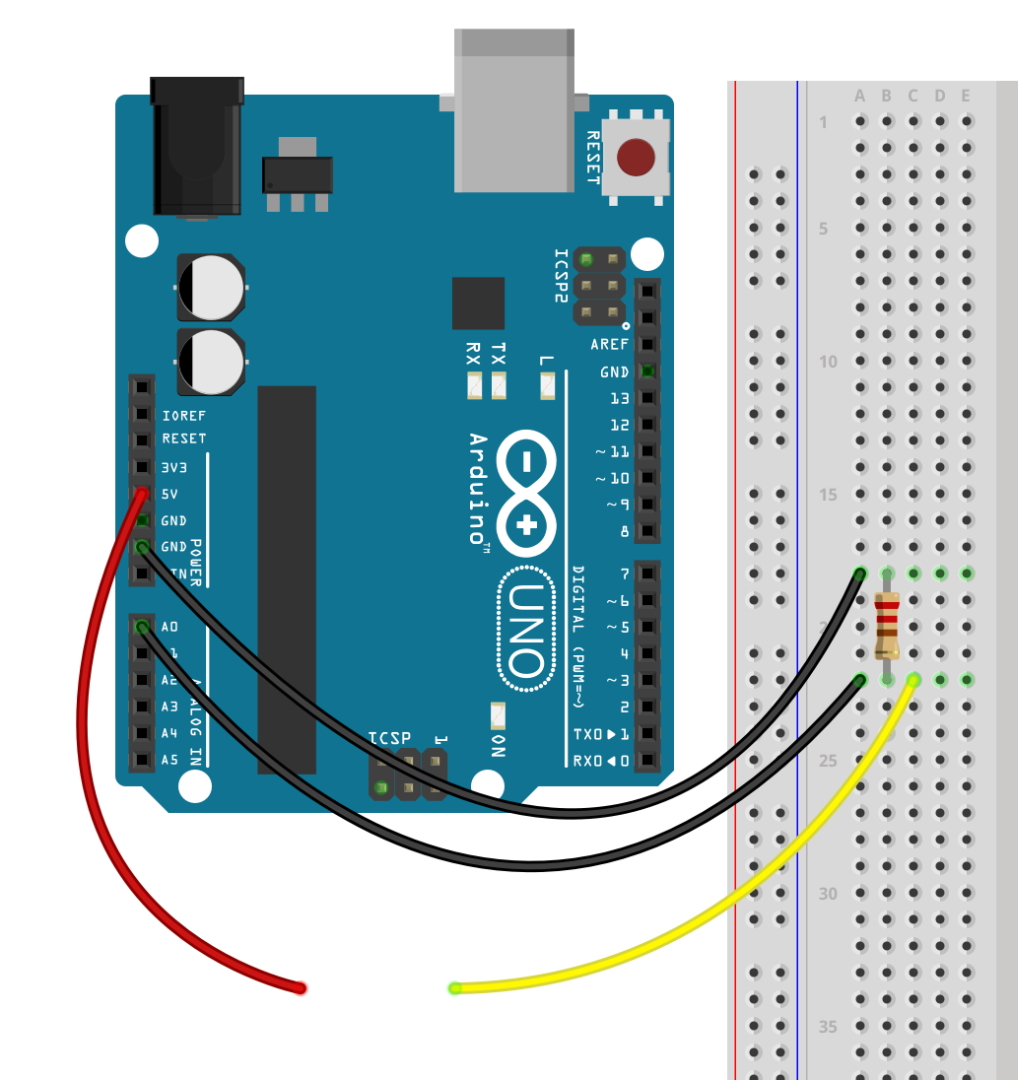
Use the Arduino, breadboard, jumper wires, and sensor to match the wiring diagram:
Step 3: Upload the Sketch Code Into the Arduino
Plug the Arduino into your computer using the USB cable. Connect the Arduino using the Codebender tool below and choose "Run on Arduino".
Step 4: Open the Serial Monitor


Gather your items. Take one and touch the yellow lead to the surface of your item. Take the red lead and also touch the surface of the item (be careful not to accidentally touch the two leads together.) Make note of the number from the serial monitor and then move on to doing the same thing for each item in your group.
Once you've tested all of the materials, find which one has the highest number.
Congratulations! You've found the life saving materials.
Everyone in pod 6 can breathe a sigh of relief and are grateful for all your hard work!


