

Introduction: Wintersowing Tips-Securing Milk Jugs


The following is a technique relating to Wintersowing.
For those of you who haven’t heard of it, Wintersowing is a method of starting seeds for your garden.
You simply sow your seed in easily prepared, "found", recycled containers and set them out in the yard in the dead of winter.
This post deals with the issue of keeping your containers securly closed so you can move them around and water them.
This post assumes you are familier with the concept and know how to initially prepare the milk jugs.
What I will focus on here is a specific trick I came up with to secure them.
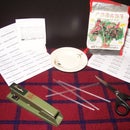
Step 1: Materials-Part 1

For this step you will need the following:
-Yarn or string (I prefer yarn as it is stretchy)
-Scissors
Cut a length of yarn sufficient to wrap fully around the milk jug.
Make a large loop (roughly 6") in one end.
Divide this looped section in half and tie another knot making a figure "8"
Step 2: Materials-Part 2

For this step you will need the following:
-Some slats from a vinyl miniblind
-Scissors
Cut up the slats into about 2.5" lengths.
Cut some of these pieces in half.
Step 3: Assembling the "Clips"

Center one of the small pieces, concave sides up, on top of one of the larger pieces and staple them together in the center.
Step 4: Using the "Clip"

Slip one of the assembled clips onto the bottom half of the jug at the point oppisite the handle capturing it between the two pieces.
Slip the top half of the jug onto the clip capturing it also.
The jug is now fairly well secured but still is likely to come apart if lifted when filled.
So.....
Step 5: Tying Things Up

Take one of the pieces of yarn you prepared earlier and loop the "inner" loop of the figure "8" over the neck of the jug, leaving the end loop hanging free.
Run the yarn under the jug, using the molded in seam as a guide, and secure things with a simple slip knot.
You now have a fully secured mini greenhouse. You can easily lift it to move or plunge into a basin for bottom watering with no fear of it coming open.
And unlike duct tape you can easily pull the slip knot to open it and reseal it if need be.
Another adavntage is, since the integrity of the jug is maintained, it is easier to save your jugs from year to year.
Simply string them together like a garlic braid.
Enjoy


