

Introduction: Wooden Dog Bowl Table for Spot

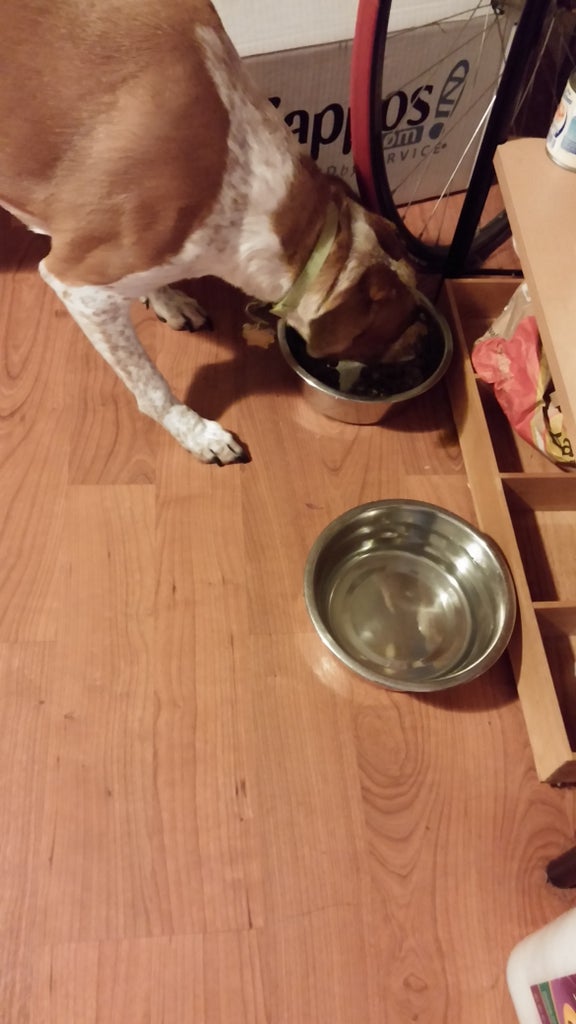


We decided to make a dog bowl holder for our dog, Spot. You can see the before picture. She would always slide her food bowl into my bicycle wheel, and she would have to really bend over to get the kibble. Now she has a high class, custom table to raise up her bowls for easy access and stable eating. We made it out of African Mahogany. Also, we made it at the TechShop in San Jose.
Check them out! http://techshop.ws/
Step 1: Model the Table


First we modeled the dog table in SolidWorks. Then we printed out drawings so we could trace the layout onto the wood.
Step 2: Cross Cuts


We started with a long board and made a few cuts on the table saw to get pieces for the table top, and the two legs. First we measured out the lengths of each piece needed and marked them with the T square. Then we set the table saw fence to the proper length and slid the wood through!
Step 3: Cutting Out the Bone Shape


Then with the outline traced onto the board, we took it to the bandsaw to cut it out. We drilled a hole at the tight curve at the bone ends so it was easy to cut it out in sections. It was tough to follow the line perfectly, so we left some extra material and sanded to the line on the belt sander. It took a hand sander to get in to the spots where the belt sander couldn't reach.
Step 4: Cutting Out the Bowl Holes


We used the scroll saw to cut out the bowl holes. To do this, first we drilled holes somewhere near the edge of the bowl lines. Then you can remove the scroll saw blade, and reinstall it through the hole. Now you can start the machine and cut out around the circle.
Step 5: Rounding Over Edge


Next we used a 1/2" round over router bit to radius the edge all around the table top. This bit has a ball bearing on the bottom so it rolls along the edge and follows the outline.
Step 6: Making the Legs


We cut out the legs on the bandsaw and sanded them on the belt sander as well. We put a small radius on the edges by hand sanding. Then we used a Kreg Jig to drill pocket holes in the legs. The Kreg jig makes it super easy to make joints!
Step 7: Attaching Legs to Top


Now its time to screw the legs onto the table top. We had to hold the legs in place while driving the screws into the table top, so we clamped a block down to give us something to clamp the legs to. We lined the block up with a line we had drawn to make sure the legs were nice and straight. Now it can stand on its own! That was the easy part...
Step 8: Sanding!

We hate sanding but it has to be done! The random orbital sander is great, but this project required a lot of hand sanding to get the rounded edges and inside of the holes.
Step 9: Finishing


For the finish, we applied General Finishes Enduro Var with a brush. Mahogany is an open grain wood, so I've read some people recommend using grain filler, but we just went ahead and just put on the clear coat. We put on a bunch of coats so we could sand it flat.
Step 10: Wet Sanding and Buffing


Once we applied around 5 coats we proceeded to sand everything flat and work our way up from 320 to 1000 grit sand paper. Then we buffed it to make it shine!!
Step 11: It's Done!!


It looks like Spot is a little wary of the table at first, but she likes it now! We took some pictures outside to show off the wood and the shine!


