

Introduction: Wooden Macbook Keys (with Backlight Functionality)


Introduction
Mac computers have been modded heavily over the past few years. This could vary in color changes, stickers, engravings and more. Wooden keys on a macbook always impressed me. You can by them online from various places for around $70 or more, but why so expensive? As a broke college student, I was determined to find an alternative solution. I decided to make the keys myself. This was a tricky project because if they don’t fit right, it’ll look stupid and be uncomfortable, as well as just function improperly. There are templates available online as well, but like anything else, they tend to be expensive. In this tutorial, I will show you how I made my template and keys, as well as share mine with you. ☺
Step 1: Tools and Materials

Tools and Materials
Below are the tools materials and software I used to create the template and cut the keys.
Materials / Supplies
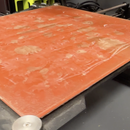
• 1 Laserbits Wood Thins Sheet: SEE HERE!
• Rubber macbook keyboard cover
• Macbook Pro
Tools
• Digital Calibers
• Exacto knife
Machines
• Universal Laser M300
Software
• Adobe Illustrator
• Corel Draw 12
Step 2: Measurements

Measurements
So first thing first, time to measure the keys. To the global readers, this is based on the us keyboard layout. There are 11 different key sizes on the keyboard. The f keys, alphanumeric keys, delete, tab, shift keys, caps lock, space, return, function keys, command and arrows. To measure the keys, I used my digital calibers. You’ll notice that the key has a groove, and the top surface is less wide than the overall key. I measure the less wide top surface. This will supply a small black rim around the wood keys but prevent the keys from sticking when you press them down.
Step 3: The Template

The Template
Now that I have my measurements, time to make a vector template in illustrator. You can use corel for this; I am just more comfortable with illustrator. Its important to color code this template, all lines that will be cut through the material should be outlined in one color, I chose red and all objects that should be engraved should be filled with another color, I chose green. Using the rounded rectangle tool, create rectangles in the 11 different dimensions measure in the previous steps. I set the corner radius to 0.075”. I then scanned my rubber macbook keyboard cover to give me a full scale layout of the keyboard. I place the rectangles accordingly on top of the image I placed into illustrator. I used the alignment tools to make sure the keys were evenly spaced and centered among one another. WARNING: this is kind of cheating. This method is quick and easy, but not very accurate. If you were to place all the keys on the macbook at once, this method probably wouldn’t work because the spacing between they keys won’t be exact. To fix this, measure the space between the keys and distribute the keys in the template to that space. I would still use the scanned image as a reference, but not as a sole guide. My template is not perfect and I did place each key on my macbook individually.
Now that they keys where placed, time to place the characters on top. For the F key symbols, I was able to stylize and recreate the symbols and place them on the keys. The rubber keyboard template assisted with the placement on the keys. For the numbers, letters and symbols, I used the font Univers. After some research, that font seems to match up perfectly. I was also able to download a vector command symbol online for free. Its important that the letters and symbols match up so that the backlight shines through properly. Remember to place a hole over the caps lock light. I have a macbook pro non-retina so I have a separate power button. I made a power button by creating a 0.17” radius circle.
Attachments

Step 4: Cutting

Cutting
Now that the template is created, it’s time to cut it out. The laser I used at my school is rather old and only works with a corel draw 12 plug in. I saved my illustrator document as a illustrator 3 file because corel will open that pretty natively. Then I selected all the red outlined objects and set the line width to hairline.
Laserbits says that the wood thins should be 100% speed and 35% power for engraving and 20% speed and 4% power for cutting on a 35 watt system. To me initially that sounded crazy but it was actually really close. It will take some playing with to get it to work right for you but with the old 30 watt laser I was using, I ended up having it set to 50% speed and 35% power for engraving and 20% speed 8% power for cutting. Because the wood thins have adhesive backing, the keys will not fly off the sheet when they are cut.
Step 5: Applying

Applying
Now that the keys are cut, time to stick them on! I recommend cutting off any excess material because you will have to bend and fold the sheet to peel these off. I also recommend using an exacto knife because it is easy to crack these thins along the grain (see a close up of my return key in my images for example). I stabbed the knife through the sheet on the edge of the key, then pressed the knife up against it from behind with the flat side of the blade pressing against the key. This raised each key up and allowed for me to peel it off with ease and without loosing adhesive. If the keys are peeling up with difficulty, or the adhesive isn’t sticking to the keys, there is an issue with your cutting settings. To lay the keys down, I had to do it one by one because the spacing of my template is off. I may have been able to use transfer vinyl tape to do them all at the same time if the template was perfect. I used the exacto knife to lay the keys down. I found it easier to press the key down and then apply the wood key on top. It allowed for easy alignment. If the key is off centered, it will probably stick when you press the key down and that is arguably the most annoying thing in the world.
Step 6: Removal

Removal
I did do a few test runs and in those runs I tested how hard it is to remove these. Bottom line, it isn’t hard at all. I used an exacto knife, stuck it under a corner and pried up will pressing the key down. The key did not leave any residue at all nor did it affect the functionality of the computer on or off of the keyboard. It is important to press the key down as you peel it off, these thins are sticky and I believe if you just yank up on it, you will probably pull your keys off.
Step 7: Evaluation

Evaluation
Overall, I am pleased with my keys. For under $20, I have a product selling for three times that online, that’s the DIY spirit! It does take some getting used to. The wood thins are in fact really thin, but there is a lip I catch occasionally when typing. I also did not include the indicator nubs on the F and H key. That doesn’t bother me but some people that use my computer seem to really miss it. I would just cut a little rectangle on the wood thins and layer it on top if I wanted them on my computer. Lastly, the backlight does still shine through! That is really the wow factor for me. It is dimmer than before, but still functional when typing in poorly lit rooms. I do really like the feel and am thoroughly enjoying them. I didn’t apply a finish to the wood, I’m looking forward to them aging as I type. I’ve gotten countless compliments and requests to make them for others, I hope you enjoy as well!
Other apple keyboard templates coming soon! (when spring semester finally ends)

Participated in the
Woodworking Contest

Participated in the
Full Spectrum Laser Contest

Participated in the
Gadget Hacking and Accessories Contest


