

Introduction: Tool Storage Cabinet


I needed a more permanent solution to tool storage; so using reclaimed cherry cabinet panels and blemished thin stock pieces, reclaimed valve handles, and less than one sheet of plywood. I designed and built this new tool storage cabinet. This is what that design turned into…
Step 1: Problem

Problem: Lately I’ve noticed that my tools seem to always be spread out over my entire work area which includes a drafting table, a work bench and a makeshift garage workbench. After endless workbench cleaning sessions, I decided I needed a more permanent solution. In an effort to make my drafting table usable and decrease my scrap wood pile, I started designing a tool drawer with whatever wood I had laying around.
Step 2: Design

I came across a great deal on a lot of hardwood scraps, cutoffs, and blemishes a while back from a former cabinet/furniture makers stash. The lot was mostly oak and cherry with some mahogany and others thrown in. A lot of the pieces were routed for cabinet doors, tongue-and-groove, or warped and water stained that were left aside.
After a few takes at the design and lot of measuring of the various pieces of thin stock and leftovers I had laying around I settled on this six drawer cabinet design. The design included two full length drawers and four half length drawers. The drawers are approximately 4", 3", 3", and 2" deep in rows from bottom to top. The final cabinet is approximately 25" wide by 15" deep by 15" tall.
Step 3: Tools & Materials
Tools:
Table Saw
Planer
Circular Saw
Drill
Pocket Hole Jig
Drill Bits/Drivers
Sanding Block/Palm Sander
Sand Paper
Measuring Tape/Ruler
Lots of Clamps
Scrap Wood
Materials:
(1) 8’x4’ Sheet of 1/2" plywood
Reclaimed Wood – size/amount will determine overall drawer size
Drawer Slides – 1 pair each drawer
Drawer Handles – I used reclaimed valve handles w/ some mounting hardware
Screws and wood glue
Step 4: Drawer Boxes


To make the drawers I used the 1/2" plywood. I first ripped the boards down to the correct height for the drawers. The plywood was cut 1/4" shorter than the overall drawer height to leave 1/8” clearance on top and bottom.
Before cutting the drawer boxes down to size, I ripped a 1/4" deep by 1/2" tall channel down one side of each strip. This channel was cut to hold the drawer bottom in place. Drawer box sides, fronts, and backs were then cross-cut to size on the table saw and sanded to 120-grit. Drawer bottoms are made of 1/2" plywood cut to size on the table saw and sanded; then it was on to assembly.
Once cut to size, I joined the pieces using a pocket holes. Holes were drilled in the front and back parts so they wouldn't be seen in the finished drawer. I first assembled halves of each drawer. Drawer bottoms were then added into the dado slot and the remaining pocket holes were screwed together to finish the drawer assembly.
Once together a couple of edges were overhung by a fraction of an inch (the sides extended out past what would be the front a little bit). This was cleaned up on the belt sander. The back was left as is since it will never be seen once fully assembled.
Drawers were stained to more closely match the cherry that would become the frame of the tool cabinet.
Step 5: Drawer Faces


Drawer faces were cut out of some of the thin stock cherry. This stock was generally warped and water stained. I cut it down to size on the table saw then sanded to reveal the grain underneath the water stains. Faces were attached with some wood glue and clamps. I then measured and drilled the holes for the handles using a couple giant lego blocks as a guide for perpendicular holes. Faces were then finish sanded to 320-grit.
Step 6: Frame


The frame was made using some of the thicker stock cherry boards. I found a few 3/4" thick panels which I used for the corners and top/bottom stringers. These were ripped to size then a 45-degree bevel was cut in them for the corners. I also ripped some strips for the top and bottom cross braces. Pocket holes were drilled to hold the four frames together.
Once everything was cut and drilled I took the pieces, some clamps, and a triangle and clamped it all in place. After checking that the corners were flush to each other and everything was square it was all screwed together. This was repeated on all four frames; front, back, left, and right.
For strength and for something to glue the face boards to (more on that later), I added 1/2" ply to the sides and back frame. The ply was ripped to half the thickness along the edges such that they would inset into the frame and allow for the thin face material would sit about even with the corner pieces. The inside of this ply was stained to match the drawers. Using some glue and clamps, the plywood subframe was glued to the frames of the sides and back and left to dry overnight.
I then taped the mitered corners together with some blue painters tape, added some glue and used some ratchet straps to hold it all together and left this to dry overnight.
Once the frame was glued together into a single unit I took it back to the table saw and splined the corners. I added some scrap maple that was left over from a previous project but looked too good to throw out. This was more for a decorative look but also provides a little added strength. I let it all dry and cut off/sanded the maple splines down until they were flush with the frame. Everything was sanded to 320-grit.
Step 7: Side and Back Faces


The face boards for the frame were made of some thin stock cherry which ranged in size from ~1/4” to 3/8”. Most if not all of the boards were warped and had water stains on them so I planed them all out to flatten them and provide a constant thickness. The boards were then cut to size on the table saw and sanded to 320-grit. I then glued the faces to the plywood inset on the frame and clamped it all in place and left it to dry overnight.
Step 8: Drawer Slide Install


Drawer slides were clamped and blocked into place. I attached the slides to the frame first, then to the drawer second. A center divider was added both top and bottom for strengthening the frame and for mounting the drawer slides of the top two sets of drawers. Slides were attached with 1/2" truss head screws. I used 4 screws per drawer slide; 2 to attach to the frame, and 2 to attach to the drawer.
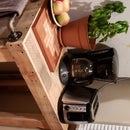
Step 9: Handles


I had a stash of old reclaimed water valve handwheels lying around that I thought looked cool and would make a great addition to a project someday. The thought of using the valve handles as a drawer pull popped into my head while designing this and after a quick mockup I really liked the look. I used a #8 bolt with a 1/2” aluminum spacer, washers and nylock nuts to put it all together. The ‘exploded’ view picture shows the general assembly order.
Step 10: Top


For the top of this cabinet I used some blemished tongue-and-groove pieces that I found in the scrap pile; these were about 3/8" thick. First I ripped the T&G off so that the sides. I then cut some 45-degree angles and made a herringbone pattern. The pieces were glued and clamped to a piece of 1/2" ply that was cut slightly larger than needed for the finished size of the top. Once the glue was dry I ripped the panel down to size with a circular saw. I used a roofers triangle and a piece of scrap wood and clamps as a guide for the saw to get square corners and parallel sides.
I then ripped some frame pieces out of a piece of leftover 4/4 cherry. After mitering the corners I glued and ratchet strapped the frame into place. The frame was held on to the central panel using some pocket holes that had been drilled before the glue-up.
Step 11: Finished


I used some high gloss wipe on poly for frame, the top, and the drawers faces. I added a couple extra cross braces on the top of the frame for mounting the top and then screwed the top to the frame. The drawers were inserted, tools were added and it was finished. Now all that's left is to find it a forever home in the workshop.
Bonus: The drafting table is clean! Hopefully it lasts...

Participated in the
Reclaimed Contest 2017

Participated in the
Workshop Hacks Challenge 2017


