

Introduction: Youtube Play Button


Hello guys!
I recently reached the goal of 100 subscribers on my Youtube channel and decided to create a play button to celebrate this achievement!
It's super easy to do and I loved the end result of this project / award even though it was created by me to offer myself...
The video demonstrates the production process and in this instructable I will explain everything that needs to be done in order to make a prize of the same kind.
Supplies
- MDF Board - I used MDF because it was what I had available from some leftovers from another project but any kind of wood will do.
- IKEA Frame - our any shadowbox.
- EVA Foam
Step 1: Get to Work!


Although this is an instructable for a Youtube play button prize you can change it to any other kind of prize. If you want to make a play button you have a template here: Link
Let's get started!
Print the template, cut out the play button and glue it in the MDF. I used a wood glue mixture with 50% water and it worked very well. Cut the MDF by the template line and sand until smooth. The easiest way I found for sanding was to stick a sanding sheet to a board and calmly sand it until it was squared. Drill a hole in the center so you can use the jigsaw and cut the triangle out. Get ready for a thorough job, both cutting and sanding, but if you do it calmly you'll be fine!
After all this work you just have to remove the paper template from the play button. An easy way to do this is to use the sandpaper that is glued to the board and sand until all the paper and glue come off.
Apply primer to the wood and then you can paint it red! Apply both primer and paint with a sponge to avoid scratching. The easiest way to leave a silky finish is to apply many layers and use a small amount of paint at a time. I think I applied about 6 to 8 layers of red acrylic paint.
For the plaque you can edit the template (Link), print and paste on a thinner MDF board, but first paint it in black.
I printed on sticky paper but it can be printed on any kind of paper, just apply glue and it's done!
Step 2: Final Assembly
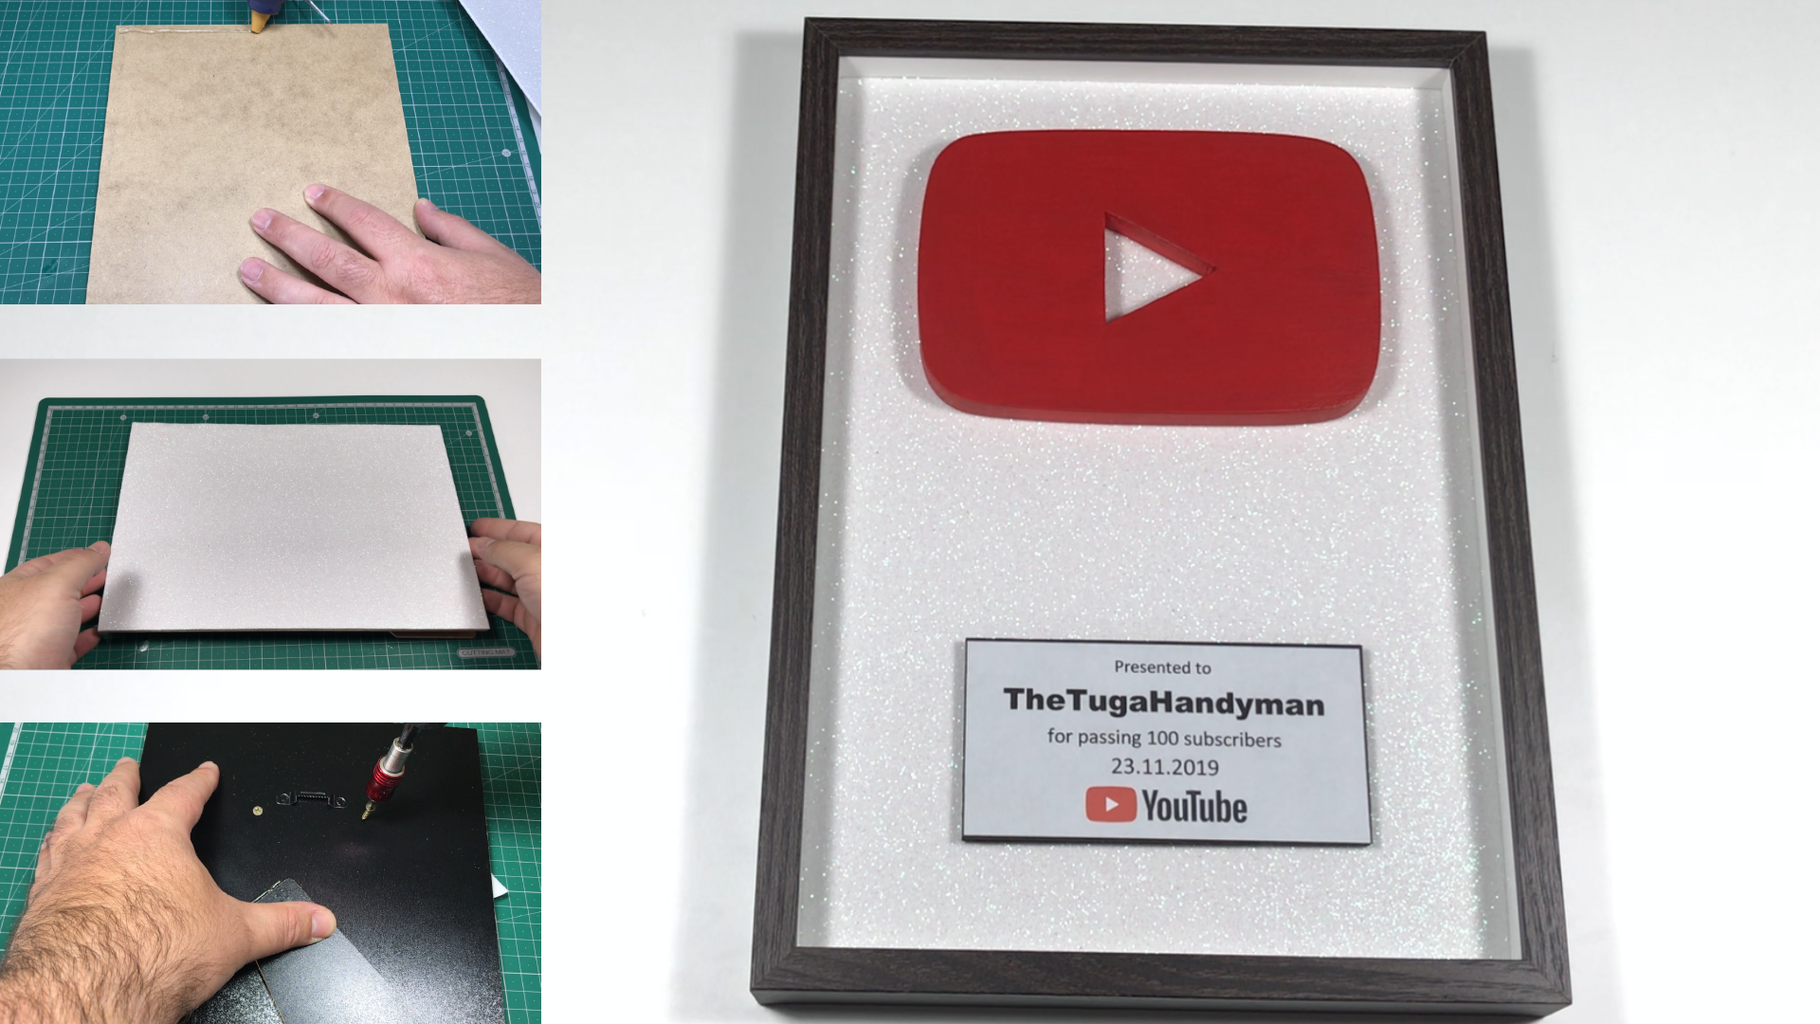
Begin by disassembling the frame and use the back to cut the EVA foam to size.
Glue the EVA with hot glue and then glue the play button and the plaque over the EVA. Since the play button is heavy you should use two screws to hold it in place, the plaque needs no more fixing than the glue due to its low weight.
Assemble the frame and your prize is complete!
This award was designed to my liking, feel free to adapt the project to your liking.
If you have any doubts feel free to ask.
Visit my Youtube channel!
Thank you very much, I hope you enjoyed it and make one of these awards for yourself!


