

Introduction: Zip Line Racer
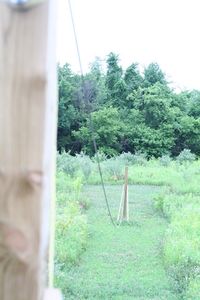

Have a zip line that needs riding? Then this is the project for you!
We take a small bicycle/trailer wheel and a couple pieces of hardware to make a fast, safe and weather resistant zip line rider.
Tools needed:
2 Crescent wrenches or a good wrench set
Large flat blade screwdriver (to remove the rubber tire from the wheel)
5/16" drill
3/8" drill (depends on the size of your tires hub ears)
Materials needed:
2 - bars of flat aluminum stock (1 1/2" wide or greater)
1 - 5/16" x 1 1/2" bolt
1 - 5/16" lock washer
2 - 5/16" nuts
1 - 1/4" x 3" eyebolt
1 - 1" -> 2" metal tube 12" or longer
1 - 1/4" fender washer
1 - Small quick release bicycle or trailer tire
The tire is the hardest item to procure. Mine came from a bicycle trailer for kids. It was to be used to turn the trailer into a stroller but that never worked well.
Step 1: Cut and Drill the Hanger Arms

Use a saw to cut your aluminum bar stock into 2 equal lengths. To determine your length measure the radius of your tire and add 4-6". You can get a good idea of the length you will need by just eyeballing the bar stock next to the wheel.
Next stack the 2 pieces on top of each other and drill your holes. In one end you will want to drill a 3/8" hole. In the other end drill your 5/16" hole. You should end up with something that looks like this:
Step 2: Create Your Handle Bar

This step also depends on the materials you have. I happened to have an old mount for a Direct TV dish that was nicely powder coated and angled so I chopped it to length as a handle.
You then need to drill a 1/4" hole in the middle of it for your eye-bolt to pass through. Place your eyebolt through the hole, add the fender washer to help prevent a tear through and screw on both nuts. Use your wrenches to turn these nuts together and lock them. We want the eyebolt free to turn but we don't want to turn right off the bottom of it mid flight.
When you have completed this setup you should have something akin to this:
Step 3: Bending Your Stock

Now... since we need to have a wide wheel connected to a narrow eye-bolt head we need to bend our aluminum slightly to make them match. You can do this with the help of your hands and either a vise or just attaching it to the wheel and bending it from there. In my case I used a vise and ended up with bends that looked like this:
Step 4: Assembly Part 1


"Some assembly required" The words that strike fear into parents hearts. Don't worry though... this one is fairly easy.
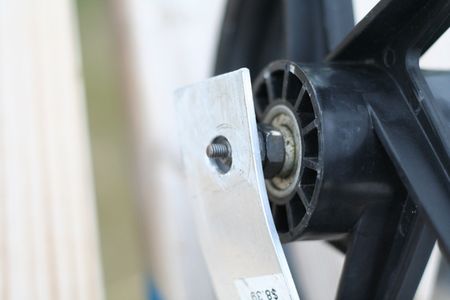
Remove the skewer post from the center of the wheel hub. (images 1-3)
(If this had not been a quick release wheel then we would have just removed the nut from each side)
Insert the skewer through the 3/8" hole in the end of one bar and then through the hub of the wheel. Make sure that you have the bar oriented correctly so that it bends towards the wheel rim. (image 4)
On the other side place the 3/8" hole in the second bar over the hub post and screw the skewer end on. (images 5-6)
Make sure that the bars are parallel and then clip the quick release to closed. (images 7-8)
Step 5: Assembly Part 2


With the wheel and bars together you should have an assembly that looks like image 1.
We now need to put the handle on. Line up the eye-bolt with the 5/16" holes in the free ends of the aluminum bars. (image 2)
Place the 5/16" bolt through the hole, eyelet and other hole. Place the lock washer and both nuts on the end and tighten well. (image 3)
Step 6: We Need a Leash!


You can disassemble either part and put the wheel over your zip line. This is easier to do after you have "dry-fitted" it once. (image 1)
Attach a "leash" of rope to the line rider for easy retrieval and to help offset the top-heavy nature of the wheel so you can send it on a test run.
Double up the rope with a loop at the end and bend it around over itself. (image 2)
Poke the loop back through the hole created to make a nice little noose. (image 3)
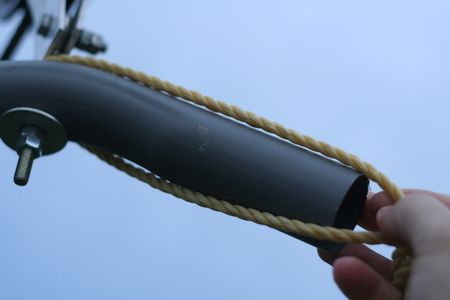
Place that noose over one end of the pipe pull it to the eye-bolt and put the noose over the other end of the pipe. (images 4-5)
Work the knot in the noose up so it is tight enough you can no longer remove the rope over the end of the handle. (image 6)
Step 7: Ride It!
Nothing left to do but enjoy it... I'll try and add a video of an actual run.
Words of warning: If your pipe is slick add some grip tape or handle bar covers. The trailer I got this wheel of of was rated for 200lbs so the wheel should be rated for near that. Watch for any wear on the wheel during use. The way this is built as long as the bolt and the skewer are kept tight you will not fall from a catastrophic failure of the wheel but still keep an eye on it.
Most of all... HAVE FUN!


