

Introduction: EBike Battery Rebuild


This Instructable is not meant to teach you How To but rather Why Not To rebuild your own eBike battery. Having just completed a months-long rebuild of mine, I have a list of painful lessons to share, all of which add up to this one piece of advice: if you can purchase a new lithium battery pack for your eBike, do so. There's a lot going on inside your eBike pack, welding batteries is a finicky business that requires specialized equipment that's not good for much else, the final product is unlikely to be really reliable or to last a very long time, the chance of fire or explosion is real, and there are probably other projects from which you can learn a good deal more.
Step 1: So What Does Rebuilding an EBike Battery Entail?


Really, you're still reading? OK, let's get into it.
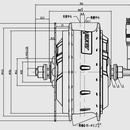
The big, heavy brick that powers your eBike is a set of battery packs wired serially with a controller that governs how each set is charged and monitors the battery's performance when charging and being discharged. Each battery pack is itself made up of individual cells (which is what most people think of as a "battery," AA, AAA, what have you). To rebuild such a pack the main steps are as follows:
- Open the battery casing (may be surprisingly difficult: they are usually sealed against water, so you will probably destroy the waterproofing and the warranty alike upon doing so).
- Disconnect the various leads, some soldered, some glued, that monitor electrical flow and temperature, making sure to keep good track of what goes where. Eliminate silicone plugs or other material used to hold the battery packs or individual cells in place. Strip out any tape or other additional material you find inside, again, taking note of every piece, its location, and what's under it. Details count here!
- Remove the individual packs, making very careful sketches of the sheet metal formations used to define each of these packs, top and bottom. Details count here too!
- Strip the connecting metal from some of the individual cells in each pack; you will need these "dead" cells to practice on as you prepare to assemble a new battery pack (indeed, you may need all of the dead cells for this purpose) and will probably want to practice spot welding on some of the stripped metal.
- Source your new materials: new cells plus extras, and at least twice as much sheet metal as you think you will need to recreate the sheet metal formations mentioned above. (Note that you may wish to use a different thickness of sheet metal than that used in the original pack but probably don't want to use a different type of metal; typically, you are buying a highly conductive nickel alloy.)
- Beg, borrow, or buy a spot welder. Do not beg, borrow, or buy the one shown above or any other that is intended for "hobbyists": you will probably need to make several hundred individual welds in order to build your pack, and will require a professional grade piece of equipment to do so. (So at least there's that: by the end of this you will no longer be a hobbyist spot welder.)
- Practice a lot with your new spot welder, your old metal, your new metal, and your old, dead batteries; figure out how to deal with edge cases, such as welds at the end of a strip.
- Recreate the sheet metal formations using your new metal and a pair of shears or, more ideal, a laser cutter.
- Weld the new batteries to the new sheet metal formations at the right points and with the correct orientation in order to create your new battery packs.
- Place the new packs in their correct positions. Attach each wire and lead in the correct spot as indicated in your careful notes, using specialist glue or soldering as appropriate.
- Kit, glue, tape, and otherwise physically secure the battery according to your careful notes.
- Return completed battery to its original housing and test the new battery by charging it as per usual.
- Assuming the battery charges correctly, start using your bike and charging normally.
- Assuming nothing goes wrong, reseal the battery in its housing before the first rains.
- Don't forget to dispose of the old cells responsibly.
Be sure to take lots of pictures and movies for the sake of reference and to record suitable measurements of voltage throughout as well.
Step 2: What Makes This So Difficult?

You face two major challenges should you undertake this project. First, the new battery has to replicate the old one in essentially every detail. The controller expects a particular voltage under particular conditions, and is more or less sensitive to temperature, too. As important, you're dealing with a lot of electrical connections in a small space, and a lot of electrical power, so shorts are out of the question...and yet surprisingly, one might say "shockingly," likely to happen. Precision counts.
But it's the second one that is really tough. Heat is bad for batteries, but heat, generated by electrical current, is what you're using to weld the cells to the metal strips that will conduct electricity between them. It is important to get as strong a weld as possible but you must inject as little heat as possible into the battery. Too much heat and you degrade or even puncture the battery, too little and you end up with a weak weld and, eventually, a loose connection deep inside your construct, with unpredictable but by no means helpful results. It's a fine line you'll be walking. What's worse, there are many factors that influence the quality of a weld: the cleanliness of the surfaces being welded; the thickness and shape of the electrodes; their placement in relation to one another; the firmness of the contact between them and the metal being welded, and between the metal and the battery beneath; the length of time allowed for the weld; the mass of the metal adjacent to the points being welded; and likely other factors, too. Again, precision counts...but how are you going to achieve precision with these many variables across a couple of hundred welds?
Step 3: Seriously, You're Still Thinking About Trying This?

Consider just a few tricky bits in one of the packs, pictured, under construction, above. Bent metal, lots of extra insulating tape, a punctured battery. None of this is the product of carelessness, it's the inevitable (as best I can tell) result of working with hobbyist equipment (a manual, lightweight welder, as opposed to a computer-controlled, industrial one; scissors instead of a heavy-duty laser cutter). But maybe you like a challenge, hopeless odds, playing the underdog. Very well, if you must, here are a few recommendations, since you insist on proceeding:
- Get a computer controlled welding device: Yes, there are a lot of variables that impact the quality of a weld, but with a computer in the loop--the Mighty Zimbra hacked one together using an Arduino, of course--you can at least control the amount of time the circuit is left open.
- Get a heavy duty welding device: Spot welding works by running lots of current through the welder to the metal, but if the welder itself is not beefy enough that current, over the course of the many, many welds you will need to make, will start to melt the machine from the inside out. We had to battle with switches welding themselves open, constant hassles with fuses, and welding wands that became literally too hot to handle. Spare yourself these problems.
- Work in a ventilated space: You are melting metal. It stinks. It is certainly not good to inhale. And you are doing a lot of it.
- Save your old batteries to practice technique: This should be obvious.
- Source more batteries than required for your pack: Even though you took my advice and practiced lots and lots and lots on your old batteries you are still very likely to destroy some new batteries along the way. The batteries are cheap, have some spares to hand.
Good luck to you, brave Maker, and may your project fare better than mine!


