

Introduction: How to Efficiently Extract Worms From the Dirt


Hello,
This instructable was inspired by my dog, "Hunter".
Background:
One day as i was washing him with his special dog shampoo, i noticed that there were allot of worms all over my feet, and on closer inspection i noticed that in a 2m circle all around earth worms were shooting from the ground, and wriggling over the grass and going away to who knows where.
This was opposed to much further away where the water from the hose had reached but the soap had not.
Anyway, on another day when i washed the dog, within 2 minutes of washing off the shampoo, it happened again, worms were everywhere.
This instructable, is about how to extract large amounts of worms from the soil, and also identifying a suitable area to extract the worms from!
In the included video you'll see that it only takes about 10 seconds before the worms come from the soil, times may vary depending on how much soap or shampoo you use and how many worms and how close these worms are from the surface, as well as the soil density which enables free movement.
Remember not to take too many worms from one area in your yard or it may negative effects on the soil ecology, its very easy to severely deplete worm numbers, so be sure not overdo it. and remember, the soapy water will repel worms for about a week, so, it wont work in the same spot and avoid doing it in the same spot anyway.
Attachments

Step 1: What Youll Need.........


In order to successfully extract worms from the ground without actually digging them up, you will need the following
- water distribution device such as watering can , though i only use a the soap filled bucket (in areas where the ground is not saturated, a watering can is recommended.
- a dark cool damp shady spot were worms would like to chill out. this can be everywhere in tropics during monsoonal/wet-seasons that hardly dries out.
- environmentally friendly soap (i use dogs tea tree oil based shampoo) i use about 30-50ml's
- a filter of some sorts, an old, but clean rag will do
- a bucket to put your worms
- a container of some sorts (large bucket ) to mix the soap and water together, MUST NOT BE THE SAME BUCKET YOU PUT YOUR WORMS IN. SOAP IRRITATES WORMS IF THEY STAY IN CONTACT WITH IT FOR A LONG TIME, SO MAKE SURE YOUR WORM BUCKET IS 100% SOAP FREE.
optional
* an old beach towel you don't mind getting dirty
must be big
Step 2: Finding the Right Spot
Now, because i live in the tropics, and when i made this instructable, it was the wet season, pretty much anywhere theres grass, there is worms, because the earth is completely saturated under my lawn, so i can do this anywhere.
But for most of you, the story may be different
To find the right spot , what you'll need to do, is look for a location that has at least a few of the following
- cool
- damp
- shady, out of direct sunlight
- has a nearby food source, such as leaf litter or rotting wood, anything worms eat
- Sandy or loose soil
- Soil which water drains through quickly
- is near a leaky tap or some permanent source of water that causes everything organic near it to rot when it dies. Or is in a low point where water collects during rain
Another thing to look out for is sir walter grass, a springy foundationed grass which kind of forms a canopy with the bases of the grass, knotting together. It generally grows to be like turf, whether applied as turf or not.
Sir walter and similar turf-like grasses provide a microclimate above the soil, as the grass kind of sits on top, with the root/bulb barrier. This in short makes worms more comfortable staying quite close to the surface. While the soil may dry the humidity is constant. The closer worms are to the surface the more likely they are to surface quickly in response to emergency like rain or, soap.
Areas that frequently flood, even slightly should have their worm populations close to the surface.
Using the beach towel, you can recreate these conditions anywhere
What you need to do is, get some already roting moist leaves, and leave under the beach towel for a week or so, but be sure to keep the towel very moist.
This will get the worms to come closer to the surface under the towel.
Step 3: Get Mixing

once you've found your worming location, go and get your bucket and fill it up with very warm, but not hot , water.
then get some of the environmentally friendly/biodegradable soap, environmental friendly because we don't want to poison the worms, and put enough soap or shampoo into your bucket , so that it becomes slippery to rub your fingers together UNDER THE WATER, also even the slightest churning of the water will cause it to become sudsy.
i find that adding exactly 1 drop of tea tree oil, to non tea tree oil based soaps will get worms out faster, as they will dislike the smell and taste, as all insects and parasites do.
Step 4: Extracting the Worms
- watering can
- soapy water bucket
- filtering rag
- worm holding bucket full of tap water (but if you want to be fancy, bottled water will work too)
what you must do, is pour the warm soapy water into the watering can, be sure to pour ALL of the water into it, if you can not get another bucket, then clean out the priorly soapy bucket .
first hose down the location to get it damp, then water it with your soapy water, be sure to get it nice and soapy.
the actual bubbles of the soap should not be poured onto the ground because it does not help at all, and puts more soap on the surfacing worms.
Step 5: Filtering Your Worms
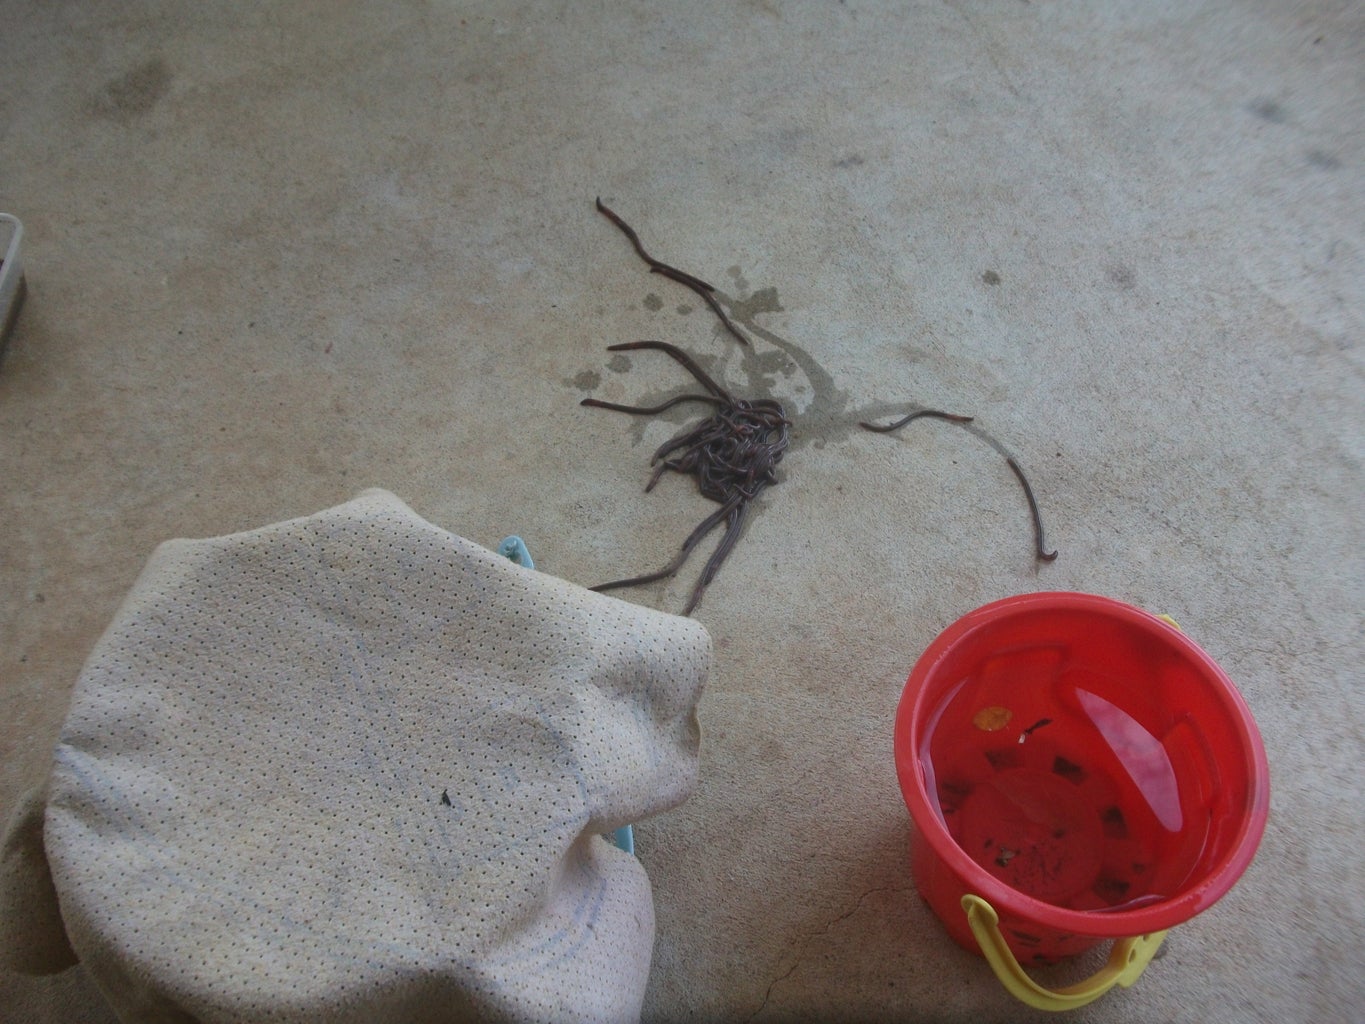

as you wait for the worms, now is a good time to work on the filter.
though, if you live in an area with very regular (at least 1 hour of good rain every 3 days), you'll find that the worms will come out instantly, as seen in my video.
but if you live in an area that is rather dry it may take a little longer, so you'd better work on your simple filter.
it will consist of a rag, on a bucket, preferably the ,now empty soapy water bucket.
the reason you must filter your worms is simply to remove the soap from them, because it begins to irritate them after a while, and we wouldn't want to torture them, plus, soapy worms wont smell or taste good to fish, should you choose to use them for fishing
once complete, you should have worms everywhere.
pick them up as fast as you can, because they don't plan on staying above the surface for long. as soon as you find one, put it in the filter, once you have enough, get your tap water, and start washing the worms in the filter , to remove any soap.
Step 6: Storing the Worms
put your clean worms into your worm bucket, this should have a lid, and be worm friendly, such as having dirt in it, and leaves, basically all a worm could ever want, besides its freedom obviously.
this container should not be the final container you decide to keep the worms in
after a day or so, put all your worms form the worm bucket, into a new one, because over night, the worms may expel any extra soap they absorbed, into the dirt, making them die over time,
just place them into a new container, and that can be where they all stay permanently.
your final container should be filled with compost dirt, not compost goo from the rotten fruits and veges, but the actual dirt from a compost heap. worms will like this, and if you can keep them out of extreme temperatures, they may go on to live in this bucket for months, if they have a food source!
Step 7: Your Done
now that your done, you may use the worms for whatever sinister purpose you desire.
a handy hint is to not use all the soapy water at once,
use half, then once there is no more worms, put more soapy water around the location you have wet, as this is were the other worms will have taken refuge.
they'll pop out in about 30 seconds or so.
if you live in the tropics, during the rainy seasons, you can do this anywhere there is moist damp soil. worms will be everywhere. i have tried this in many friends backyards, and it works everywhere, even nature strips
HAPPY WORMING
Don't forget to comment!


