

Introduction: Sanding


Before we go too much further into woodworking we should talk about sanding. In the previous three lessons, any sanding you did on the class projects was probably more than adequate, but with some very basic techniques you can greatly improve the quality and time it takes to make your projects beautiful.
Sanding is done to create an even surface and enhance the look of wood. It can take time to do a good job of sanding, but every project benefits from sanding.
Sanding is the action of removing small amounts of material from the surface of wood with an abrasive. Sandpaper comes in different coarseness levels, called grit. Coarse grit sandpaper is used to quickly remove lots of material, while fine grit sandpaper is used to smooth out an already mostly smooth surface and make it even smoother.
Step 1: Grit Sizes
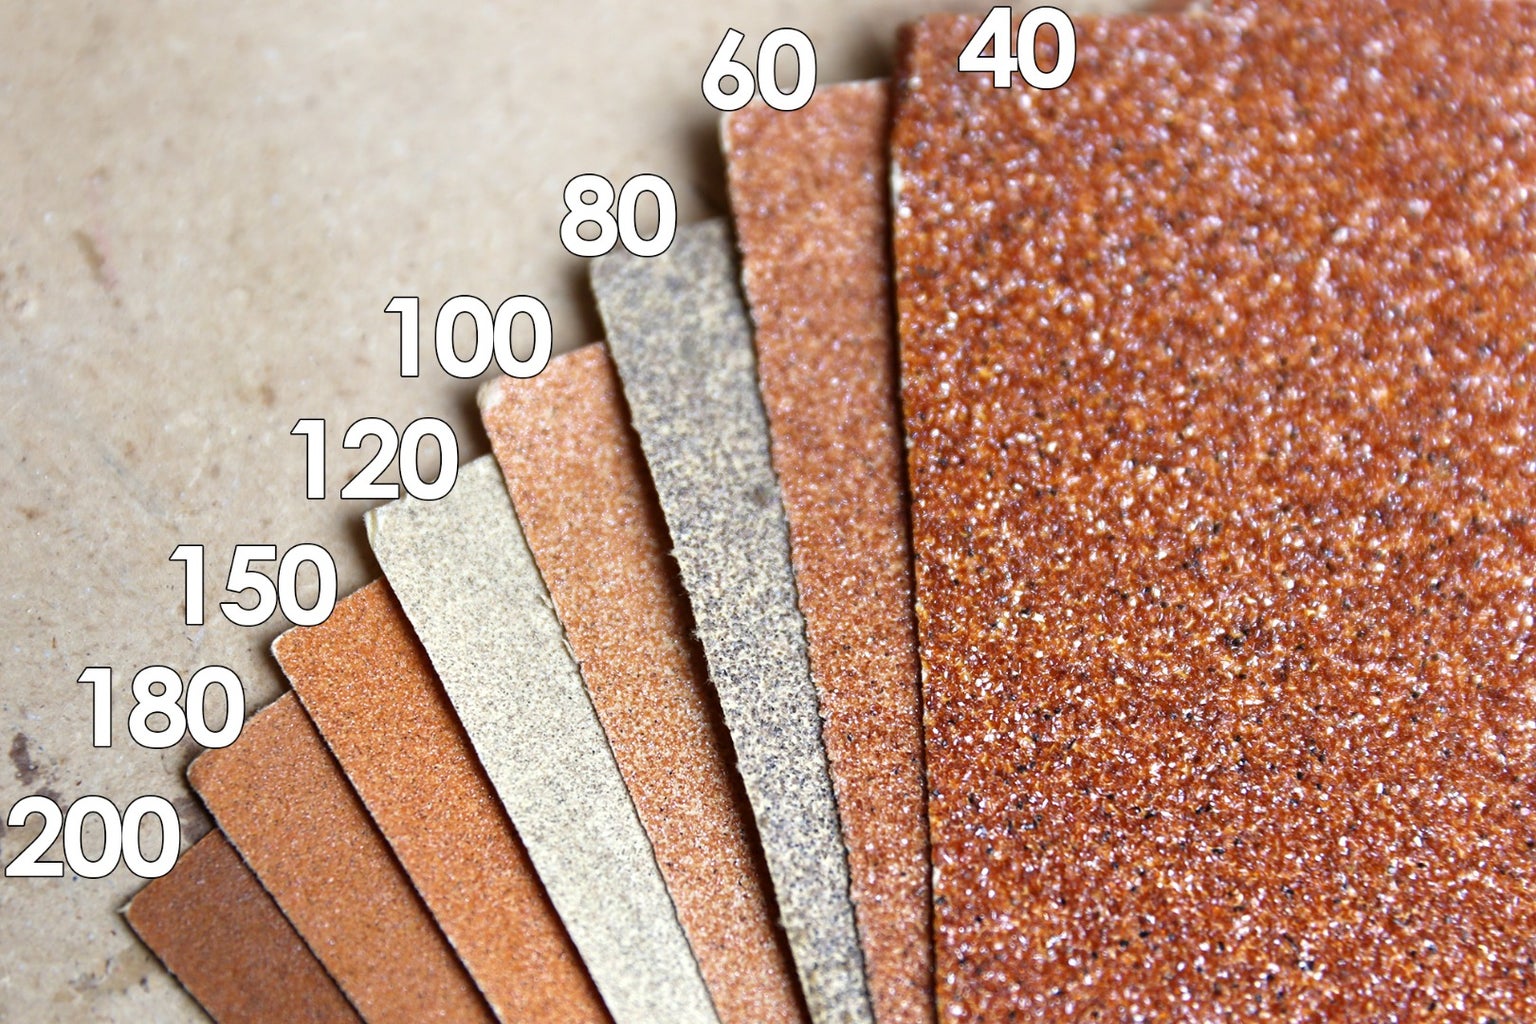
Sandpaper comes in different grit sizes.
Coarse grit (40-50) are great for rapidly removing material to shape wood, or to rough up a surface in preparation for gluing.
Medium grit (60-80) are for sanding smooth a surface after it's roughly the shape you want. These grits will remove tooling or abrasion marks from coarser sandpaper grits.
Fine grit (80-120) are for bringing a nice smooth finish to an already relatively smooth surface, can increase the sheen and will remove abrasion marks from medium grit sandpaper - great for preparing a surface for finishes.
Very fine grit (150-220) an even finer sanding finish - perfect for preparing a surface for finishes.
Micro grits (240-3000) are used either as a sanding in between coats of finishes or paints, or used progressively stepping up the grits to polish wood.
I like grabbing the assorted pack, which usually covers a few different grit sizes. Here's medium, fine, very fine, and micro mesh assortments.
Step 2: Coarse to Fine

It might seem obvious, but it bears stating. Always start with a lower grit sandpaper and work the area of interest on your wood before moving up to a higher grit. Taking your time with the lower grits where a lot of material can be removed quickly will save you loads of work down the road.
Skipping grits can sometimes be okay, but skipping ahead to a high grit with a rough surface to sand will make long and tedious work - and may not even be that effective at smoothing. When stepping up to higher grits each grit corresponds to different depth of wood scratches in the wood, slowly smoothing out the surface. Spending the time in the early stages of sanding make the finishing work much more enjoyable.
Step 3: Area to Sand

With coarse grits it's easy to see what area has been sanded, but this gets harder to notice as you step up to the higher grits. A great trick to help you visually is to scribble a pencil over the area you're working before you start sanding, as you start sanding you'll be removing a small amount of wood and removing the pencil marks.
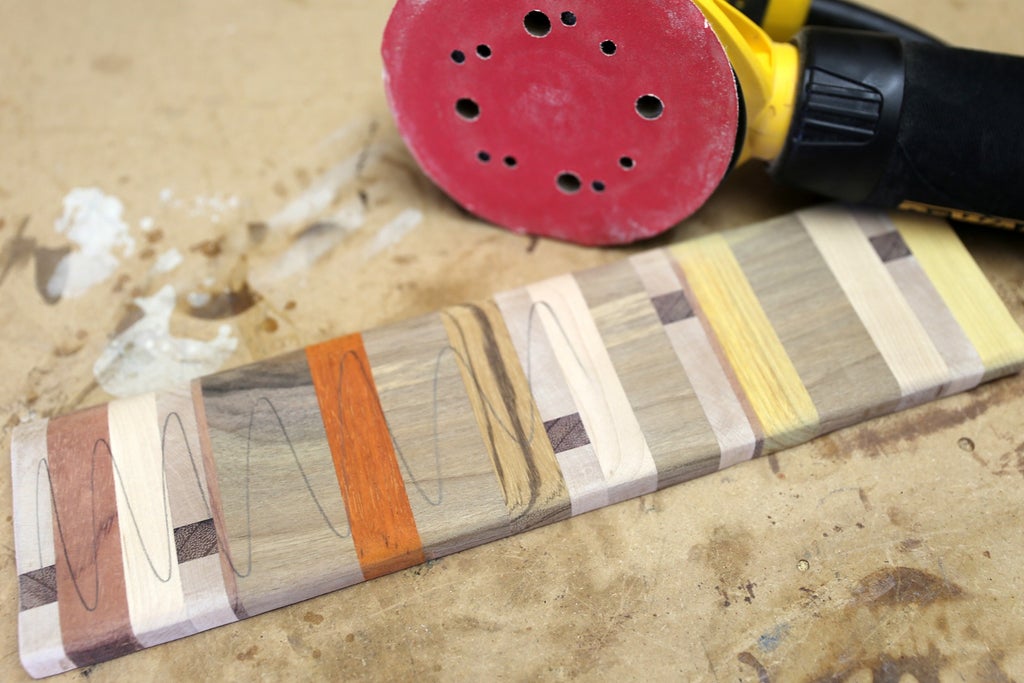
Keep applying pencil to your work piece as you step up the grits to keep track of where you've sanded and what spots need more attention.
Step 4: Working With Mixed Densities

Wood comes in all kinds of densities and each of these densities sand down differently. When working with mixed wood types be mindful that less dense woods will abrade faster than denser woods.
In the picture sown here there's an example of two woods that sanded at different amounts on the left side near the bottom.
Step 5: Sanding Between Coats of Finishes

Painting over smooth work produces great results, but sometimes the paint can dry with small debris or rough patches. Sanding with a micro grit in between coats when the finish is completely cured and dried can produce very smooth results.
Make sure to clean the surface with a lint-free or tack cloth to remove any fine dust or debris.
Step 6: Cleaning
After sanding it's good practice to clean up the mess that comes with sanding and take a moment to examine your work.
When working with fine sanding avoid the temptation to rub a damp cloth over your work to clean it, as water can cause wood to swell and deform. Use a lint-free cloth or even a tack cloth, which is a semi-sticky cloth used for removing fine particles from surfaces - works great for preparing a surface for finishes.
Step 7: Quiz - Sanding
{
    "id": "quiz-1",
    "question": "60 grit sandpaper is suitable for finish sanding.",
    "answers": [
        {
            "title": "True",
            "correct": false
        },
        {
            "title": "False",
            "correct": true
        }
    ],
    "correctNotice": "Correct! 60 grit is much too coarse for finish sanding.",
    "incorrectNotice": "That's incorrect"
}
{
    "id": "quiz-2",
    "question": "All wood types sand the same.",
    "answers": [
        {
            "title": "True",
            "correct": false
        },
        {
            "title": "False",
            "correct": true
        }
    ],
    "correctNotice": "Correct! Different wood types have different densities and will sand down at different rates. Always use caution when sanding mixed wood.",
    "incorrectNotice": "That's incorrect"
}
{
    "id": "quiz-3",
    "question": "Microgrits are great for removing lots of material quickly.",
    "answers": [
        {
            "title": "True",
            "correct": false
        },
        {
            "title": "False",
            "correct": true
        }
    ],
    "correctNotice": "Correct! Microgrits are 240 grit and higher, and only suitable for very fine sanding.",
    "incorrectNotice": "That's incorrect"
}
Step 8:
Take your time when sanding, and spend the few extra minutes with the coarse grit to really get your wood project in the best possible place before moving up to the next grit.
Sanding can be time consuming, but taking the time at every step of the way will give you immense satisfaction when your work is finished and looks amazing.


