

Introduction: Welding Joints and Beyond


There are five kinds of welded joints that you will use over and over and over and OVER again. Butt, tee, corner, lap, and edge. This lesson goes over how to square, clamp and tack your joints, then weld them with minimal heat distortion and maximum strength.
Step 1: Cutting and Grinding Your Parts
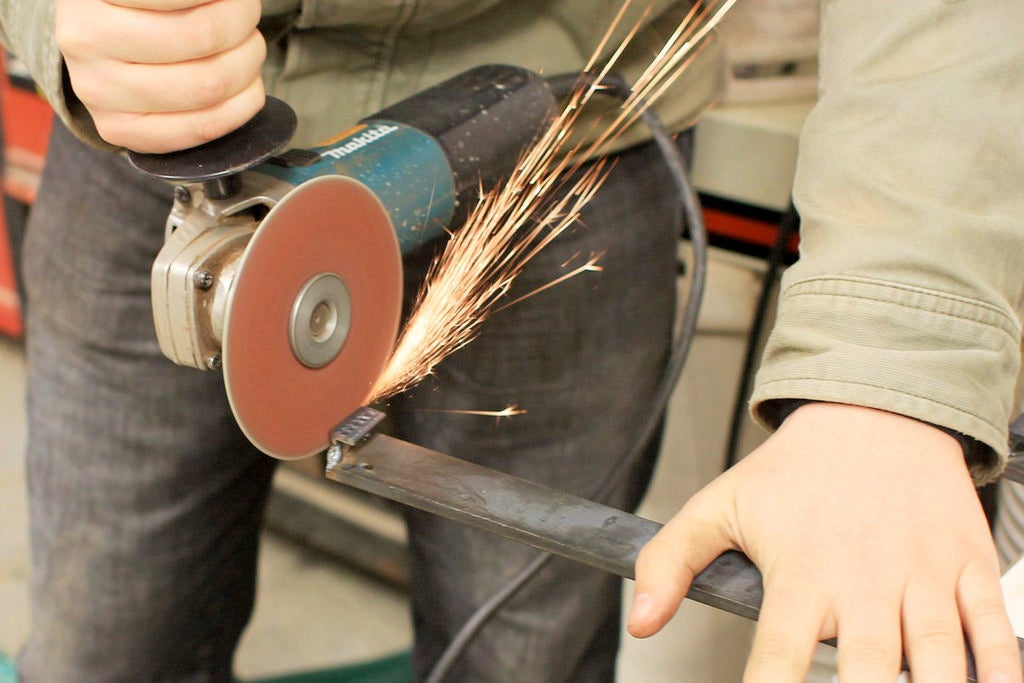
In the Tools and Materials section of this course, we go over how to set up an angle grinder for use with a cutting wheel and flap wheel grinding disk. Cutting steel bar, rod, and tube is most affordably done using an angle grinder and cut off wheel. Making nearly straight cuts on flat bar with a cut-off wheel can be acheived by rotating the guard on the grinder, and positioning cut off wheel straight down perpendicular to the bar. This method can be imprecise and lead to more grinding work later.
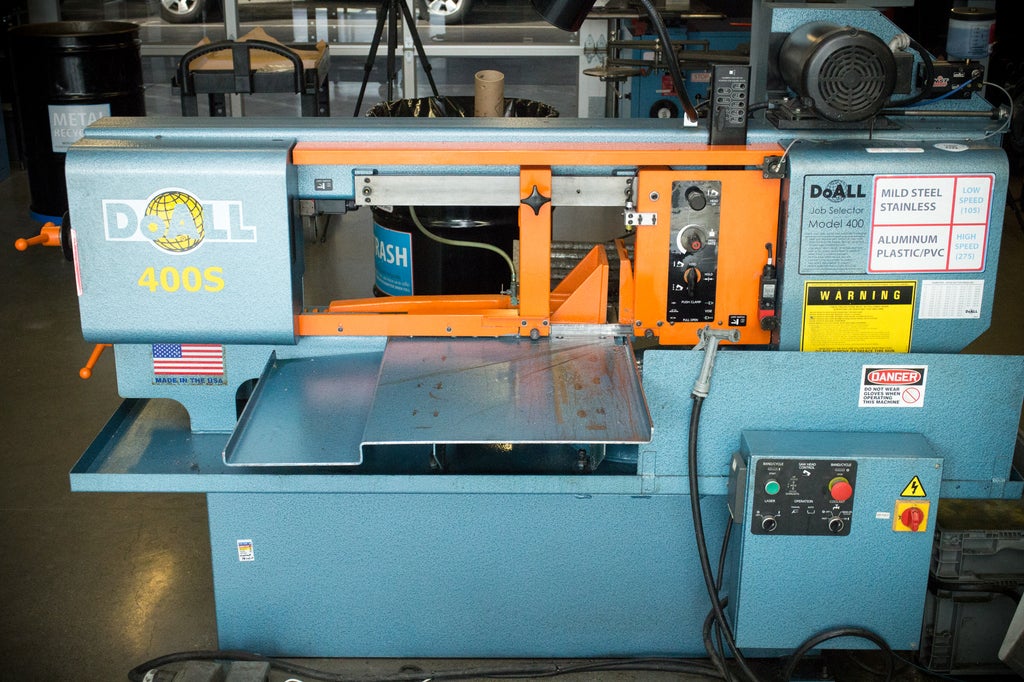
For this reason, I prefer to use a horizontal band saw for metal cutting. They are far more precise and versatile, certainly worth the investment if you are becoming serious about metal fabrication. They allow you to work quickly and cleanly and save a ton of time. The one pictured here is very nice, but in other shops, I have used much smaller (and affordable) bench-top monted metal band saws that can do the same job with the right jigging.
If you are feeling particularly ambitious, check out this $80 solution to getting straight cuts with a sawzall by Instructables author joeynovak.
Step 2: Clamps and Tacking

Welding clamps are used to hold work together before you tack your parts together. Clamps come in more sizes and shapes than you can even dream of. My favorite and most commonly used workholding clamps for welding are:
Be sure to check your square as you tack pieces together with a steel square tool. If your tacks are not keeping your material square, you should be able to bend and twist (or even bang and hammer) them back to square before completing your weld beads.
We tack our material to minimize heat distortion on our material. Rapid expansion and contraction will cause your material to shrink toward your weld bead, so alternating sides as you tack can help reduce this deformity.
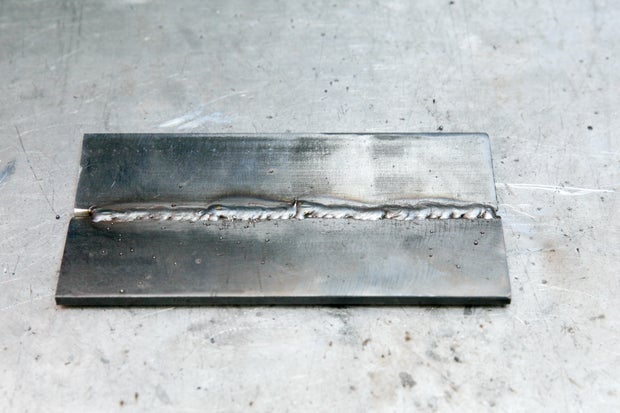
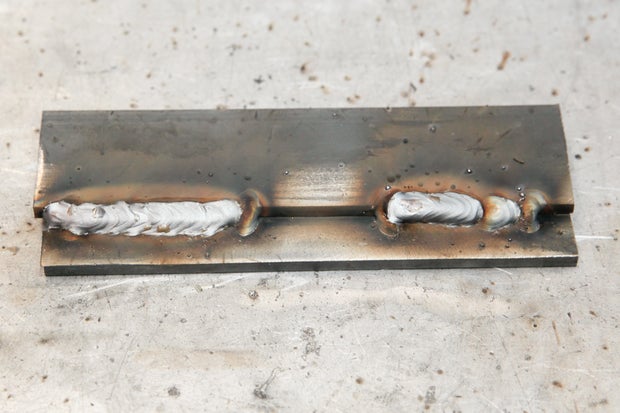
Step 3: Butt Joints

We prepare hot-rolled flat bar steel for welding by first grinding off the mill finish. This finish protects the steel from rusting while it is being transported from the mill to your workspace, but if it isn't removed, you will have a contaminated weld that could potentially break.

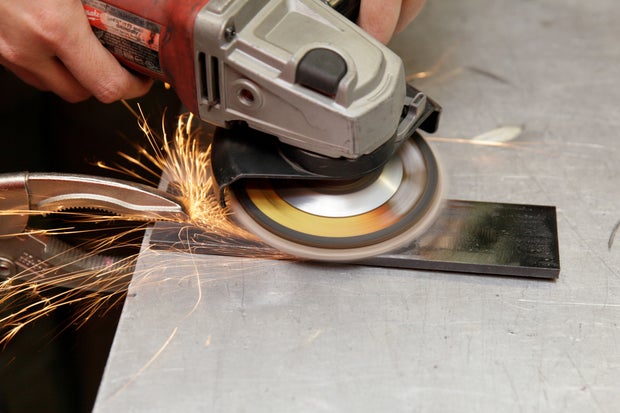
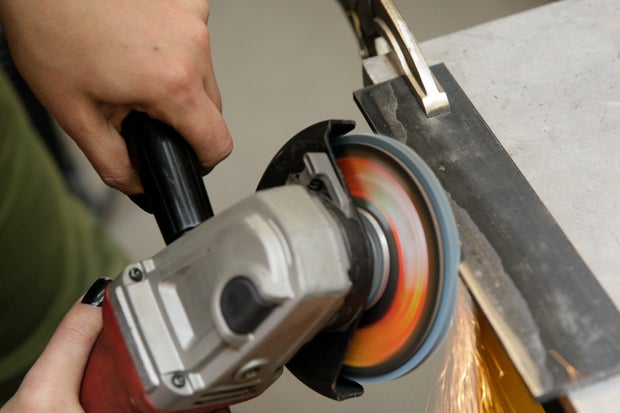

It is a good practice to use an angle grinder to bevel the edges of steel stock before it gets welded. By creating two bevels on the joining edges you create a tiny little valley for the weld pool to form in. Doing this for butt welds is a good idea to ensure good penetration.
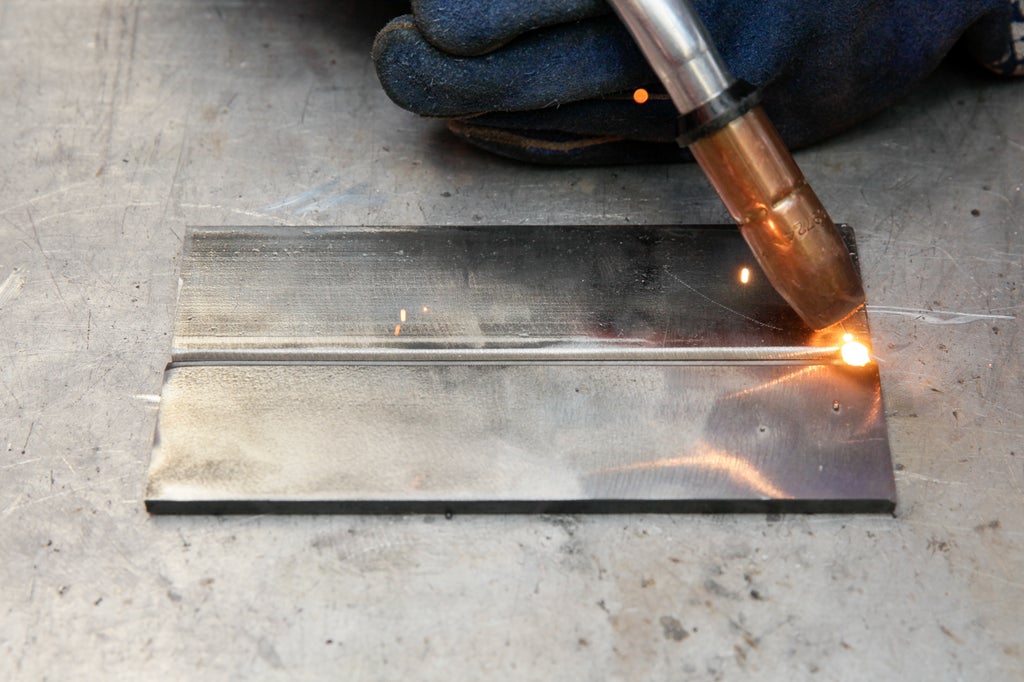
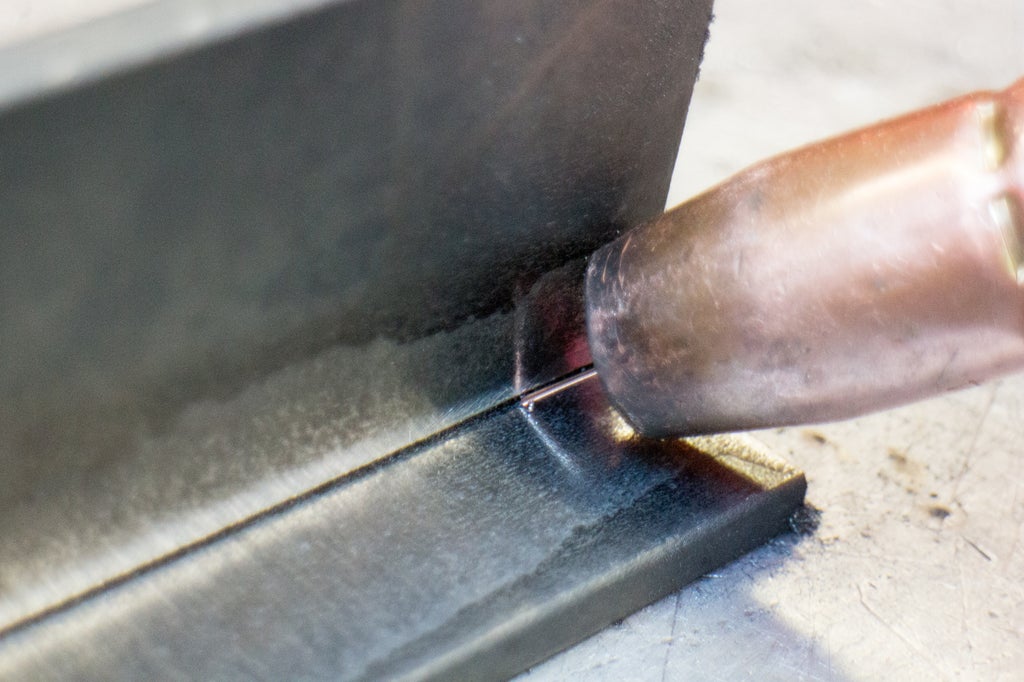
Complete your first tack weld. To do so, positon your electrode sticking out of the gun between the crevase of bevel valley you created with the angle grinder. Your wire should barely be touching your base material. Squeeze the trigger for two seconds, and complete the tacking loop motion.
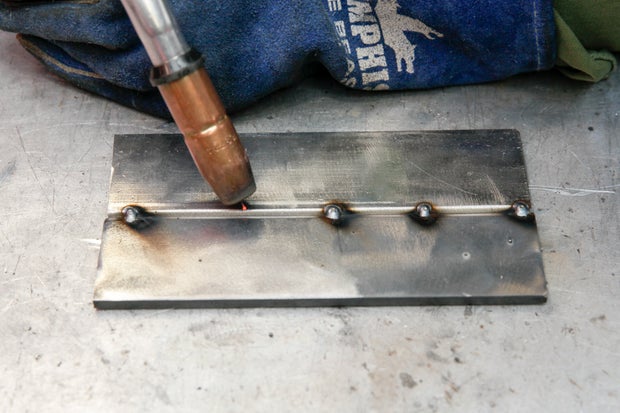

Repeat this action, alternating side to side so that the heat spreads evenly until you have tacks spaced 1" to 1.5" apart across the span that is being butt-welded together.
Run welded beads across your joint, start by connecting your tack on the outer edges than work your way towards the center. It's ideal to weld from the bottom of the stock up to the top, pushing the weld forward with the tip of the gun, however that isn't always comfortable or a good way to start learning. In the beginning, it's perfectly fine to weld in whatever direction/position that is comfortable and that works for you.


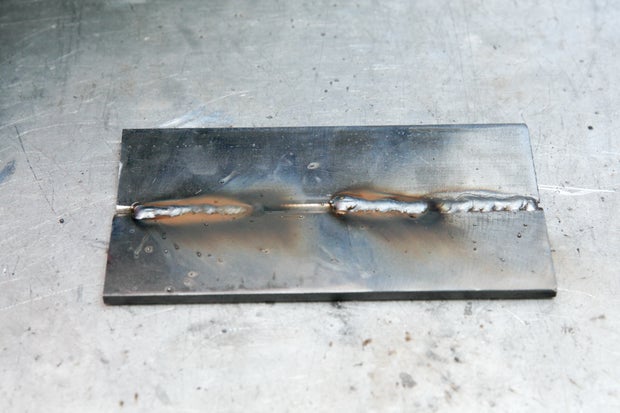
Once finished welding the the flat bar, you are left were left with a big bump where the filler material was added to the weld pool. You can leave that if you like, or you can grind it flat depending on what you are using the metal for.
If you find gaps ground in your weld, you may tack the gaps where the weld didn't penetrate properly, and grind the material down again. This typically means that you need to have more power and more wire to fill in the weld.
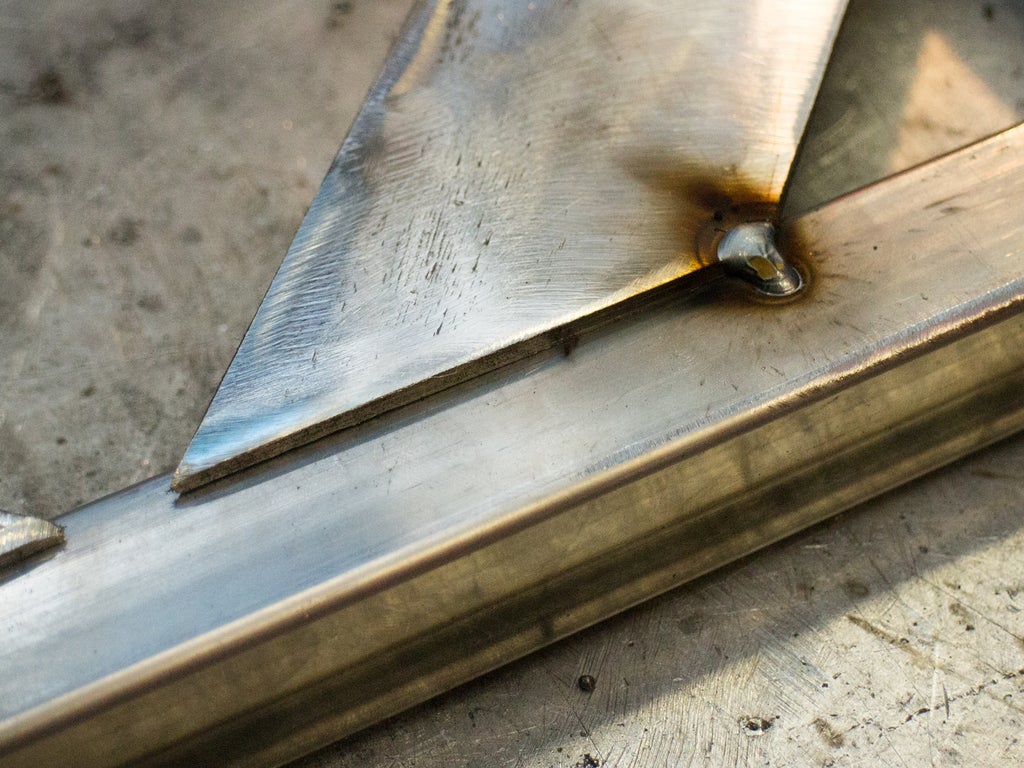
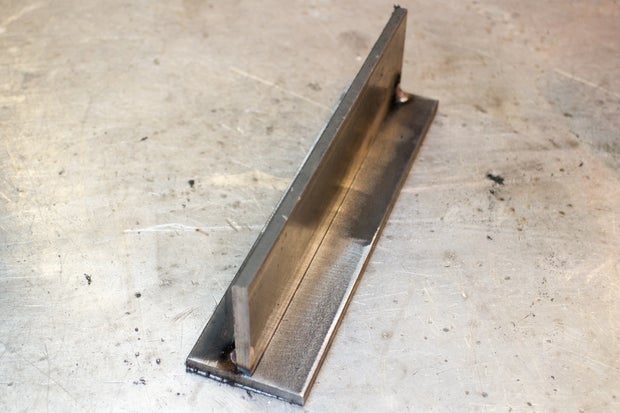
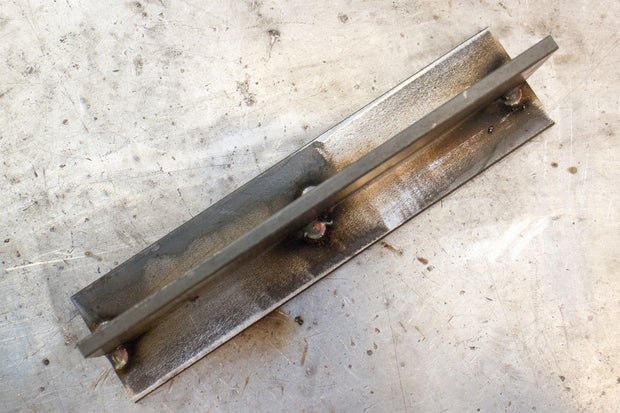
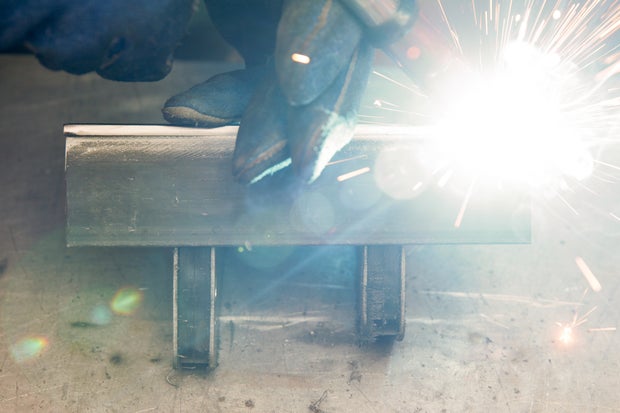
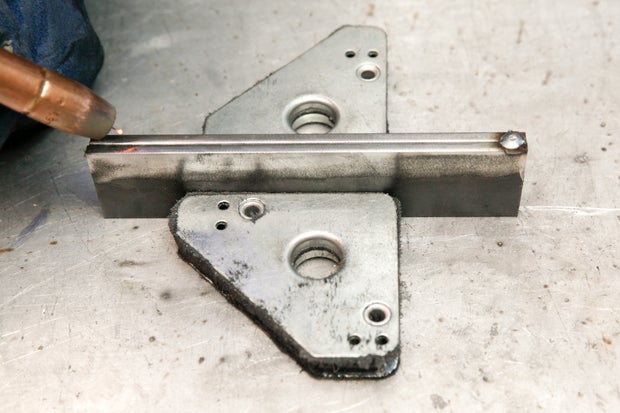
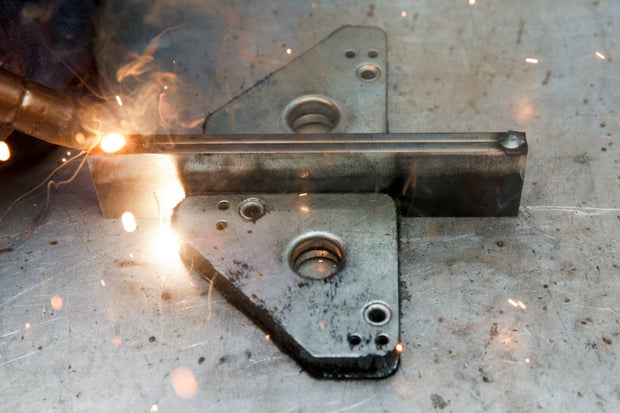
Step 4: Tee Joints

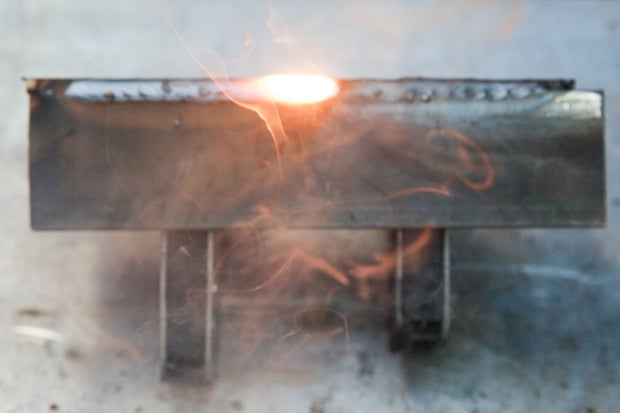
To learn the Tee joint, we first need to introduce the concept of fillet welding. Fillet welding refers to the process of joining two pieces of metal together whether they be perpendicular or at an angle. To perform a fillet weld, we change the way we position our welding torch against the material, so that we penetrate into the corner of our joint at an angle that will be well shielded and ensure strength.
The weld bead will not penetrate all the way through the other side of your base material like we see when we are welding on the sheet material from the Beginning to Weld Lesson.
The tee joint is when two pieces of metal are perpendicular to each other at a 90 degree intersection. Prepare your metal for welding by grinding off the mill scale finish. You only need to grind off the mill finish where you intend to weld, remember to keep considering how to minimize your grind time.
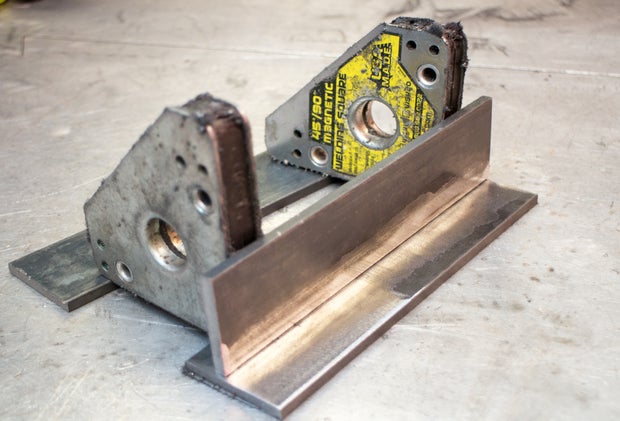
For a clean and close fitting weld, I recommend using magnets that will hold your material square to one another while you are making your first few tacks. Be sure to check your square between tacks using a slide rule or metal square.
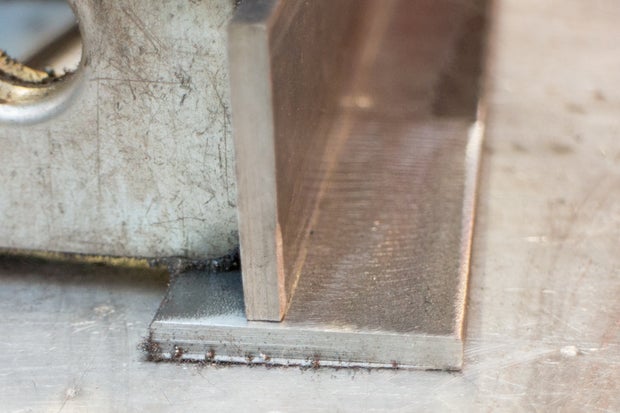
Start by tacking each end, placing a tack weld on either side of the tee. Complete a tack in the center, before tacking the opposite side of the tacks you already placed in the center. Finish by tacking the back side of your previous center tack.
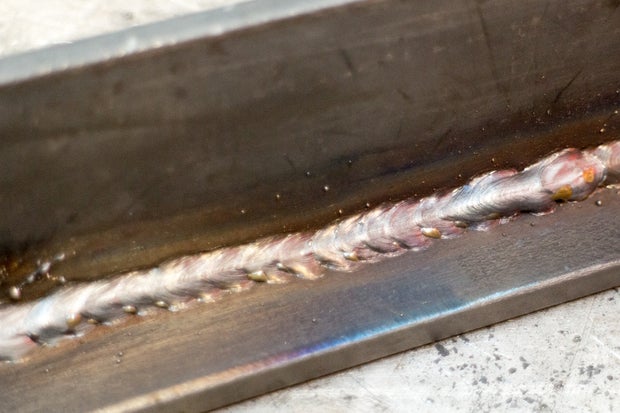
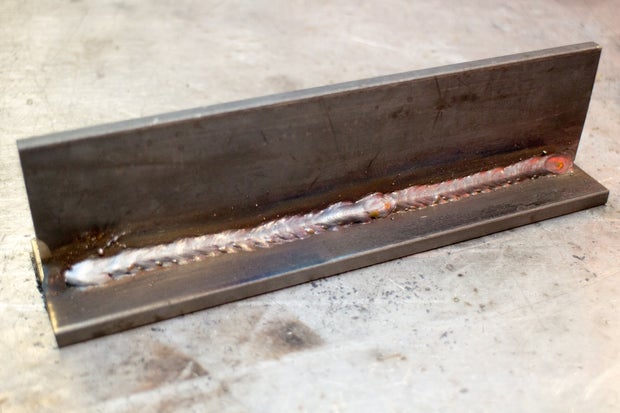
A fillet weld motion is not quite the same the chain of loops like we did for our butt weld, instead it is more like a rounded zig-zag shape, where we grab and melt the edges of the base material as we run the weld puddle across our joint. Run beads in sections along your joint, alternating side to side and back to front, working your way towards the middle. A nice fillet weld will form a neat even triangle shape between the pieces of perpendicular material.
Step 5: Corner Joint

A corner weld is a type of joint that is between two metal parts and is located at right angles to one another in the form of an L.

To complete this joint, begin by tacking the outside edges, then make the same curved zig-zag weaving motion we made for our filleted tee weld.


Corner joints can be hard because you can't often rest your hand on your material to steady your torch hand. You may want to practice a dry run along the joint to make sure you’re going to be able to weld comfortably, I've gone as far as clamping a vice grip to another piece of material to create a hand rest. Instructables author Phil B has a pretty cool hack to keep welds straight.


Step 6: Lap Joint

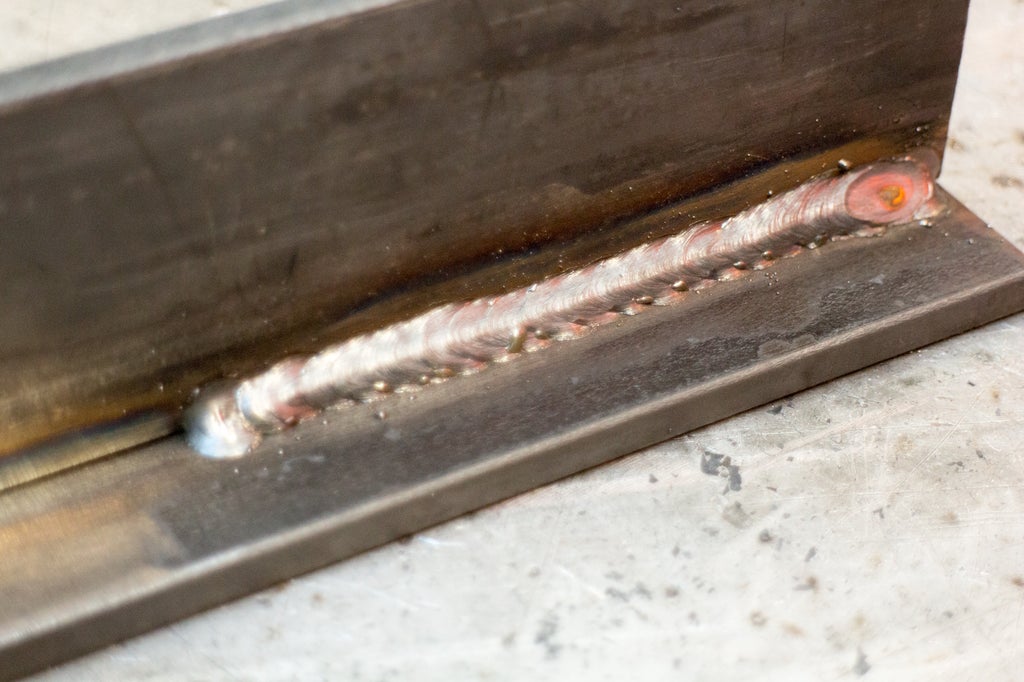
Lap joints will need to be completed when your project has one piece of material nested on top of another sheet or bar, with a large amount of surface area being mated. This joint is very similar to the tee joint, and we will need to perform a fillet weld to merge the material into one continuous piece of steel. Lap joints often necessitate slightly more voltage and a slightly decreased wire feed because there are no gaps in your material, and you are essentially welding onto a heat sync. The bottom layer of welding material is absorbing the heat energy of the top piece of material, dissipating the heat quickly.

Prepare the edges of your material to be welded. Begin by tacking the pieces together. Instead of making a small cursive E shape, place your consumable wire electrode on your top piece of material, squeeze the trigger, and gently drag the gun toward the bottom piece of material. You should be able to see the edge of the top material ever so slightly melt away through your welding hood as you complete this motion.

Complete your lap joint by first running beads along the outer edges, and work your way towards the middle. The angle of the gun should go into the corner at 45 degrees. The weld pool should visibly 'grab' the edge of the steel on your top piece of material. Remember that in a tee joint, your are not making small loop motions while you weld, but instead a slightly rounded zig-zag.
Step 7: Edge Joint

An edge joint is similar to the lap weld, in that we will be grabbing the corners of our sheet or bar material as we weld the edges together, melting them into our weld pool. Position the torch parallel to the edge and use the same zig-zagging motion as the torch moves along the path of the weld.
The heat affected zone of an edge weld is greater than any other joint we have gone over. Because the heat is spreading into two parallel pieces of material, with the same amount of heat being applied to both pieces, the material can burn out quickly. To avoid a gap in your weld or material, edge welds will often need a lowered voltage setting.


Begin by tacking the two ends, then place two tacks between the two edges, equidistant apart - four tack welds in total.


Run a bead on one end, then the other end, completing the middle bead last. By welding the ends first, we minimize heat distortion and potential burn-out.
If your material is very thin, consider using a small lap weld instead of an edge weld; as you perform this lap weld, you pick up the edges of both workpieces instead of just the top piece. You'll have an easier time manipulating your puddle and a slightly smaller heat affected zone.
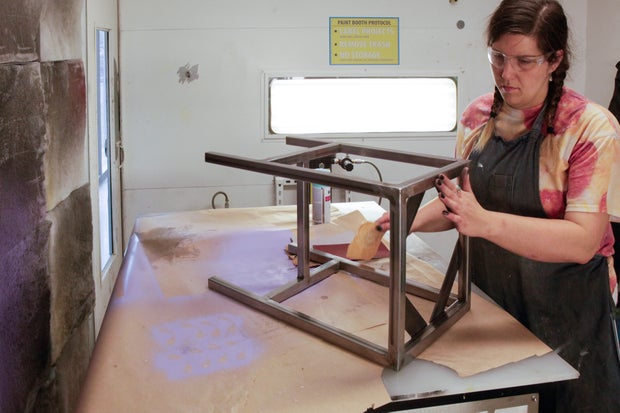
Step 8: Class Project

For this class assignment, I recommend that you practice making joints by cutting down two 36" lengths of hot rolled flat bar, prepare it for welding, jig our joints, then weld them together.
Cut the bar into ten 6" sections. You only need to remove the hot rolled steel's mill finish from the areas you are welding on. Remember to always wear a proper respirator when grinding to prevent flu-like systems from inhaling metal particulate.
Share your results or anything you made with these skills in the Class Project uploader below.
Step 9: That's a Wrap!

That's it! You're officially dangerous enough to weld two pieces of metal together.
MIG welding is accessible at so many levels that many makerspaces and hackerspaces are beginning to offer welding equipment. To see if a hackerspace or makerspace near you offers welding, check out this list of global hackerspaces.
Now that you've familiarized yourself with the world of steel and electrified molten metal, are you ready to take on a more complex project?
Check out this perfect capstone project that will get you inspired to start making your own steel furniture as I guide you through how to work with square tube to make a simple stool.

Learning to weld is a powerful skill in a maker's toolbelt! Here are some inspiring builds, projects, and techniques that are great for taking your welding practice to the next level:

Check out this diamond plate fire pit from Instructables author cammers.

This easy pot-rack project by YoseiI is a quick welding job that is an awesome space saving solution for any kitchen.

Make you own welding clamps with this Instructable by TSSJ-ryan.

Make a shelf that won't quit, EVER! ozymandias87 guides you through designing and building shelves for your workshop.

Kiteman takes commonly available steal stock and transforms it into a minimal, functional, and portable BBQ.

Instructables community author rrybarczyk goes over great technique for squaring and cutting in their steel box tutorial.
Now it's time to tell your DIY story! Share your welded creation with everyone by showing off your process in an Instructable! Perhaps you'll even be eligible to enter one of Instructables' fabulous contests, and win an awesome prize! Can't wait to see what you make :D
Step 10: Thanks and Feedback
Thanks to the folks at Molten Metal Works in LA for letting me bang around in their shop and take lots of pictures while I developed this class.
Extra huge thanks to the Pier 9 shop staff for letting us take up so much space in the shop for a few days while we shot this class.
Ultra hugest of thanks to Trent Still and Paige Russell for staying late and being the best shop buddies a gal could ask for.

Thanks for following along! Hope you were able to build your knowledge of MIG welding and develop a skillset that will make you a little bit more confident in the workshop.
I'd love to hear any feedback you have about this class or see any resultant welding projects (or really anything) that came from skills you learned from these lessons. Reach out and say 'HEY!' .
-Audrey


