

Introduction: 2 Storey Compost Bin!


I bought a compost bin but I found it too small for my garden. Also it took quite a long time to break down the material completely. Making it into a 2 stage compost bin with the bottom stage below the top has greatly improved it and greatly improved my compost making too!
Step 1: The Problem!

Its too small and the plastic bottom piece (you can just see it in the door of the composter) that would normally be on the ground is easily chewable by rodents creeping up from below.
(The image shows it on top of the concrete base ring I made for it)
Step 2: Original Size

I first made the bottom section this size (about 4 bricks high) but rodents snuck in, up on top of the bottom mature compost and chewed into the tasty fresh stuff in the top compartment..
Step 3: Making the Concrete Ring.

I originally made th ring in place on top of the bricks. It had 2 curved rebar round the outside and rebar that crossed in the middle to keep the inner plastic piece from falling down. The bin was set on top and bolts were pushed down into the wet concrete through the holes in the outside of the bin so that the bin would sit perfectly when the ring set up. Afterwards, i found that I could move the ring on my own.
If you do it, I recommend doing it on flat ground and moving the ring into place later. (Have someone help you)
Step 4: Bricking Up Higher

I increased the size in front and raised up the bricks to a new height. I used old shabby bricks that i had found in the ground (old steps in their garden, I guess) and did not try to do a very nice job.
If you do it, put a piece of ply across the front so you can bring the front bricks exactly flush with the plywood. I finished it off level on top. I went 8 bricks high and this has worked very well for me (6 ft one high). I think for average people 7 bricks high is good.
My original heap was on a concrete pad that was already there but it sloped to the back and made wet compost. I added concrete inside so that it sloped slightly to the front so no more drainage problems!
(I smoothed it flat after I took the photo).
The brickwork was laid on a mix of 3 parts fine sand to 1 part type s cement. It is made to a consistancy like stiff pie mix. You can trowel a "wave" onto the mix in the wheelbarrow and it will stay up. (Wetter than that and the bricks tend to sink).
In a pinch you can use type 10 cement or type n.
It will not be ideal but if you have a little that is going to waste, use it!
It is only a composter!
You could also make the bottom of the composter from stone with any of the different cement types in your mortar. 3 sand to 1 cement mix for this job in stone too. And you can have the mortar a little drier if you use stone. (Brick sucks the moisture out and drys the mix quick), stone does not suck the moisture out much.
Step 5: Wire Mesh

I wanted wire mesh for rodent protection this time. I used some wire from an old sieve that I use to make fine soil. It was barely wide enough for the job! All I had to do was cut off the excess so that it fit under the concrete ring.
Step 6: Placing the Concrete Ring.

Next, a bed of mortar was put on top of the brickwork and the mesh added, then another little bed of mortar on top and the wetted concrete ring was laid on top. It is important to mark the ring so you know where the front of the compost bin will point and align it properly before it sets! I had to tie wire the mesh to the front part of the ring and plaster it into place.
(If I do it again, the mesh would go in to the concrete ring as I make it!)
Step 7: Adding the "door" and "lid"


I was worried about how to get the door tight enough and how to attach it solidly.
It could be quite a problem!
I ended up attaching it with a bit of clothes line wrapped around the back of the bricks. The clothesline has a tightener that you twist to get it really tight. Let off the tension a little to remove the door and take away your finished compost. (I made the door from an old pallet) The lid was a piece of plywood. Luckily it slipped under the front of the concrete ring a bit! It is not attached to the door but is held in place because it slipped in so nicely under the ring. If you loosen the door a little, you can easily take off the lid as shown in picture 2 and picture 3
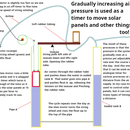
Step 8: Using the Composter!


Because the black composter is a bit higher, it gets more sun and gets hotter so it rots compost a bit quicker than before. When it has rotted down a bit, you loosen the wire, take off the lid on the bottom compartment, and fork out some of the compost and pull it straight down into the bottom compartment.
then close the doors,
stand on the lid
and mix up the top compost a bit, ready for adding more material.
It has worked well so far composting is quicker, and getting fresh material in my finished compost is no longer an issue.
I now have almost 3 times the capacity and probably 3 times the throughput too!
And my compost is nicer.
Brian White


