

Introduction: A Ring From Scratch


My inspiration for this project came to me when I visited the Cartier exhibit at the Denver Art Museum. Since I am a very resourceful machinist by trade I figured that I could try this. These rings are just for fun. If I were to propose to my current girl friend I would probably need a bit more practice!
With readily available materials I began work on some just-for-fun rings!
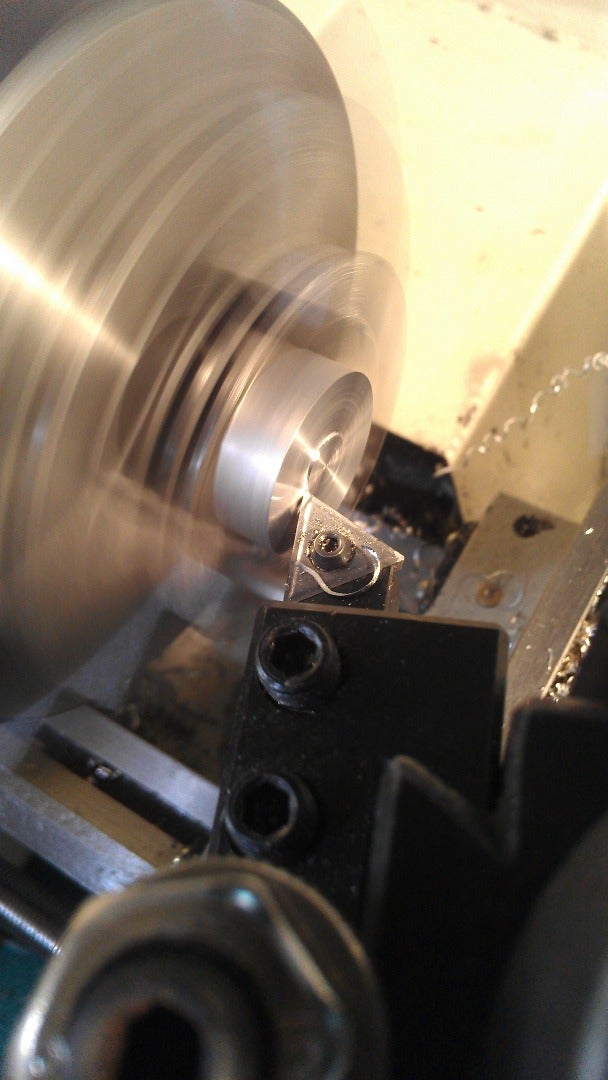
Step 1: Machining the Ring Blank


At one time Aluminum was the most valuable metal on earth because it was so hard to manufacture! The reason I use aluminum was because it is cheap (today), relatively soft, and easy to work with.
I started with a 1.00" diameter 6061-T6 aluminum rod which I machined down to size.
TOOLS
-Metal Lathe
-Drill bits (Center drill, pilot drill, Silver & Deming drill)
-Turning, Facing, & Boring tools (HSS, Carbide, Indexable)
-Calipers or Micrometer
1. Pick your Ring Material
-Silver
-Gold
-Aluminum
-Stainless Steel
-Titanium
2. Pick your Ring Size
-0-16
3. Know your Stone Size
-Round (diameter), Rectangular (Width/Height)
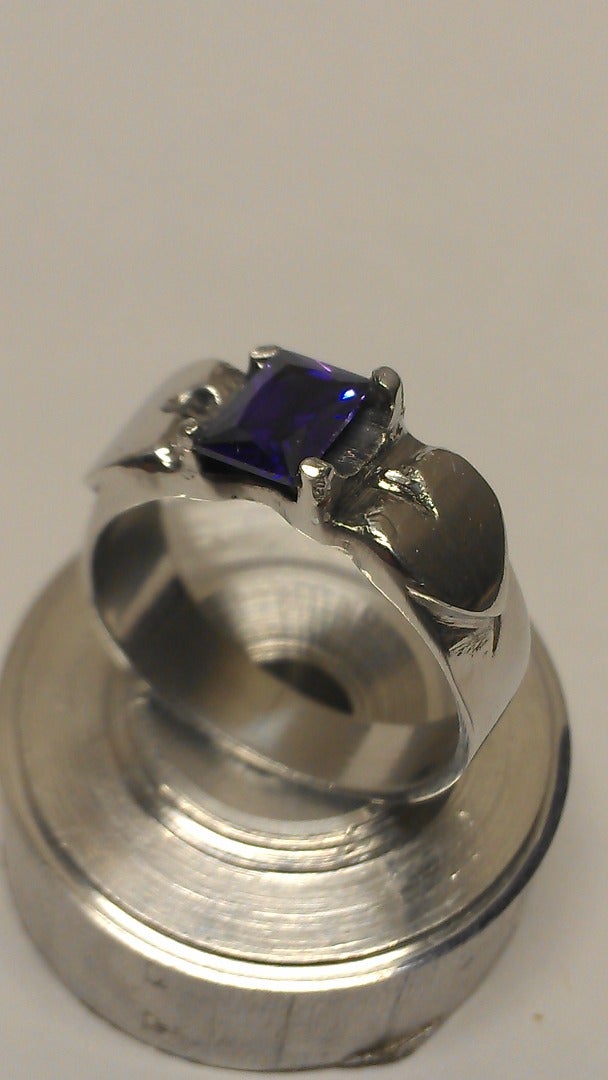
Step 2: File Like MAD!!


File the Ring Blank into the shape that you want!
TOOLS
-Files (Bastard, double cut, smooth)
-Needle Files
-File card (for cleaning files)
-Assorted engraving tools
-Dremel, burrs,
-Buffing tools
File using a "PUSH" stroke. Keep both hands on the file; drive hand and palm the tip.
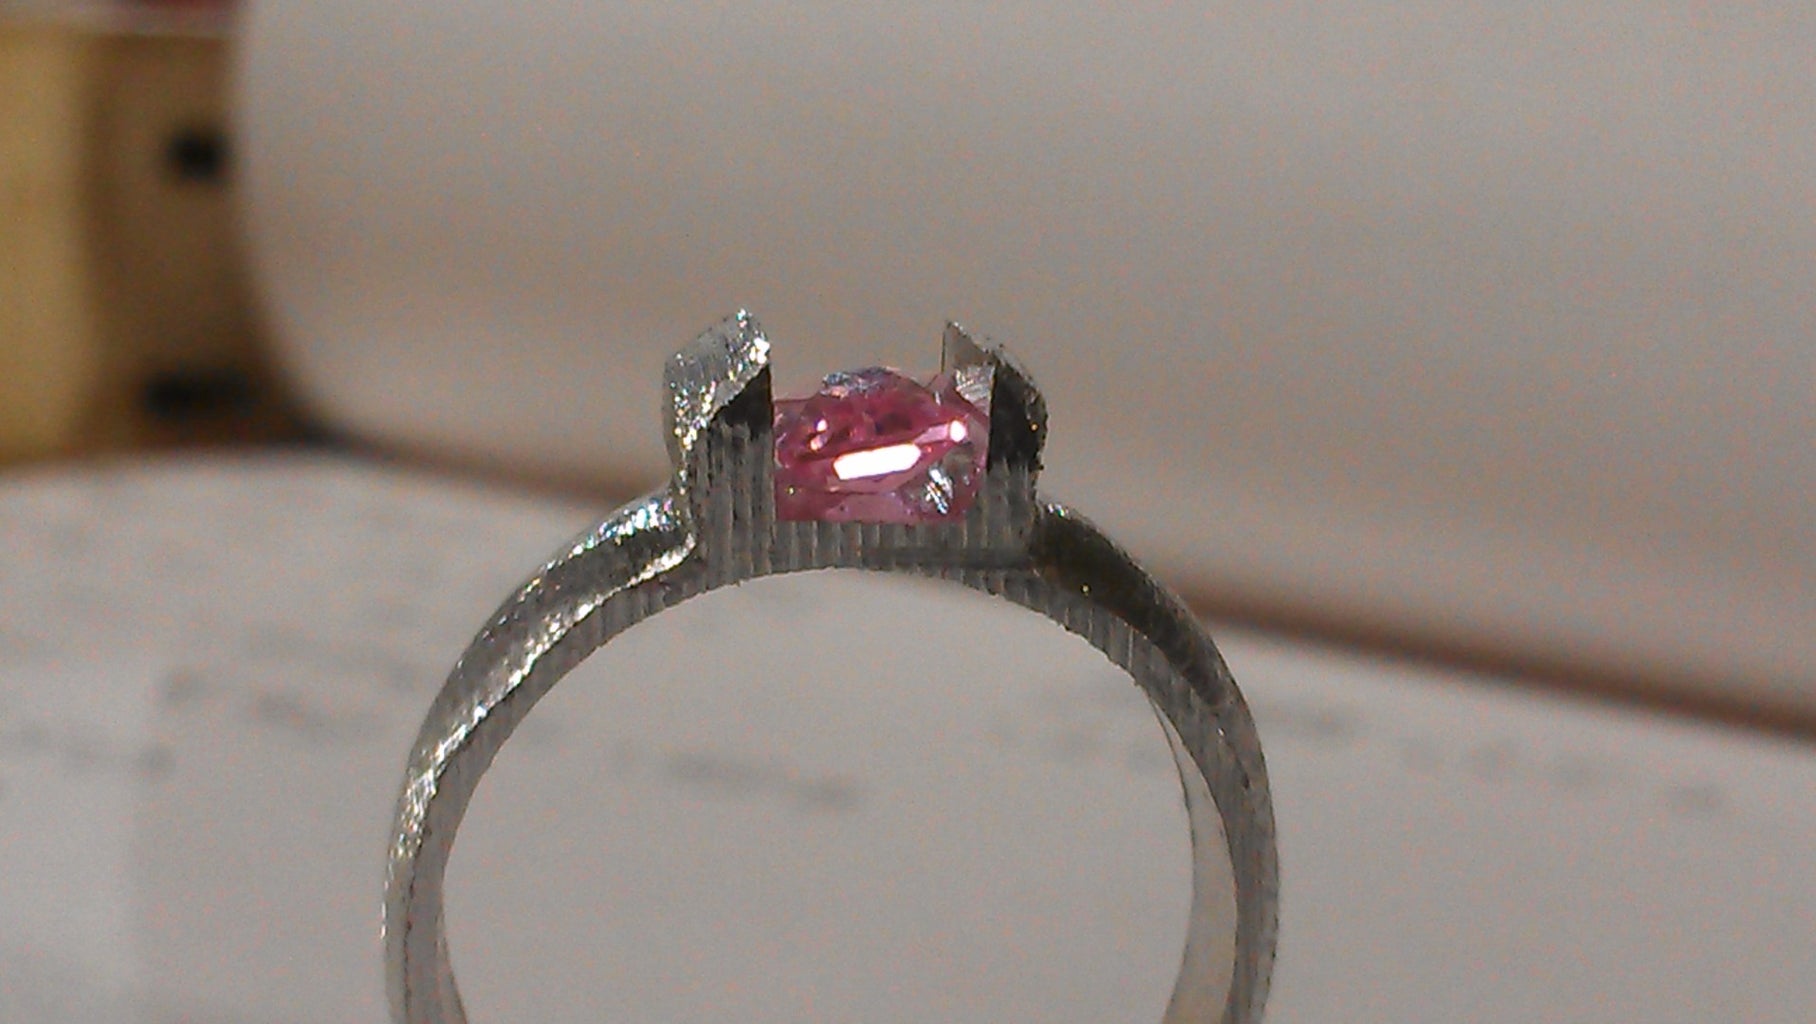
Step 3: Making the Prongs!


TOOLS
-Needle files
-Rotary tool
-Burrs
Again, using files make shape the prongs for the stone! Be careful and take your time!
Use your imagination to shape the metal !
Step 4: Polish!


TOOLS
-Sand paper (sanding sponge)
-Scotch brite pads
-3M wheels
-Cotton Buffing wheels
-Buffing compound (medium, fine, ultra fine, super fine)
-Rotary buffing tool
Using care and taking your time, buff, polish and sand the ring into shape!
Step 5: Fitting the Stone


TOOLS
-Pliers (jewelers, precision)
-Patients
Be careful with step! You want the stone to be solid but no crushing it!
Step 6: Oops!

Well....I broke it. I pushed too hard and broke on of the prongs off!
Conclusion: Since this was my first time making rings and fitting stones I feel that I did fairly well, but I still need loads of practice. I tried and that is what counts!
Also the aluminum was 6061-T6 which is a hardened aluminum the prongs are less malleable and therefore, are more likely to fracture.
This was worth the try! In the future I will make more, try harder, and have fun!
Step 7: Boxes


Here I made the hinge and the box. Just for fun!
Good luck making! Have fun!
Thanks for viewing!
First Prize in the
Rings Challenge


