

Introduction: Arduino Minecraft Interface


This came to me many years ago when I had first started playing the very popular game, Minecraft. When I play Minecraft I get more into the technical side of building, calculators, and computation has always been more appealing to me. However, only twice did I find anything similar to what I wanted... That being a way to interface Minecraft Redstone with my little Arduino... Though at the time I wasn't proficient with programming, the man who made an Arduino Minecraft server would not help me out, and the Hey0 mod that was supposed to log redstone events in Minecraft was many years out of date. It has been roughly 4 years since this occurred and I had all but forgotten the events that had transpired. I was back to playing Minecraft more commonly and thought I would revisit this and thus, the AMI was born. This project is still under development and I am attempting to establish a website to work this out of, but for now an Instructable will, at least, put this program into others hands.
.
To Use The Example In This Tutorial You Will Need:
~Arduino
~RGB LED Common Cathode
.
Attached is a zip file containing:
~Source Code, Program, Arduino Program, Cat Picture, Minecraft World

Step 1: AMI: Setting Everything Up


We will begin with the program. All that is found in the .zip folder on the first page is the source code, the program, a list of known bugs, a minecraft world, and a picture of a cat, because they are awesome.
.
The first image displayed shows all the files contained in the zip file.
To set up the program you only need drag the executable into the logs folder in the .minecraft directory, however we'll add a shortcut and change the icon on the desktop so it looks nicer.
.
To add the AMI.exe program:
-Open your Start Menu and Type "run";
-Search "%appdata%;
-Enter the "Roaming" Folder, or if your computer took the Initiative, you may be in your roaming folder;
-Once in the "Roaming" folder, click to enter ".minecraft";
-Now enter the "logs" folder and drag AMI.exe into the logs folder;
.
.
Now to create the shortcut:
-Right click the AMI.exe and click "Send To";
-Then click "Desktop" and go to your Desktop;
-Right Click the Link and Click "Properties";
-Click "Change Icon" and change this that to whatever icon you like(The computer chip looked pretty cool);
.
.
To Use The Minecraft World:
-Head to the ".minecraft" folder, however drag "AMTest" into the "Saves" folder
.
This concludes setting everything up.
Step 2: AMI: the Interface, and Arduino


As of currently, when the program starts it will ask for your Adruino's com port number, and the BAUD rate. Upon receiving these it will tell you if connection was established or not. If connection failed the program will close, check to make sure your Port Number is correct and that your Arduino is setup properly according to: Arduino Setup Guide .
.
For this you will need:
-Arduino
-RGB LED
.
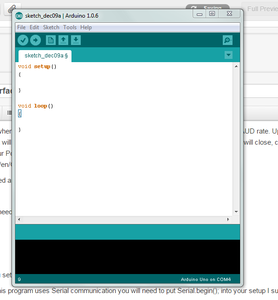
STEP 1: Get you setup program, in other words your "void setup(){}, void loop(){}"
STEP 2: Since this program uses Serial communication you will need to put Serial.begin(); into your setup I suggest a BAUD of 9600.
STEP 3: Set 3 pins to OUTPUT Mode;
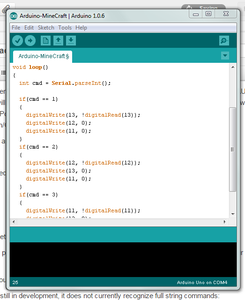
STEP4: Due to being in Development, the program does not currently recognize strings, so we set "int cmd = Serial.parseInt();
STEP 5: Set your command by comparing cmd to an integer value. Then set its effect, such as an LED turning on.
Step 3: AMI: Setting Up the Example
This is a small step, but I wanted it to be separate so the pictures were right next to the instructions.
According to the example code we went through and the Minecraft example to come next, connect the pins according to these pictures and the wiring table I have made.
WIRING TABLE
~LED RED PIN :: Arduino Pin 13;
~LED GREEN PIN :: Arduino Pin 12;
~LED BLUE PIN :: Arduino Pin 11;
~LED GND PIN :: Arduino GND;
Step 4: AMI: the Minecraft World and How to Use Commands
As well, when typing commands the syntax is "/say !<command-number>!
The Program searches for characters between the '!'s
As stated in the video, when creating a new world follow these steps:
~Make world and Close Minecraft
~Navigate to the ".minecraft" folder through "Run"
~Enter the "Logs" folder
~Open, Clear and Save the "latest.log" file
Step 5: AMI: Testing
Go ahead and test your buttons, If they work, Amazing you now have access to do whatever you want with reality in Minecraft. If not, please do not hesitate to ask questions, I will respond as quickly as possible. The video shown is the same as the first, but demonstrates it well.
.
Please post a comment telling me any bugs, or post a fix to a bug. Tell me what you thought. In fact, tell me what you build with this. Personally I have wanted one of these for years, so I have plans of building a quadrotor that flys from Minecraft. And Remember, Keep It Classy.

Participated in the
Make it Glow!

Participated in the
Formlabs Contest


