

Introduction: Arduino Project in 5 Minutes


In the following Instructable, we'll show you how you can make your next Arduino project in just 5 minutes.
It's simple, easy and fun.
Enjoy! :)
Step 1: Plan It!

1. Go to Circuito.io
2. Select the components in the screenshot, add a description and your email and click "Send"
3. Instantly receive schematic and code from Circuito.io.
* Sometimes our emails go to "promotions" so make sure to check the different inboxes.
Step 2: Connect It!


1. Download the attachments from the email you received.
2. Unzip the folder.
3. Open the .FZZ file (If you don't have Fritzing, you can download it here for free)
4. Move components around so you have a clear view of the connections.
5. Connect the different components to the breadboard.
Step 3: Code It!
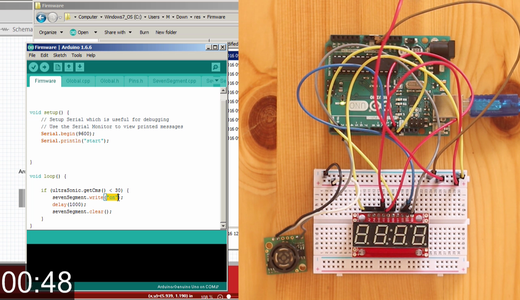

1. Open the Firmware folder
2. Open the Firmware.ino file (if you don't have Arduino installed, you can download it here for free)
3. Make changes to the code.
The original code will show the word: ON if an object is closer than 30 cm. from the sensor:
void loop ( )
if (ultrasonic.getCms () < 30 {
sevenSegment.write("on");
delay(1000);
sevenSegment.clear();
We decided that for this project, we want the seven segment display to show the distance from the sensor:
sevenSegment.write (ultraSonic.getCms() );
delay (250);
Step 4: Test It!

Now that everything is in place, you can test your project and see if it really works like it does on the video :)
If you have any trouble, you can always write to us >> hello@circuito.io or through our FB page
Step 5: Share It!

We would love to see how your project turned out.
Share it with us through our FB page and with the Makers' community.

Participated in the
Sensors Contest 2016

![Tim's Mechanical Spider Leg [LU9685-20CU]](https://content.instructables.com/FFB/5R4I/LVKZ6G6R/FFB5R4ILVKZ6G6R.png?auto=webp&crop=1.2%3A1&frame=1&width=306)


