

Introduction: Arduino / Raspberry Pi Case With OpenCase


OpenCase allows you to easily dimension and generate DXF files for electronics enclosures. You put in the material thickness, inside dimensions, and tell it where to cut holes and cutouts, and it does the rest. It uses OpenSCAD for all the calculations and file generating. Quick and Simple custom case design.
You could use it for anything from an Arduino to an ATX enclosure, or your custom project, whatever. It is very flexible.
Step 1: Download OpenSCAD
OpenSCAD is an open source CAD system for programmers. It allows you to define objects using functions and programming. It is perfect for this project, as it is easy to just use some for loops and math to build the panels for a case.
Go here: http://www.openscad.org/downloads.html To Download it.
Step 2: Download OpenCase
OpenCase is currently hosted on GitHub. Go here: https://github.com/joeynovak/open-arduino-case And click the "Download Zip" button. Or, if you are a git pro, clone the repo.
Step 3: Dimension Your Case

OpenCase works by allowing you to define a few dimensions for your case, and then OpenSCAD generates and renders the peices. You then export these to DXF files and load them into your laser cutter. To dimension your case, open the "open-case.scad" file in OpenSCAD. OpenSCAD will take a minute to do an initial preview render.
You should see a screen like in the image. You can click and drag in the 3d viewport, or use the scroll wheel on your mouse to zoom in and out. It won't change your design at all, so feel free to play around.
In the left column of the screen is the code for OpenCase. This is all OpenCase currently is, just a large OpenSCAD file. The first few dozen lines are where you define your case. Since OpenSCAD and DXF are "unit less" it doesn't matter if you use mm or inches. They are currently setup in inches for an Arduino Uno with MiniUSB Port with an HR911105A network board.
Go ahead and change the following Variables:
- materialThickness - This should be your material thickness :) You could make a case out of balsa wood, or cardboard, acrylic, MDF, you name it. Just measure the thickness and use it for this variable.
- spaceBetweenParts - You can change this to whatever you want. In theory making it exactly the "kerf" of your laser cutter would produce the least scrap, but it's kind of fun to have a big piece with all the pieces cut out.
- padding - Just leave this at .02 for now, read the OpenCase readme for details.
- width - this is the inside width of the case
- height - this is the inside "height", or Y dimension of the case
- tall - How tall the case is. (Z)
Next, you need to specify the holes and cutouts in your case. You can put holes in the top and the bottom of the case, and holes and rectangular cutouts in the front panel.
A "hole" is defined as a 3 element array. i.e.: [.125/2, 1.34 + .1 + .1, .6] The first element is the radius of the hole (.125/2, or a 1/8th inch hole). The next element is the X coordinate from the bottom left of the front panel, the last element is the Y coordinate from the bottom of the panel.
A "cutout" is a 4 element array, the first two elements are the x and y coordinates of the bottom left corner, the third and fourth elements of the array are the width and height of the cutout.
In the future, OpenCase will probably have a number of example files for real systems (raspberry Pi, PiZero, Samsung Arktik, etc...) that you can use as a starting point for your case.
Step 4: Render and Export Your Case.
OpenSCAD by default, just does a demo rendering, to export to dxf we need to do a real render, this is REALLY easy, just click on Design -> Render, or push F6. Once you've done that you can go to File -> Export -> Export as DXF
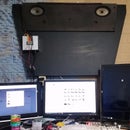
Step 5: Cut and Assemble Your Case!

You should now be able to take the exported DXF file and load it into the software your cutter uses. This should work on just about anything, from a ShopBot to a Laser Cutter, and probably even a 3D Printer, although if you are going with a 3d printer, I would make some changes and print it as 2 pieces instead of 6.


