

Introduction: Nabi USB On-The-Go / OTG Cable


USB OTG is what lets you plug usb devices into smart phones and tablets. It's nothing special, just a usb cable that has a micro usb connector on one end, and a female usb connector on the other. Unfortunatly, Nabi (now owned by Mattel) doesn't put micro usb connectors on their tablets, and are out of stock of the USB OTG adapter cables on their website... Argh... I did some research, and had a theory about the connector. Keith Green (aka: kgreen30) did a very cool write-up here of how to wirelessly charge a nabi tablet, and his pictures and pinouts of the cable led me to believe the USB OTG cable was possible. Thanks Keith!
FYI, a USB OTG device knows when a usb otg cable is plugged in because the 5th pin in the micro usb connector is connected to ground (sometimes via a resistor). Keith discovered that one side of the nabi connector has all the usb wires. And I discovered that the order of the pins is the exact same as a micro usb connector. So the un-used pin he found, was the USB OTG select pin. That was my theory, and it is now proven.
So... First step. Get yourself a Nabi usb cable and cut it in half. Also, get yourself a USB OTG adapter from amazon and cut the micro usb end off.
Scrape the plastic and insulation from around the Nabi connector until it looks like the picture. You'll have to pry off the metal shield as well. Be careful, while the pins aren't too small, it is easy to cut a wire once you have the shield off.
You'll need a sharp knife as that plastic is very tough. Once you get the metal shield off, you'll need to scrape away the plastic from the un-used pin (it's next to the ground pin / black wire). The un-used pin on my cable was actually cut short, yours may not be. The picture above is after I put a good pin in, so yours may not quite match the picture, but it should be close.
Step 1: Carefully Cut Away the Plastic Around the Connector


From Keith's picture, his cable had a full length extra pin, mine didn't. So I had to pull it out, and replace it with a pin from the other side of the connector.
First, pull the plastic part of the connector off. With any luck, the non-usb pins will stay in the black plastic, and the usb pins will stay on the cable side. Now, you have to extract the right non-usb pin. The pins are unique for each position, so you have to pull the RIGHT pin out of the connector (the one that matches it). So looking at the connector, go exactly 180 degrees and that is the one. It is 3rd from the outside. You only get one shot at this, so be gentle and careful.
Pull it out, Now, you may be thinking you should slide it in where the USB pins are and then put the plastic back on. I found this very difficult, as it is difficult to get the thin end of the pin to slide all the way into the plastic piece. So I put it in the plastic piece in the right spot, and then slid it back into position. I also had to cut some solder off the pin next to it so it would slide in easily. This part takes a lot of attention to detail, and some time. Don't force it, or you'll be straightening pins...
Step 2: Short the New Pin to Ground

Once you have the connector back together, and the un-used pin is now long enough to solder to, short it to ground. Be careful... Shorting it to the pin next to it wont actually hurt anything (I think), but it will make your cable not work.
Step 3: Connect the Usb OTG Cable, and You Are Done!
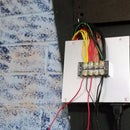
The hard part is over now. Strip the wires on the other end of the usb cable, and where the usb micro connector was. The wires are very very small so be careful. Take your time.
Once you have the colors all matched up and wires soldered together, and heat shrink tubing over the splices, you should be good to go!


