

Introduction: Arduino Tutorial: Get Traveled Distance Using ADNS-9800 Laser Mouse Sensor


The ADNS-9800 Laser gaming sensor comprises of sensor and VCSEL in a single chip-on-board (COB) package. ADNS-9800 provides enhanced features like programmable frame rate, programmable resolution, configurable sleep and wake up time to suit various PC gamers’ preferences. The advanced class of VCSEL was engineered by PixArt Imaging to provide a laser diode with a single longitudinal and a single transverse mode. This Laser gaming sensor is in 16-pin integrated chip-on-board (COB) package. It is designed to be used with ADNS-6190-002 small form factor (SFF) gaming laser lens to achieve the optimum performance featured in this document. These parts provide a complete and compact navigation system without moving part and laser calibration process is NOT required in the complete mouse form, thus facilitating high volume assembly. The sensor is based on Laser technology, which measures changes in position by optically acquiring sequential surface images (frames) and mathematically determining the direction and magnitude of movement. It contains an Image Acquisition System (IAS), a Digital Signal Processor (DSP), and a four wire serial port. The IAS acquires microscopic surface images via the lens and illumination system. These images are processed by the DSP to determine the direction and distance of motion. The DSP calculates the Δx and Δy relative displacement values. An external microcontroller reads the Δx and Δy information from the sensor serial port. The microcontroller then translates the data into PS2, USB, or RF signals before sending them to the host PC or game console.
In this tutorial You will learn how to connect ADNS-9800 Laser Mouse Sensor to Arduino and Display Traveled Distance (Δx) on 20x4 LCD
You can buy one from there: https://www.tindie.com/products/jkicklighter/adns-9800-optical-laser-sensor/
Step 1: Building Circuit
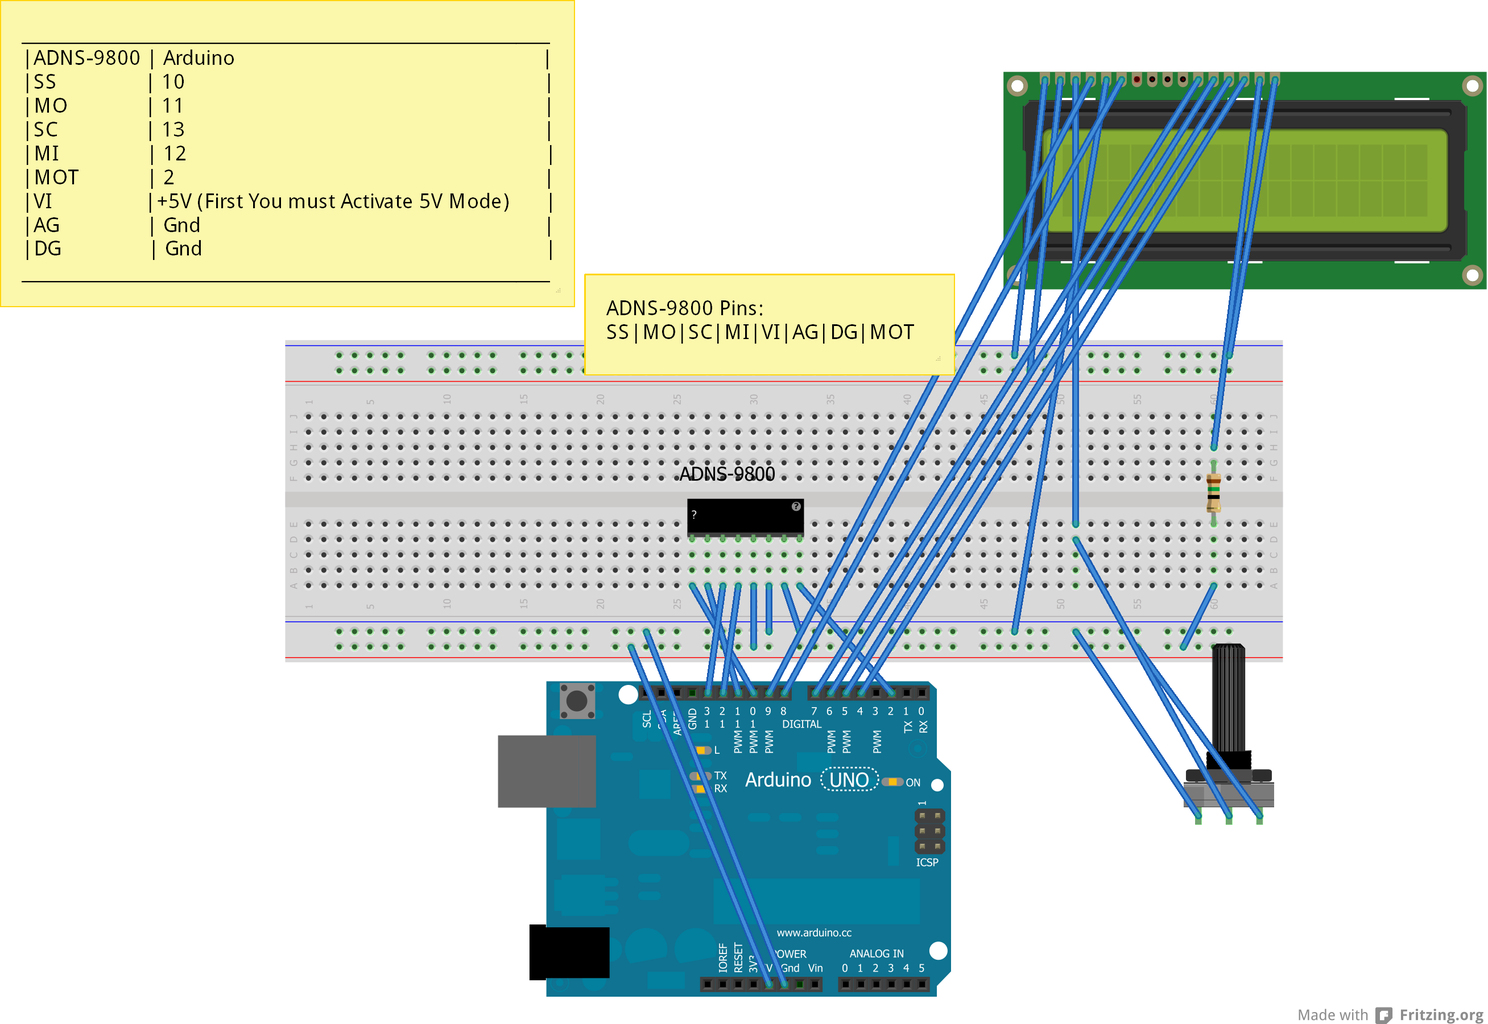
First You Need to Build Circuit
You have to Connect Your Arduino to ADNS-9800 and LCD Screen
You can download Circuit from there: https://dl.dropboxusercontent.com/s/vcu90sescnt10l2/Laser%20Mouse%20Control.fzz
Step 2: Uploading Code

Now Connect Your Arduino to Computer.
Download Arduino Project at https://dl.dropboxusercontent.com/s/4b3hy0y87f3a67b/Laser%20Mouse%20Sensor%20Code.rar
Then Open it, Select Your Board and Your COM Port and Click Upload Button
NOTE: You have to activate +5V mode first (this tutorial is written for arduino uno (any arduino will work which uses Atmega8 - Atmega16 - Atmega32)), To activate +5V mode you have to cut the three traces on the 3.3V side between the exposed sets of pads, and add three solder bridges to the 5V side of the board (Be careful don't damage board).When you will activate +5V mode and then connect it correctly it will work fine, but remember code that is uploaded doesn't show distance in meters and you have to decrease loop delay to speedup sensor. If you are removing LCD please edit code to display distance that sensor has traveled

![Tim's Mechanical Spider Leg [LU9685-20CU]](https://content.instructables.com/FFB/5R4I/LVKZ6G6R/FFB5R4ILVKZ6G6R.png?auto=webp&crop=1.2%3A1&frame=1&width=306)


