

Introduction: Arduino Remotely Controlled by Bluetooth or Bluetooth LE Using Phone
Ever wanted to remotely control your Arduino? Either to read sensor values, or make it do something? Maybe even make a remotely controlled robot?
Well now you can. This instructable will cover the most basic example; switch a LED on and off remotely.
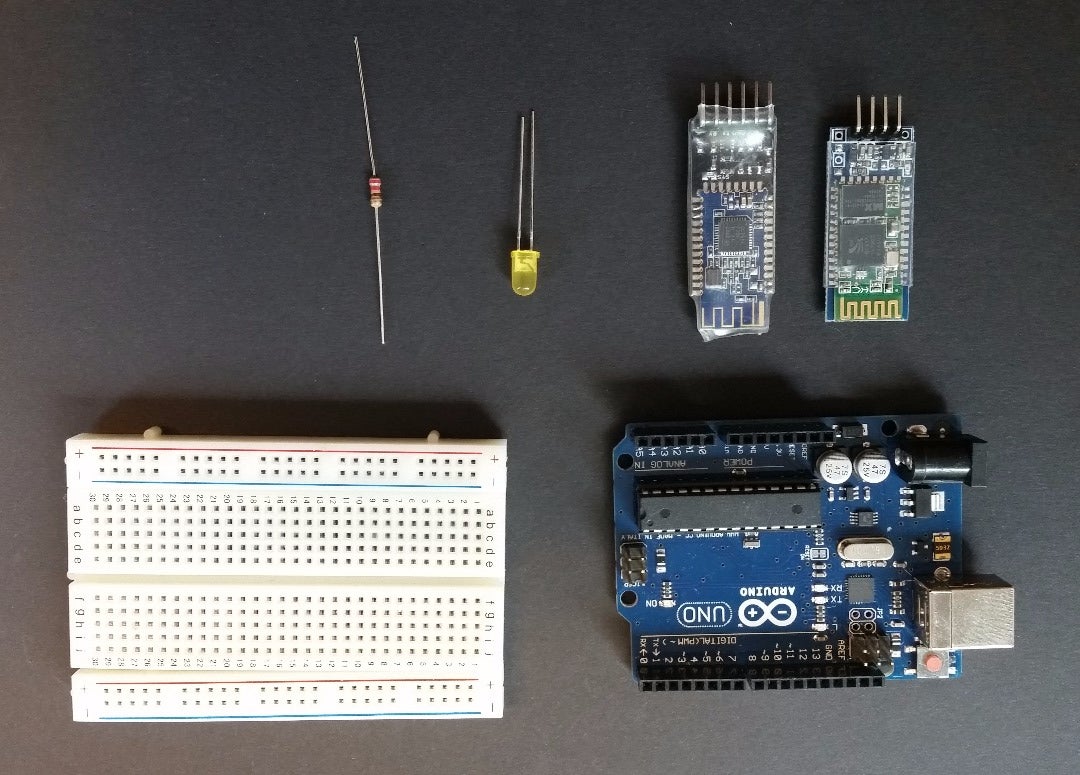
What you will need:
- 1 x smart phone
(currently the app we will use only support Android, but we are working on getting it accepted for iOS AppStore).
To use with a Bluetooth LE unit, the phone must support Bluetooth LE. - 1 x Arduino
- 1 x 220 ohm (or similar) resistor
- 1 x LED
- 1 x Bluetooth or Bluetooth LE unit. The ones we have tested and works:
- Bluetooth: HC-05 and HC-06 (will not be supported for iOS)
- Bluetooth LE: HM-10
- Assorted wire
App for smart phone:
To easily create graphical user interfaces, download the PLab app for Android from Play Store.
This app was created for a first year course, Programming Lab, at Norwegian University of Science and Technology (NTNU), the Department of Computer and Information Science (IDI).
This app will allow you to create Processing sketches and run them from the Internet on your phone. Processing is a programming language that make it easy to create graphical applications very fast.
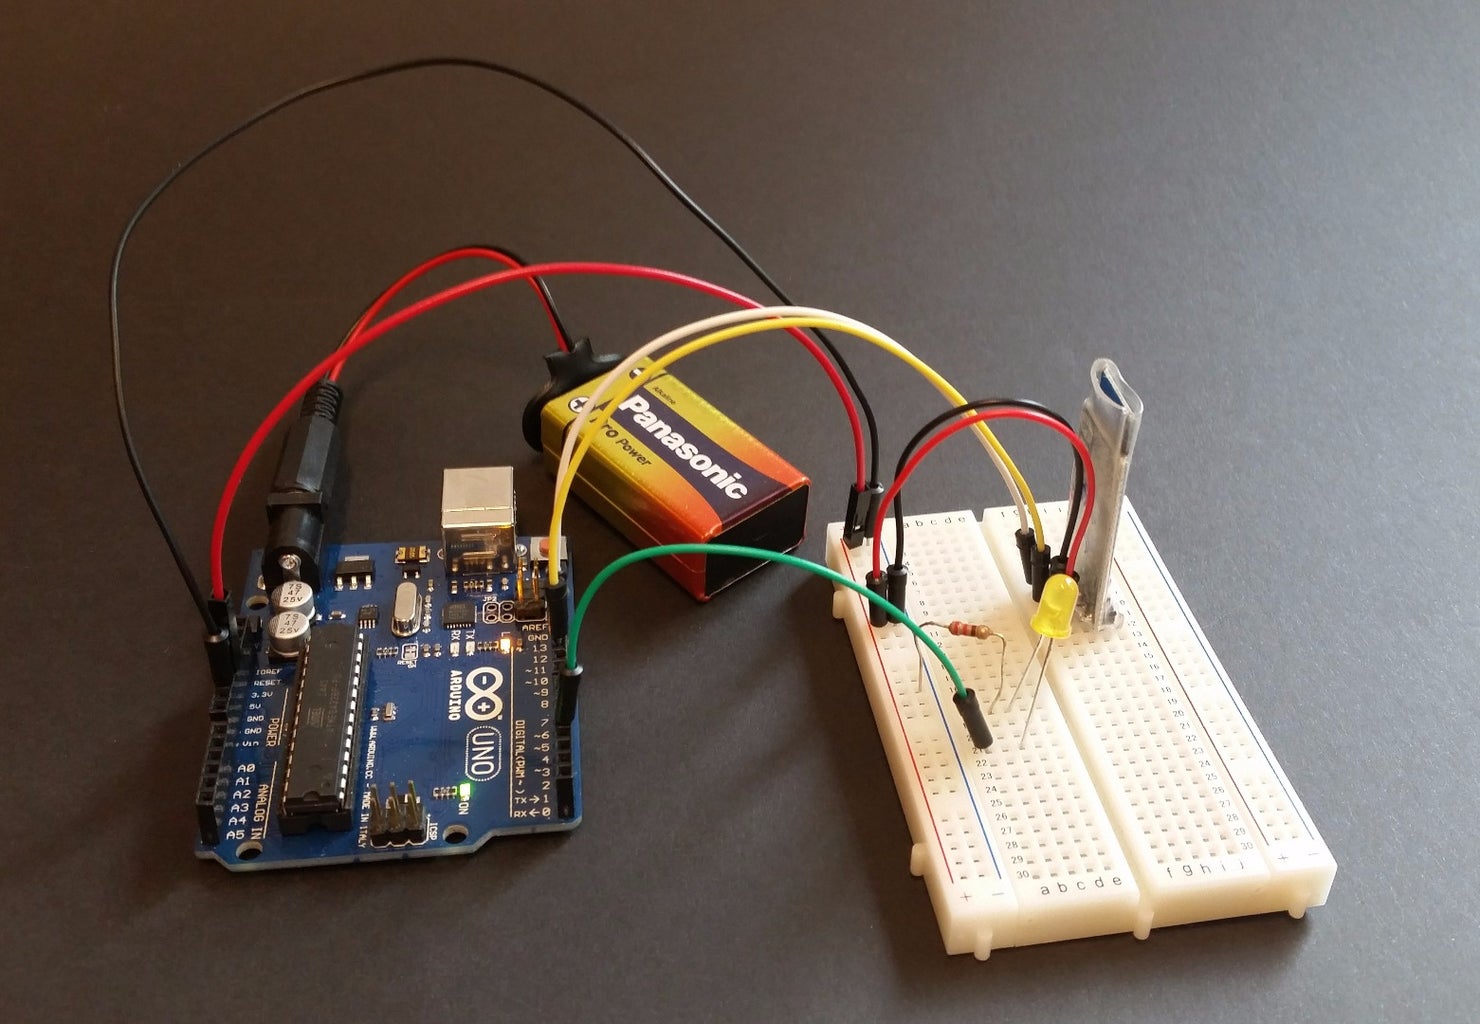
Step 1: Hooking Everything Up


To connect the Bluetooth or Bluetooth LE unit (from now only called BT):
- VCC on BT to 5v on Arduino
- GND on BT to GND on Arduino
- TXD on BT to digital 10 on Arduino
- RXD on BT to digital 11 on Arduino
To connect the LED circuit:
- LED anode (longest foot, rounded side, or see wikipedia for more explanation) to digital 4 on Arduino
- LED cathode to one side of 220 ohm resistor
- Other side of 220 ohm resistor to GND on Arduino
Step 2: Upload Code to the Arduino
All code for this instructable can also be found here on GitHub.
First off, you have to have the Arduino programming environment installed.
Next, you must select a version of the code for the Arduino. Both work, so it really does not matter which one you choose:
- SimpleButtonExample.ino require PLabBT library installed (can be found here on GitHub).
- SimpleButtonExampleSoftwareSerial.ino require no additional libraries.
When you have selected a version of the code.
- Connect the Arduino to your computer.
- Open the source file.
- Press upload.

Step 3: Download the PLab App


Download the PLab app for Android from Play Store.
This app will allow you to create Processing sketches and run them on your phone from the Internet. Processing is a programming language that make it easy to create graphical applications very fast.
The app is open source, and has its own Wiki which explains some of it basic functionality.
Step 4: Running the Sketch


First off, the sketch must be a place where the app can find it. This means it must be uploaded to the Internet.
The app has InterfacesInc.pde included internally, so ONLY SimpleButtonExample.pde needs to be uploaded.
To run the sketch, first connect to your Bluetooth or Bluetooth LE device:
- Select wheter you want to connect to a Bluetooth or a Bluetooth LE device. To connect to a Bluetooth unit, this unit has to be paired with your phone. This is not neccessary when working with Bluetooth LE.
- Select the device from the list.
Then tell the app where it can find the sketch.
Since it is already uploaded here, it should be possible to use this upload directly. Get the address, and feed it into the app. This can be done by:
- Go to settings and delete "URL address base" and "URL address end".
- Leave settings and painstakingly write the entire address into the "Sketch ID" field.
If you have access to a web area, it would be much easier to use this to store your sketches.
For more information about the app: See the apps own wiki.
After the sketch is successfully loaded, a white button on grey background should be visible. Pressing and holding this button down should make the button go black and make the LED on the Arduino shine its light!


