

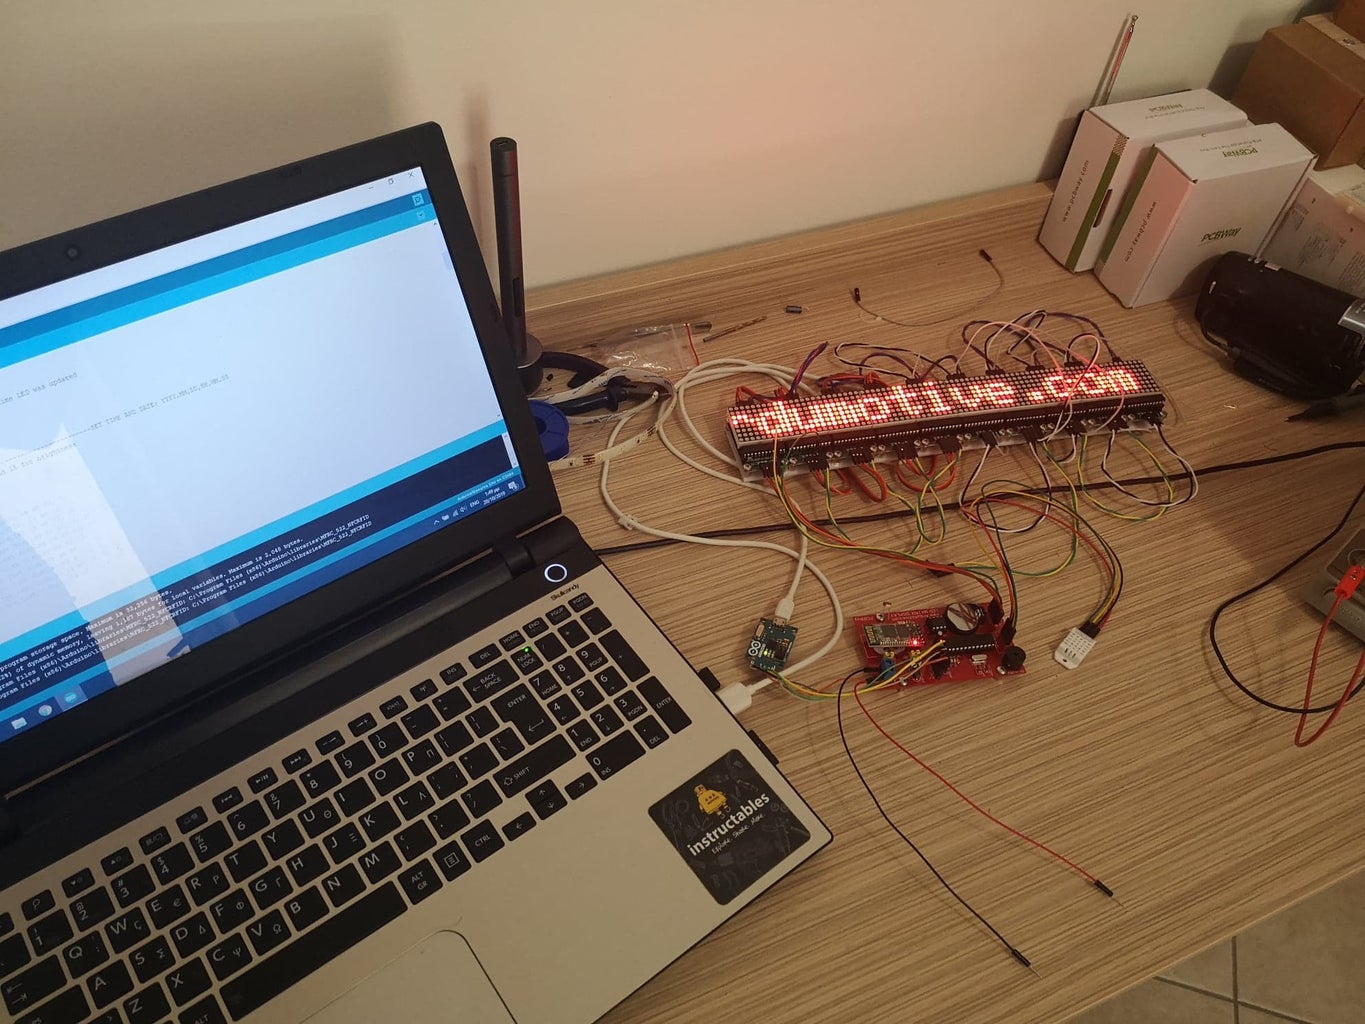
Introduction: BT LED Matrix Display - 80x8 Px Arduino Based


In this guide I will show you how to make your own Arduino LED Matrix display! In this project I decided to make my own PCB that is based on Arduino UNO microcontroller - Atmega328p. Bellow you will find the electronic schematic with PCB layout so you can easily produce it.
Display Features:
- Time
- Day of the week
- Date
- Temperature and Humidity
- Ticker (scrolling) Text
- Adjustable brightness level
- Bluetooth communication
- Memory saving
The board is specially design for up to 10 led matrix displays with MAX7219 IC. You can display the time and date (DS1307 RTC IC), temperature and humidity (DHT-22), change the brightness (15 levels or auto via photocell) and scroll a text message. We have developed an android and windows application to update time/date, brightness and text message via Bluetooth connectivity. The text and brightness value are stored in EEPROM memory, that means that every time that you will turn off/on the unit, these variables will be loaded from memory.
Assembly Video:
We are supporting the open hardware - software community so this project will be marked as an open-source. Before share/copy/change anything of below guide, make sure to read and agree with the CC BY-NC-SA licence agreement! Many thanks to the developers of all Arduino Libraries!
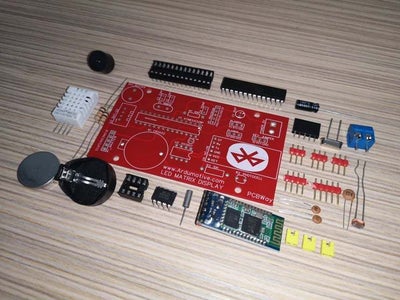
Step 1: What You Will Need - Hardware

For this project you will need:
- 1x Atmega328 (with Arduino UNO bootloader)
- 1x 28 DIP socket
- 1x 16 MHz Crystal Oscillator
- 1x 10 uF capacitor
- 2x 22 pF capacitors
- 2x 10 kOhm resistor
- 1x 100nF capacitor
- 1x Photo-resistor
- 1x Buzzer
- 10x LED Matrix 8x8 MAX7219 modules
- 1x DHT-22 Temp/Hum Sensor
- 1x HC-06 or HC-05 Bluetooth module
- 1x DS1307 IC
- 1x 32.768 kHz Crystal Oscillator
- 1x 8 DIP socket
- 3x jumper10x male pin header
- 1x 5pin female header
- 1x Battery holder CR2032
- 1x Coin battery CR20321x Power supply 5v 3A
- 1x 2pin screw terminal (p5)
Step 2: Circuit Schematic - PCB


Order it from pcbway.com and get 10pcs PCB for free! (only for new members). Instructions on how to order it can be found in the video.
Tip: You can also make your changes to the circuit - online - here.
Step 3: The Code
Tip: Use a usb to ttl module to program your pcb (or the Arduino uno board)
Attachments

Step 4: Assembly and Box
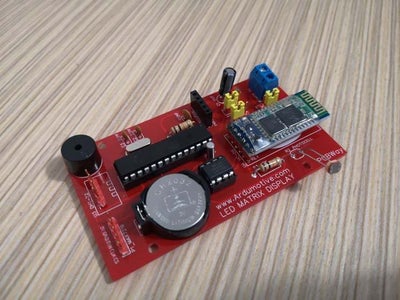

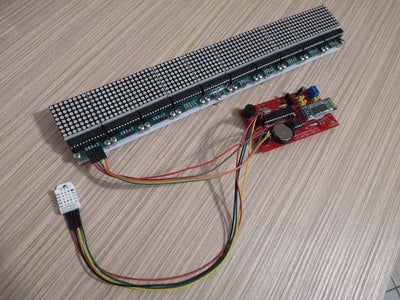


Assembly the pcb, you will need a soldering iron, it will take some time...
For box use black - transparent plexiglass, 3mm thickness:
- 2pcs 33x4 cm
- 2pcs 33x6 cm
- 2pcs 6.6x4.6 cm (left and right)
Optional, if you have a 3d printer you can print the left and right side.


Step 5: Software and Configuration Protocol


From here you can download the software for windows os.
https://www.ardumotive.com/uploads/1/2/7/2/1272651...
For Android app, download it from Android PlayStore
-Update time and date with your device clock
-Update brightness level
-16 available levels (set to 0 for automatic adjustment)
-Change the ticker (scrolling) text (set to blank to deactivate it)
How to use it:
Turn on Bluetooth and pair your display. The default name of the Bluetooth module is "HC-06" or "HC-05" and usually the password is "1234".
Now open the application, press the "Load Paired Devices" button and select your BT module.
Note: If you can't establish a connection with your LED Matrix Display, just restart it.
If you have any problem with this application just send me an email.

Participated in the
Make it Glow Contest


