

Introduction: Build a Bamboo Longboard


We recently brought in a shipment of 1/16" solid Bamboo veneer. Unlike many readily available Bamboo products, this is a veneer product as opposed to a plywood- which is harder to make skateboards with. After making and testing a few decks in the Thin Air Press vacuum bag, we are excited to experiment with the full range of properties that this new building material gives us.
Bamboo = Flex... and not just flex, but a crazy amount of 'springback' which gives it a unique feel while riding. The ability to mix and match Maple, Bamboo and even Birch (the lightest of the three) veneer in a deck's construction is going to open up the possibilities for our building community.
That being said, it should definitely by viewed as a more advanced building material. It is not as forgiving or strong as Maple before it is laminated and must be handled with care. Hopefully this tutorial gives you a good idea of some basic handling instructions, and the possibilities this new material presents.
Tools & Materials Needed:
(4) 1/16" Maple Veneers
(3) 1/16" Bamboo Veneers
(1) Shaped Foam Mold
(1) 20"x70" TAP Kit
Titebond III Glue
Glue Roller
Utility Knife
Masking Tape
Jigsaw
Sanding Tools
Outdoor Protective Coating
Step 1: Preparing Veneer


For this particular board, we wanted to play around with a custom combination of 1/16" Maple and 1/16" Bamboo veneers. The hope is that it will create a unique feel that is not too flexible, but still has some give that would be fun for riding. Typically, a solid Maple board will be very stiff. By replacing layers of Maple with Bamboo in the construction, it will give it a bit more flex.
So once you have decided how many layers of veneer to work with, you may need to cut your veneer to size before pressing. On this board, we went with 7 layers total - the two outside layers (top and bottom) and the middle layer are Bamboo, while the two Core and two Cross grain sheets are Maple.
Cutting your veneers can be done with a sharp utility knife. With a few deep scores, the Bamboo material will bend and break in a straight line relatively easily.
Once your veneers are cut, lay them out in your desired order.
For this deck we are laying them out:
Bamboo
Maple
Maple Cross
Bamboo
Maple Cross
Maple
Bamboo
Step 2: Pressing the Veneers


TIP: You will notice that there are lines of green masking tape running along the width of the top sheet of Bamboo. This is done as an extra measure to help prevent the Bamboo from splitting along one of its many seams. Bamboo is made from many strips of material butted up to each other, and because the material is so thin, it has a tendency to be fragile along these lengthwise seams. While the veneer won't necessarily break without this taped reinforcement, we have had success with it so far and will continue to take this extra step on our boards.
Step 3: Cutting and Sanding


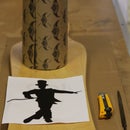
After laying out the centerline, truck hole placement and our paper template for the outline shape, we started cutting out the final shape with a jigsaw. We were concerned about the Bamboo material being difficult to cut, but were pleasantly surprised with the results!
Not only does the Bamboo cut easily with a handheld jigsaw, but it is also very easy to sand and get a nice smooth finish. In no time (about 20 minutes) we had a cut and sanded board ready for a protective coating and any artwork that may be applied.
Step 4: Finished Deck


The combination of Bamboo and Maple veneers gave this board a very unique stiff, but springy feel. It would not flex down very much while simply standing on it, but with a little weight shift or jump it bent nicely under our weight and sprung back into position easily.
You can see from some of the photos how the material bent into a nice mellow concave, with kicks on either side. On the second board we built with the Bamboo material, we were able to get some pretty extreme bends on a 1" drop deck. This was a 9 layer board that we glued up all in one pressing to test the limits of the Bamboo. It came out great!


