

Introduction: CNC Machining: Run Setup 1


Your stock is in place, your files are loaded, the CNC is warmed up--it's almost time to start cutting.
Before you start, take one more look at your simulation.


In particular, look at where the tool enters the material in the first toolpath. In your first toolpath, the tool descends above the back left corner, and then sweeps to the right. When you begin machining, the DMS will select T1 from the magazine, start the spindle near Machine Home, jog to the X-Y location above that back left corner of your stock, and then descend. If it doesn't descend in that location, you know your WCS has not been set properly. Knowing what your tool should do is the best way to spot errors before they happen.
Step 1: Adaptive and 2D Pocket
1) Execute Program 100001 from Setup 1 (p. 14) and run the Adaptive and 2D Pocket toolpaths.
Switch the key to Run Mode.
Ensure that the Feed Rate Override switch is set to zero before you hit cycle start, and then slowly increase the Feed Rate to 100%. The correct stance while machining on the DMS is to have a hand on the Feed Rate Override Switch or on the E-stop, while looking through the window on the door. If anything goes wrong, you can also press the red Feed Hold button and then the gray Reset button (see p. 14).
As the tool descends, pay particular attention to the Z value of the Distance To Go section on the controller.
The Adaptive toolpath should take about twenty minutes to run, and the next 2D Pocket toolpath should take less than a minute. During the Adaptive roughing, watch for vibrations and listen for chatter as its machining. If you see the part shift or vibrate excessively, your workholding is not sufficient. Stop the machine and resolve the issue.
Step 2: Parallel, Contour, and Drilling Toolpaths
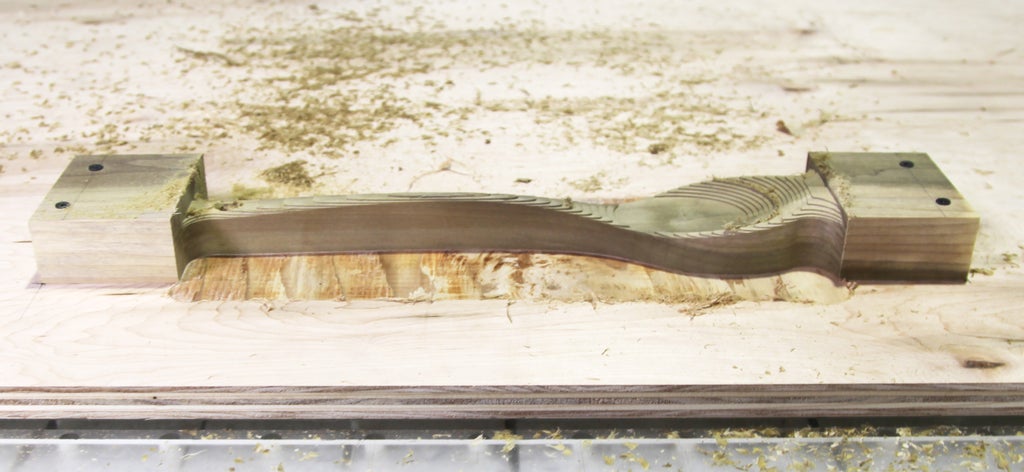
1) Run the Parallel Toolpath.
Tool 3 (1/2" Ball EM Long), will descend in the front right corner of the part--in the front of the scoop of the spoon. This operation will take about ten minutes to run.
At the end of this operation, look at the side of the spoon. Notice that it has marks from this toolpath that match the ones in the simulation. This is testimony to how accurate simulation is.

2) Run the Contour toolpath.
This will clean up the edges and take about eight minutes to run.
3) Run the Drilling toolpath.
Carefully watch your stock and spoiler board and make sure that the force of drilling isn't pulling the spoiler board up, off of the machine table. If it is, hit Feed Hold and Reset to stop your program and spindle. Turn the key to Setup Mode, pull the E-stop, and place a toe clamp close to the front center edge of your spoiler board. Then, post process just the Drill1 toolpath--Deep Drilling.
Don't ever be afraid to stop the machine and make changes inside the machine, or edit the toolpath parameters. It's easy to post process a toolpath again by selecting just that toolpath or a group of toolpaths, and then loading the new program. In other words, you don't have to post process an entire Setup at a time. Because you haven't moved the part, you can just go ahead and run the new program without worrying about setting a new WCS. This is also a reason to get in the habit of measuring and inspecting a machined part BEFORE you move it.


