

Introduction: Cleaning and Restoring Your N64

Hello there! Welcome to my first instructable! Do you have and old N64 that doesn't work or is super dirty? Then this instructable is for you! In this in instructable i will show you how to clean your N64, N64 Cartridges and N64 Controllers. I'm from the Netherlands so my English might not be great. Sorry :)
Step 1: Tools


Before you do anything,
I do not take any responsibility for any damage done to the N64.
Ok, with that out of the way, lets begin! Now, the N64 is so simply build that it only needs a couple of tools.
- A Game-bit of Game-bit-screwdriver
- A Phillips head and flathead screwdriver
- Cotton swabs
- Paper towels
- Nail polish remover (without acetone)
- Soap and water
- Compressor or compressed air in a can (Optional)
- WD40 (Optional)
The game bit is only available on-line for about 5 bucks. Now that we got the tools, let's get started!
Step 2: Taking Appart the N64


In my case the N64 did light up, but i wasn't getting a image. After cleaning it worked again! That shows how simple and easy it is to fix an N64. Ok, lets begin. Before undoing any screws we need to get the extra memory out (if you don't have it you can skip a step). Take the clip off and carefully remove the sticker with a flathead screwdriver. Then try to get the memory out by pushing the memory towards you and up. There are special tools for this, but i don't own it. With the memory out, lets take the rest of the N64 apart!
Step 3: Taking Appart the N64

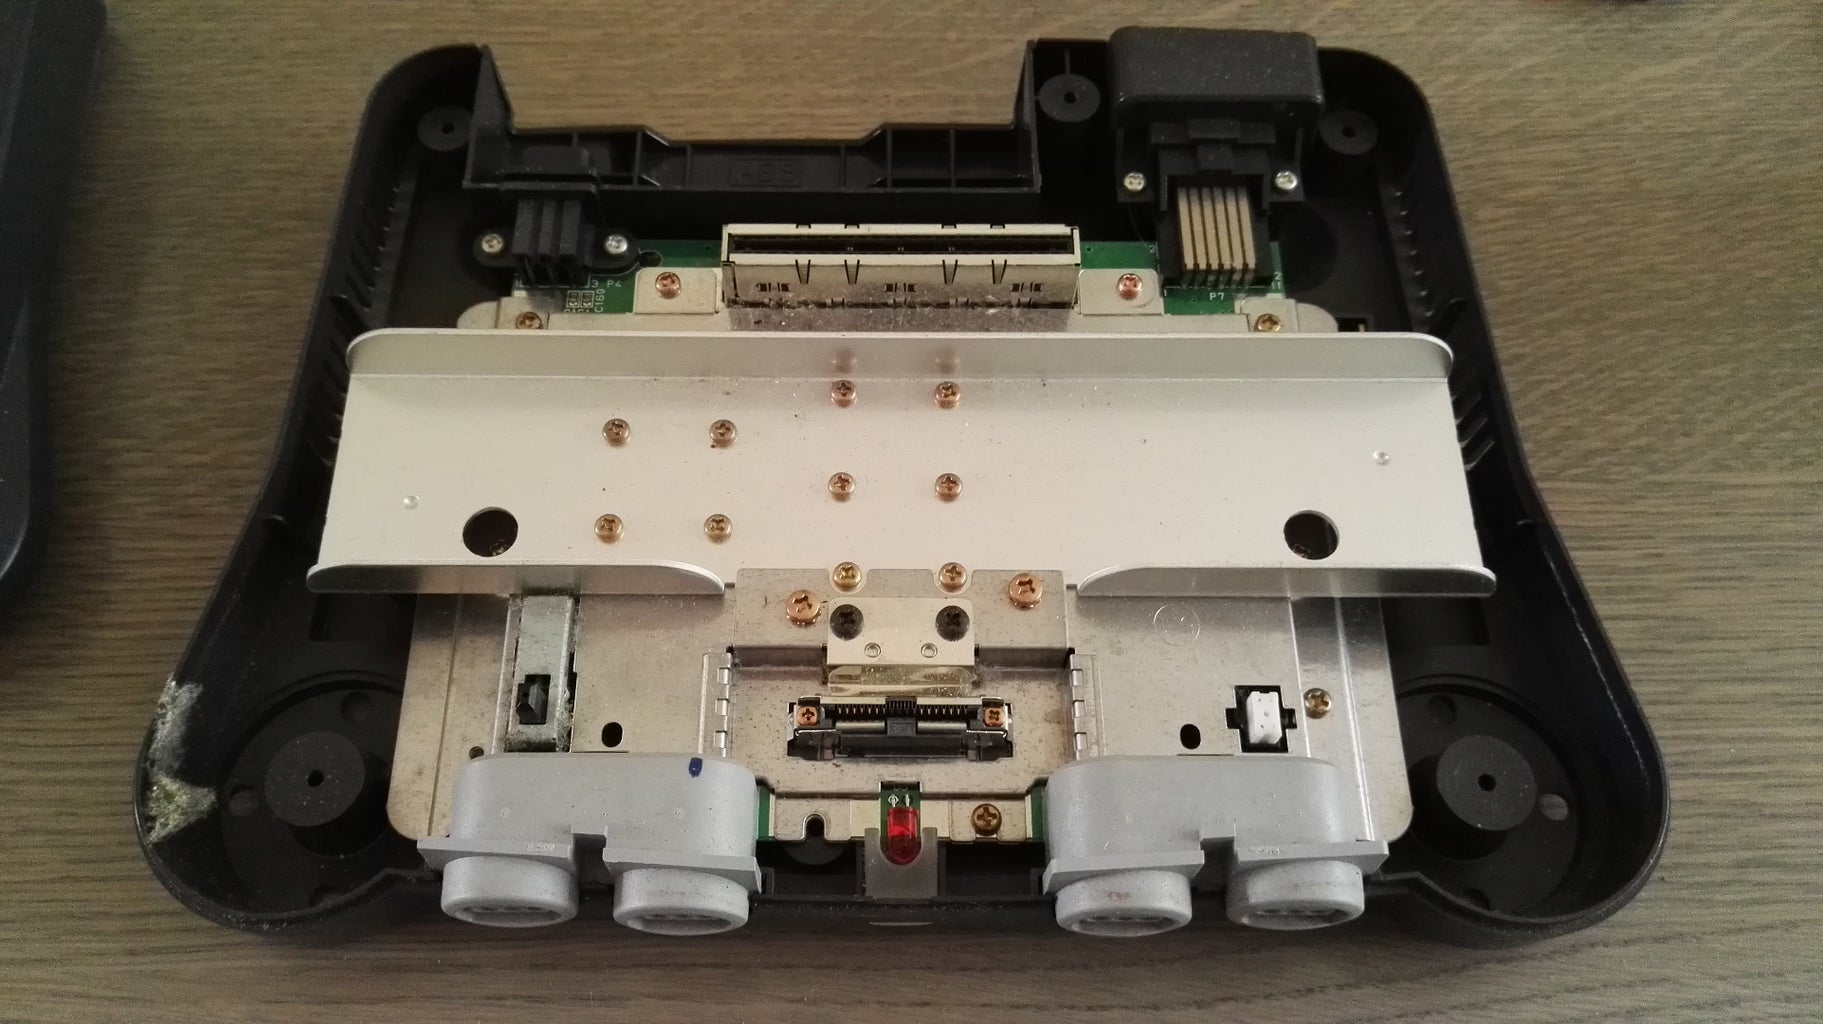

Flip the N64 and there are 6 weird Nintendo screws holding the top part of the N64 to the bottom part. This is the part where you really need a game-bit. Take the screws out and start organizing your screws, you will see in a minute why. Flip the N64 again and now take the top part off. You will (probably) see allot of gross dust and other crap. But you will also find a bunch of screws.
Step 4: Taking Appart the N64


Take all the screws out... all millions of them. just kidding, sort of.. but do take out every screw. Organize all of them and take the metal heat sinks and shielding off until you're left with just the board. Start up your compressor and blow the board clean. The cartridge contact can be cleaned with a special cleaning kit or just a paper towel with some nail polish remover.
Step 5: Cleaning


All the plastic covers can be simply stuffed in the sink and cleaned by some soap and water. Take the light lens thing out and the metal pieces before cleaning the bottom part so that you don't lose them. For the top part you will need to take the cartridge spring out for the best cleaning. Tip: dry the plastic parts with compressed air, it will get it dry fast!
Step 6: Assembly


Now that everything is clean, you can start putting the N64 back together. Put the metal shield back on the board and place the the board with the shield back to the bottom part. Then just put the heat sinks en metal parts back on the board. Be sure that the controller ports are clean as well before putting the top on. You can do this with a paper towel slightly moistened.
Step 7: Cleaning the Memory


Before you put the top back on, lets clean the memory. Use the smaller game-bit to open it. Then just clean the plastic and metal parts with water and soap, and it might not be super dirty, but its a good idea to clean the metal contacts as well with some cotton swabs and nail polish remover since we have it disassembled anyways.
Step 8: Assembly


Now put the top part on and screw it in place with the 6 screws. Next put the extra memory in an seal it up with the sticker like nothing happened.
Step 9: Polish (optional)


You can give the N64 a nice shine with just some WD40. Take a paper towel and some WD40 and cover the N64. let is sit for a couple of hours and let the WD40 be sucked in the plastic. After a while take a clean towel and take the left over WD40 off and you got a nice fresh N64!
Step 10: Cleaning Cartridge


A clean console needs some clean cartridges. The cartridges are held together with just 2 Nintendo screws. use your game-bit to take it apart. Inside you will see 2 Phillips screws holding the metal shielding together. Take the cartridge apart and clean the metal en plastic bits with water and soap. Clean the board with some cotton swabs and nail polish remover. Note that there are some cartridges with a battery in them. Now is the time to replace it!
Step 11: Testing

Before you test your N64, Be sure it is completely dry or else you can short out your N64 and who knows what will happen, anyways. After cleaning, test if your console to see if it works. If it doesn't work now, you might have broke something or it is still broken. In that case you need to go deeper in the electronics in order to fix it. If it does work, Congratulations, you got a working N64! You can take it one step further by cleaning your controller.
Step 12: Cleaning the Controller


Flip the controller over and remove the 7 screws located at the back. Next there are 2 screws hidden in the expansion port. Now that its open, take the 3 screws out that hold the joystick in place and now the electronic bits will pop out. Set the rubbers aside and clean the outer casing and buttons with water and soap.
Step 13: Cleaning the Controller


With the cotton swabs and nail polish remover you can clean the rubber contacts. There are 3 sort of hidden rubber pads in the board. You can easily pop them out and clean the rubber bits. Just like the cartridge slot, you can clean this expansion slot with some paper towels and nail polish remover.
Step 14:


Now its all clean, you can put it back together. Start by putting the buttons back with the rubbers. Then put the board on and try to put the left and right trigger on there as well. Then be sure the cable isn't stuck on a screw port. Then simply screw it all together and your done! For some extra cleaning/lubricating use some WD40 on the joystick. If it is messed up anyways you might want to replace the joystick.
Step 15: Enjoy!

Enjoy your fresh N64, ready for hours and hours of playing time!
If you have any further questions or just want to leave a comment, JUST DO IT!


