

Introduction: Collaborating With Bees: Honey Comb Light Boxes


Materials List
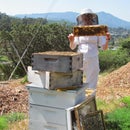
Beehive
Bees
Natural comb
3/4 inch rough milled wood, cherry in this case
Scrap wood, plywood
1/8 aluminum plate
Boos block oil
Threaded screw inserts
Screws
LED strips, warm white 600
LED connectors
Wall power
Endlighten Acrylic .157 inch thick
Cork weatherstripping
Biscuits, #FF
Steel wool, sandpaper
Dust mask, eye protection, latex gloves
Tools and Machinery Used:
Omax water jet cutter
Epilog 120 watt laser cutter
Metabeam laser cutter
Joiner Planer
Saw stop table saw
Miter saw
Drill press
Pneumatic grinder
Biscuit router
Caliper
Rotary power sander
Sand blocks
Face shield
All CAD work done on Autodesk Fusion 360- a free program for Makers like me
Step 1: How to Collaborate With Bees


It's not easy to create a collaborative sculpture with bees. They don't always want to cooperate. You have to know the parameters within which they will build comb, such as bee space, the location within the hive, and the season. Then you have to figure out how to get the bees to build on your sculpture rather than seeing it as an obstacle, building with instead of building around it or trying to remove it completely.
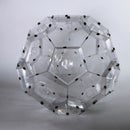
I wanted to create art that compels, and I knew that it must be beautiful regardless of how the bees engaged the piece. I've included images of art that inspire me, and theses were the basic of my designs for this series.
Beeswax, when in the hive, is a remarkable material. It is lightweight, translucent, durable, strong, and completely perfect for the temperature and humidity in the hive. Comb in a hive can support about five pounds of honey per square foot when a colony is healthy. Outside of the hive, comb is ephemeral, becoming dark, dusty, and very fragile over time. I wanted to create a structure that could accommodate the weight of the comb, give it support, and could make some use of it, highlight its beauty and give it a platform to rest. I worked for several months to develop just such a structure before I landed on the light boxes I have shown in the following pages, and the ring idea is what lead me directly to the idea of a light box.
Step 2: Design Your Model


For this project I used Fusion 360 to model my design.*
I first modeled Langstroth hive boxes using dimensions I found on the innerwebs. The I used those dimensions to model my light box.
This lightbox is a little different than most in that I've used a special acrylic called Endlighten, which diffuses the light from LEDs placed directly against the edge of the panel. It's a nifty invention, allowing people to use clear acrylic as a light panel, so when the lights are off you can see through it, but when powered the panel becomes opaque and glows from the inside out.
Using the Endlighten acrylic allowed me to design my lightbox very thin, like a picture frame. I set the dimensions and used one box to cut from the other to open the center and crate the ledge for the Endlighten panel. Then I cut at the corners to make the part for the wood frame, which I used four times for each lightbox frame. This single panel I sent it a print file and took with me to the shop when I made my cuts for the frames.
Then I built the Endlighten panel in Fusion and saved the cut file as a PDF for illustrator.
Next I modeled a diffuser to dissipate the heat for the LED's, which I made from aluminum. I imported CAD files from McMaster Carr for the fasteners, which I then used to cut pilot holes in my 1/8 in aluminum sheet.
The final pieces will be hung on a ferrous wall, so I used magnets to mount them. The magnets are also 1/8 in thick, and I modeled them and cut them from my aluminum. This part I then saved as a PDF to cut on the Waterjet cutter.
*Fusion 360 is a great hybrid solid and surface modeler that plugs directly into tool paths and a PDF generator, so it's easy to develop and make parts and projects all from within the program. Plus, it's easy to use and has my favorite feature- a history tab, so you can go back into your model and make adjustments that adjust all the other parameters in the model. I once used Sketchup but found it difficult even after more than a decade, and Fusion is such a great replacement.
Step 3: Select Your Wood and Plane It


I selected cherry for this project, since it is a tree that is pollinated by honey bees and has a pleasant color and grain structure for my needs. I started with wood that was a little under an inch thick.
I used a joiner and planer to get make it smooth and square before cutting the frame pieces. When finished the thickness of the cherry was 3/4 inches.
Step 4: Cut and Route the Frame Edges


Next I cut the cherry into strips to my frames using a table saw.
I wanted the boxes to be substantial, so I made the frames 1 1/2 inches wide. Plus, I loved the grain and color and wanted to highlight it and not have it lost by the rest of the materials.
Then I routed the cherry to make the ledge to house the acrylic. For this I used a rabbit router bit that was wide enough to remove 1/2 inch of material. Start out cutting in smaller sections if the wood is prone to tear outs the way the cherry was prone to do. I routed all the frame pieces together and then increased the depth, routing again and repeating these steps until my self was dee enough to match my drawings.
Step 5: Miter the Frame Pieces


Next I mitered the frame corners. I used a chop saw with miter capabilities, but there are many ways I could have done this, and some are more precise and give better results.
I saved all the scraps for testing and practice for the next step.
Step 6: Biscuit Joiner and Gue


I used a biscuit joiner to make the corners of my frames. I mounted the joiner to a jig that helped me position the pieces for a better cut, then clamped the jig in a table vice to keep it from jumping around. It's a powerful little tool, and I recommend secreting it rather than holding it by hand as some recommend.
I used corner clamps to join my corners while gluing, though I could have used a number of other types of clamps for this. I used elders wood glue and small biscuits for this set, then let it sit over night to harden.
Step 7: Cut the Aluminum Heat Sink Plate


Next I cut the aluminum heat plate from files I imported into the Waterjet cutter software. We at the shop call this machine Liz Taylor because it is difficult and temperamental, but like her acting, this machine performed perfectly for me without having any troubles at all.
My tolerances for the magnets were off my less than 2 tents of a millimeter, but it was enough to make it necessary to get out the pneumatic tools and fix them.
Then I drilled my pilot holes for the screws to fit, using a drill press, clamps and a spoil board behind the aluminum.
Step 8: Use the Aluminum to Pilot Your Holes in the Frame


I clamped the aluminum to the wooden frame and drilled the pilot holes for the threads using a drilllpress. Then removed the aluminum and drilled larger enough holes to hold the metal treads which I then pounded into my frame. The threads will allow me to screw and unscrew the assembly without ruining the wood.
The threads I pounded lightly with a wooden mallet, minimizing damage to the frame should I miss and hit the wood.
Once reassembled, I used the aluminum to guide my holes for the magnets, which I screwed directly into the wood.
Step 9: Sand and Treat the Wood


I took my time and enjoyed the view while I sanded on a new downdraft table made by shop manager Josh Meyers. I started at a rough grit of 80 and worked my way up to 1200 grit so the wood is smooth as skin. Then I used an edible treatment to seal the wood, Boos block oil. It's made of mineral oil and beeswax and is safe for the bees. It gave a great finish to the wood and brought out its rich color and luster.
Step 10: Cut the Acrylic


I made the mistake of ordering a full sheet of Endlighten, and then needed Mei Shipek and Josh to help me, as pictured above. I cut the acrylic into 48"x48" sheets for the metabeam laser cutter.
Step 11: Building the Light Boxes


This was a bit of a pain for several reasons. It rained every day the week I finished this project, and so I had to build in some extra engineering so that the LEDs would be pressed directly against the acrylic even when the wood contracted from a dryer atmosphere. For this I used a foam tape gasket and lined the back of the LED strip with it, pressing it tight as I wedged the acrylic info the space. I cracked many LEDs this way, and some companies have much better quality than others, which I learned the hard way.
There are a few other cork gasket pieces I used to try and eliminate and light from washing over the surface of the acrylic and ruining the glow effect.
Here is an image of the first light box hanging on the ferrous wall after assembly.
Step 12: Procure Comb to Make the Collaboration Happen!


If you've seen my other Instructables then you'll no doubt have seen how I used a bee vacuum to suck hives out of walls and place them in a proper hive box. After the relocation has been successful, I have a lot of comb left over. I used this comb to entice the bees into collaborating with me on the last step of this project.
Step 13: Getting Messy


This is the best part. I covered the surface of my worktable and had lots of clean water and rags nearby. My inspiration for this series was two of my favorite artists, Carl Andre and Josef Albers.
Step 14: Install in Hive

Now is where the magic happens. The bees will take this and the framework I have created and make a sculpture of their own, 3D printing with wax. Insert entire light box into hive, and come back in a few weeks to see what they've created.
Step 15: Update #1, Progress and Stalls


First peek after setting up the sculptures in the hives, and I'm seeing me see results. The homage to Josef Albers looks great, will come cleaned and attached and beginning to look all fixed up.
The second sculpture isn't faring as well. The bees have seemed to ignore the coyote brush honey, perhaps because its crystallized. I decided to scrap the crystallized comb and go for some fresh nectar just collected from the eucalyptus trees on the hill.


