

Introduction: Compact Macintosh Audio Visualizer


WARNING!
crt monitors contain VERY HIGH voltage
PLEASE READ THIS
https://68kmla.org/forums/index.php?/topic/17033-h...
Hello
I have made a Macintosh SE audio visualizer. It is non destructive(the building process at least) and it looks awesome I originally did it my Macintosh Classic ii, but the screen started to fade in and out and make clicking sounds. So i did it again with my Macintosh SE
for those of you wondering what an audio visualizer is, it visual representation of music. It can be little bars that move up and down to a line that shows certain patterns. read more herehttp://en.wikipedia.org/wiki/Music_visualization
(i also wrote this over on a forum. here is the link https://68kmla.org/forums/index.php?/topic/23109-...)
I KNOW THIS CAN BE DONE with Macintosh se and classic ii(i did it to both)
it will probably work with an se/30 a classic and maybe a plus and 512/128k
Step 1: Materials

You will need
>18 gauge STRANDED wire
>some way to strip wire
>a female composite plug
>solder iron and solder
>torx size 15 long screw driver(get them online or at hardware store, needs to reach inner screws of the mac handle)
>the screw driver needs to be 6 inches long or longer!
Step 2: Find a Candidate

A NOTE
PLEASE try to fix your old mac before you do this! This method is non destructive, but your mac is worth more working then as a visualizer!
here is a great forum that can help you fix your mac!
What the Macintosh needs to have
>needs to have a working screen/analog board
>needs motherboard that can output signal. it doesnt matter if it is glitchy or garbled
>needs good psu(powers on)
Step 3: The Build


>unplug the computer
>unscrew case the case with a torx size 15 screwdriver and take off the back
>the back slides away from the front. the front top can be stubborn, dont use a screw driver to split it, it will dent the plastic, slowly work the system apart.
>first DISCHARGE THE CRT. READ THIS https://68kmla.org/forums/index.php?/topic/17033-h... .the voltage in the parts could injure you!
>find the combo of yellow,green,red,blue wires and follow it to the analog board
>This combo starts in near the middle of the crt, on the side closet to the analog board(power area)
>this combo of wires is what controls horizontal and vertical movement of the crt picture
>unplug the the combo of yellow,green,red,blue wires from the analog board and reroute it under the crt
>cut four pieces of stranded wire. they should be about a foot and half long(or about 45 centimeters)
>solder 1 wire to the ground and 1 wire to the signal of the composite plug
>straighten done end of all the wires and plug them into the plug you re routed under crt(positive and negative dont matter, i could have use all red wires if i had felt like it!)
>you need the composite cable going to the yellow and the green wires! this will create the correct line that you want.
>then, the wires coming from the blue and red, make a loop at the end not plugged in
>put the loop over the the bottom two pins on the analog board that had the bundle of wires connector
Step 4: TESTING THE SYSTEM


>plug the anode cap back in and be sure the motherboard is plugged in too. I would remove hard drive and floppy drive(or unplug them from power
>Unplugging power from the floppy requires you to disconnect it from the motherboard
>Unplugging power from the hard drive requires you to unplug the molex connector from the hard drive(its the yellow, black and red wired block)
>plug sound source through the composite jack on the mac(so a red/white sound connector)
>plug the system in
>DO NOT TOUCH ANYTHING IN THE COMPUTER FROM NOW UNTIL I SAY YOU CAN!!!!
>if you get a vertical line going all the way up and down the screen you did it right
>if you get a dot in the center of the screen, you have a loose connection
>start at low volume and increase
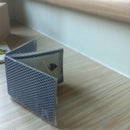
>get something the picture(this was at low volume)
>turn down volume and unplug the machine
>discharge the machine again
>if you remove the anode cap while discharging, put it back on
NOW IT SAFE TO TOUCH THE MACINTOSH
Step 5: Finishing Up


>reassemble the macintosh
>Reroute the wires through the case(this is why long wires are important)
>i stuck the composite cable out of the lock slot on the back. i ducktaped the inside wire so it didn't pull through
Step 6: How to Put Audio Into It
there are a few ways to put audio into this,
the first is to get a headphone jack to composite cable. then plug the head phone jack into a mp3 player and one of the into the mac.
a second option is to hook it up to an amplifier. i cant give specifics on this though because that is not how i did it.
a third option(the one i did) i get a speaker that has a removable right or left speaker output, and plug the headphone jack to composite in through that. Try both composites because the music will only play from one!

Participated in the
Vintage Contest

Participated in the
Epilog Challenge VI


