

Introduction: Convert a Teddy Bear Into a Hidden Bluetooth Speaker


Teddy Bear and Bluetooth Speaker, both are awesome and it is super awesome when both are together. Just think, how funny it will be if your Teddy Bear can play musing! Your child will be super excited. I am also very much excited converting my Teddy Bear into a nice and invisible Bluetooth speaker. I am going to share it with you. So, just keep reading.
Step 1: Bill of Materials


1. Bluetooth Audio Receiver Module with Built-in 3W + 3W Audio Amplifier ( ebay.com)
2. 2, 3W-4ohm, 45mm Speaker ( ebay.com)
3. 5V Boost Converter Module ( ebay.com)
4. Li-ion Battery Charger Module ( ebay.com)
5. 1000mAh Li-ion Battery ( ebay.com)
6. Some wire & of course a Teddy Bear
Tools required
1. Soldering Iron with solder ( gearbest.com)
2. Hobby Knife ( gearbest.com)
3. 3D Printer (gearbest.com): You can buy this Anet A8 excellent 3D Printer Kit only at $149. All printed parts used in this project is made by this printer and quality is very good.
4. Niddle and Sewing Thread
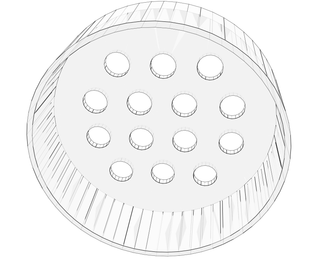
Step 2: Making a Case for the Speakers


I am going to place the speakers inside the lags of the teddy bear. A protective case for the speakers is required otherwise the diaphragm of the speaker may be damaged as the teddy bear is a soft thing and kids like to play with it. So, I designed a case for the speakers using Thinkercad. The design file is included. The outer radius of the speakers is 45mm, so the inner radius of the case should be 45mm to set it perfectly with the speaker. I used very low price Anet A8 printer to print the cases and the print quality of the printer is very good.
Attachments
Step 3: Soldering and Putting the Speaker in the Case


After printing the case you have to put the speakers in the case but before doing this you must solder some wire to the speaker. I soldered a 1-foot long doubled jumper wire to each of the speakers. Then I placed each of the speakers in the case. Both of them are now safe from the kids.
Step 4: Connecting All the Modules


First, connect two speakers to the Bluetooth audio module. R+, R-, L+, L- pads are clearly marked in the module. These are the audio amplifier output for right and left speakers.
After connecting the speakers connect the output of the boost converter to the input of the Bluetooth audio module. Connections are very simple. Out+ of the boost converter should be connected to 5V in of the audio module. Out- of the boost converter should connect to the GND of the Bluetooth audio module.
Then, connect the battery to the input of the boost converter. Positive pin of the battery should be connected to the IN+ of the boost converter through an SPDT switch. The ground terminal of the battery should be directly connected to the IN- pin of the boost converter.
Finally, connect the charger module to the battery according to the polarity.
Step 5: Dissecting the Teddy Bear!


It is the funniest step. Cut the bottom sewing with a hobby knife. Then, bring out the felt from two legs of the teddy bear because we will place the speakers inside the legs.
Step 6: Placing the Speakers Inside the Teddy Bear


After bringing out the felt from the legs place two speakers in two separate legs. After placing the speakers put the felt again inside each leg. Then place all other modules in any convenient location. Try to keep isolated all of the modules from one another to avoid short circuit. Keep the switch and the charging port of the battery charger module out.
Step 7: Sewing


It is the last stage of our project. I hope you placed all the necessary modules and speakers at appropriate place. So, you have one thing left to do. Yes, you are right. You have to re-sew the part you cut to put the circuits. So, take a niddle a complete the job.
Just done it? Congratulation!!
Enjoy your speaker.

Participated in the
Hiding Places Contest 2017

Participated in the
Audio Contest 2017


