

Introduction: Create OpenCV Image Classifiers Using Python


Haar classifiers in python and opencv is rather tricky but easy task.
We often face the problems in image detection and classification. the best solutio is to create your own classifier. Here we learn to make our own image classifiers with a few commands and long yet simple python programs
The classification requires a large number of negative and positive images negatives do not contain the required object whereas the positives are the one that contain the object to be detected.
About 2000 negatives and positives are required. The python program converts the image to grayscale and a suitable size so that classifiers takes the optimum time to create.
Step 1: Softwares Required
You require the following softwares for the creation of your own classifier
1) OpenCV: the version i used is 3.4.2. the version is easily available on the internet.
2) Python: The version is used is 3.6.2. Can be downloaded from python.org
Moreover you require a webcam (of course).
Step 2: Downloading the Images
The first step is to take a clear picture of the object to be classified.
The size should not be very large as it takes larger time for the computer to process. I took 50 by 50 size.
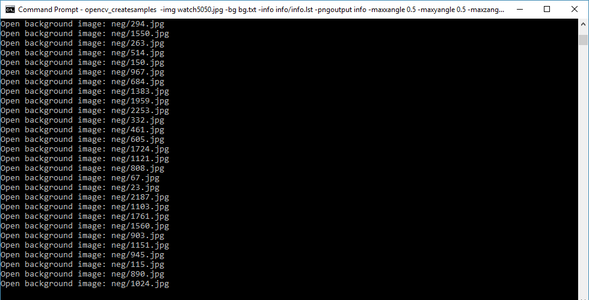
Next we download the negative and positive images. You can find them online. But we use the python code to download images from 'http://image-net.org'
Next we convert the images to greyscale and to a normal size. This is alo implemented in the code. The code also removes any faulty image
By now your directory should contain the object image e.g watch5050.jpg neg images folder bg.txt file empty data folder
If data folder is not created, do it manually
> The python code is provided in the the .py file
Attachments

Step 3: Creating Positive Samples in OpenCV
Now go to opencv_createsamples directory and add all the above mentioned content
in commad prompt go to C:\opencv342\build\x64\vc14\bin to find opencv_createsamples and opencv_traincascade apps
now execute the following commands
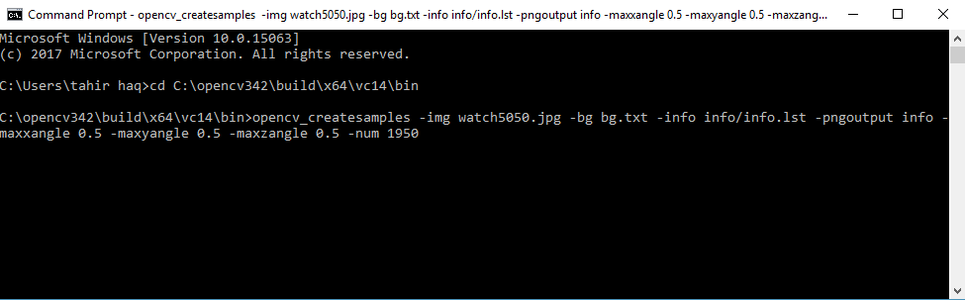
opencv_createsamples -img watch5050.jpg -bg bg.txt -info info/info.lst -pngoutput info -maxxangle 0.5 -maxyangle 0.5 -maxzangle 0.5 -num 1950
This command is for creating the positive samples of the object 1950 to be exact And the description file info.lst of the positive images the description should be like this 0001_0014_0045_0028_0028.jpg 1 14 45 28 28
Now the folder contains
>info
>neg images folder
>bg.txt file
>empty data folder
Step 4: Creating Positive Vector File

Now create the positive vector file that provides the path to the positive images the decsription file
Use the following command
opencv_createsamples -info info/info.lst -num 1950 -w 20 -h 20 -vec positives.vec
By now the contents of the directory must be the follow:
--neg
----negimages.jpg
--opencv
--info
--data
--positives.vec
--bg.txt
--watch5050.jpg(the required object image)
Step 5: Training the Classifier

Now lets train the haar cascade and create the xml file
Use the following command
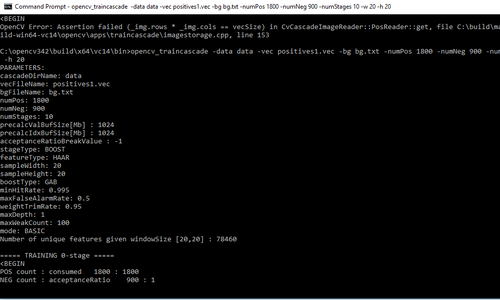
opencv_traincascade -data data -vec positives.vec -bg bg.txt -numPos 1800 -numNeg 900 -numStages 10 -w 20 -h 20
stages are 10 Increasing the stages takes more processing but the classifier is way more efficient.
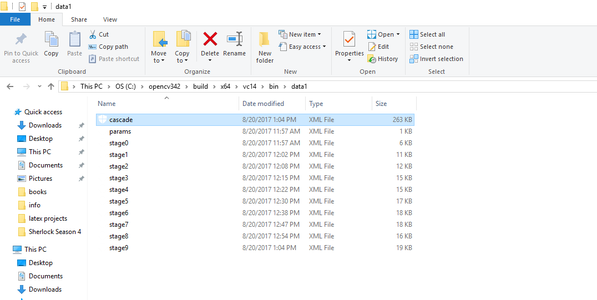
Now haarcascade is created It takes about two hours to complete Open the data folder there you will find cascade.xml This the classifier that has been created
Step 6: Testing the Classifier
The data folder contains the files as shown in the image above.
After creation of the classifier we see if the classifier is working or not by running the object_detect.py program. Dont forget to place the classifier.xml file in the python directory.
Attachments
Step 7: Special Thanks
I would like to thanks Sentdex here who is a great python programmer.
He has a youtube name with the above mentioned name and the video that helped me a lot has this link https://www.youtube.com/watch?v=jG3bu0tjFbk&t=21s
Most of the code has been copied from sentdex. Though taken a lot of help from sentdex , I faced a lot of problems still. I just wanted to share my experience.
I hope this intructable helped you!!! Stay tuned for more.
BR
Tahir Ul Haq

![Tim's Mechanical Spider Leg [LU9685-20CU]](https://content.instructables.com/FFB/5R4I/LVKZ6G6R/FFB5R4ILVKZ6G6R.png?auto=webp&crop=1.2%3A1&frame=1&width=306)


