

Introduction: Custom Scooter Lift System for Lexus NX SUV


Lisa is a disability advocate who is always on the go. She has Limb Girdle Muscular Dystrophy 2i, which causes her muscles to become weaker over time. Currently she uses a Travel Scooter to get around when she needs to go longer distances, such as across our university campus or downtown. While she is presently able to lift her scooter in and out of her car, it is steadily becoming more difficult for her to do so independently, and more often than not she will ask others in the parking lot for help.
This Instructable is for a custom-made lift system that fits into Lisa's Lexus NX SUV. It uses pulleys and a winch on a frame to lift the scooter off the ground and up to the appropriate trunk height. Then she can simply push the scooter into the trunk and be ready to go.
Supplies
3 Pulleys
1"x1"x8' Mill Finished Aluminum
1"x1"x8' Mill Finished Solid Angle Aluminum
1" outer diameter, 0.065" thick, 40" length Mill Finished Aluminum piping
1.25" outer diameter, 0.065" thick, 15" length Mill Finished Aluminum piping
1 24” x 48” x 1/8” Traction Mat
1 1/8” diameter, 6” long Galavanized Steel
1 1" Vibration-Damping Loop Clamp
1 1-1/4" Vibration-Damping Loop Clamp
Step 1: Meeting the Customer/Car Measurements

The first step in our design was meeting our customer. We meet with Lisa to watch how she maneuvers the scooter to get it in and out of her car, talked about her wants/wishes, and then measured the dimensions of her car's trunk opening.
Lisa had mentioned that with her old car she had used a Bruno lift, so we did some research on how those functioned. Since that lift does not fit in her Lexus NX SUV trunk she needed a different solution.
Step 2: Concept Generation


The team began looking at current products already out on the market to help generate some designs. The one lift design we took away from our research was a single arm lift that was bolted in the back corner of the SUV's trunk and would pivot on a swivel. This allowed us to begin trying to simplify the design to better suit her needs and drive the cost down.
To start, we thought that aluminum tubing was necessary to generate the swivel point and keep the weight down of the lift. However, we also took into consideration that aluminum is more difficult to weld than steel. To make the swivel easy for Lisa, we thought that sleeve bearings were needed to minimize the friction between parts.
Then we started looking at the frame structure of the lift. A lot of scooter lifts on the market now are bolted through the floorboard of the vehicle however, we thought it was best if we could avoid that at all cost. We decided to try and utilize the three mounting bolts in the car that connect to the frame of the vehicle to avoid modifying the car. In addition, to reduce the bending moment forces that would need to travel through those bolts an L-shape structure on the floor was designed to disperse some of the loads into the floor.
Step 3: Modeling and Analysis


We then proceeded to make a rough 3D model to get a better representation of the design and discover faulty points that we might have overlooked. This design would show us what it would look like as a prototype so we can add the pulley system as well as the battery to the final design.
Before we started building, some initial analyses were done through Inventors FEA software to make sure that the product would not fail during operation. During the analysis, 1.00 x 0.065 inch and 1.25 x 0.065 inch tubing were used based on some early napking-sketch calculations. The tubing needed to be strong enough to withstand the bending moment generated by the scooter but also small enough to keep the size down. After we assessed our 3D design, we decided that the L-shape base for the lift should be angle aluminum as angle aluminum resists bending and keeps the cost to a minimum. Rubber feet will be added as well under the angle aluminum to reduce the wear and tear on the car's floorboard.
Lisa's scooter weighs around 40 pounds, therefore, we designed the scooter lift with a safety factor of 2 to ensure that any mistakes in our calculation would not cause failure to the lift. Therefore, during the analysis, an 80-pound load was applied to the end of the tubing to provide the maximum stress and displacement the tube should never see during operation.
Step 4: Aluminum Tube Bending


To keep the design as small as possible, the lift’s arm was designed to follow the car’s contour to not waste space. We borrowed her car to go through an iterative process of bending the tube to achieve the best fit.
We utilized the hydraulic tube bender. The first bend ended up being around 36-degrees 13.5 inches from the end and the second 54-degrees 16 inches from the first bend. Excess material was left on the top end to ensure that there was enough material to pick up the scooter outside the car as well as place it in the optimal position within the vehicle.
Step 5: Fabricating Base


We started with cutting the angle aluminum, for the L-shape base, to the desired lengths that proved to be adequate for bending moments but also not be too intrusive and take up too much trunk space of the vehicle. To make these cuts we used horizontal and vertical bandsaws. One of the angle aluminum pieces needed to be cut at a 45-degree angle so the two pieces would properly mate and provide a clean joint for welding.
We then worked on the vertical aluminum tube piece that was used as structure for the smaller tube that fit inside. We first cut the tube to the proper dimension of 15 inches to provide the largest amount of structure that would not interfere with the back windshield. Again, to ensure a clean fit between the mating parts of the vertical post and the L-shape base for welding, the tube was cut at a 45-degree angle then another 45-degree 90-degrees from the first cut producing a heart shape at the bottom of the tube. This will allow for the tube to fit within the corner of the base pieces.
We finally needed to build the base bracket that would hold the winch in the correct position. First, we tried making this bracket out of 1.00 x 0.125 inch flat aluminum stock but after welding it together we decided that the structure was not strong enough to safely hold the weight of the winch. Therefore, we switched to make the bracket out of angle aluminum as well. This stiffened up the structure a lot. Two side pieces were cut at 6.5 inches and the cross member at 6 inches. The winch has mounting bolts that are 3.1 inches apart therefore we centered two holes in the cross member at 3.1 inches apart with a 3/8-inch drill bit.
Step 6: Fabricating Connector Brackets


Once we had the main base assembled, it was time to work on the connecting brackets that would connect the base to the car. However, the three connector brackets required unique individual bends in them to sit flush with the contour of the vehicle. Therefore, the base was set roughly into its final position and measurements were made to each bolt surface.
We cut each bracket 6 inches out of the 1.00 x 0.125 inch flat aluminum stock and then placed custom bends in each one. To produce the desired bends, a line was marked on the bracket with a sharpie to simulate the bend line. We then used a sheet metal bender at the innovation hub to produce a bend to the desired angle. These were then test-fitted in the vehicle with the base to ensure they were as close as possible to the desired shape. Once again, a 3/8-inch drill bit was used to make a hole in the bracket for the bolts that would secure the lift to the car frame.
Step 7: Welding


Once everything was cut to size and test fitted with everything it was time to weld. We first welded the three angle pieces for the winch mount bracket first. Then we welded the two angle brackets for the base together using welding blocks to ensure they were at 90-degrees. These blocks were also used when we welded the vertical tube to the base.
After the base was completely welded, we then needed to weld the connector brackets. Since these need to be welded at specific angles and locations along the base, we needed to use the car once again to properly line everything up. In addition, the pullies were stainless steel, so we were not able to weld the pulley wheels to the lift. So instead, we decided to screw the pulleys into an aluminum bar that will be welded into the lift arm which will match our final design. We are using 3 pulleys in 3 distinct positions to help with the load from the scooter.
Step 8: Final Assembly/Modifications

Once everything was welded together the sleeve bearings were put into place to reduce the friction during operation as well as take the additional slop and provide a snug fit between the two sizes of tubing.
The winch will be powered through a cigarette lighter plug located in the trunk area. Both the winch and cigarette lighter plug power lines will be cut and soldered together and wrapped in heat shrink wrap around the where the solders are made. This allows us to shorten the cable to the size we need and remove excess and clutter in the trunk due to cables.
Step 9: Paint


Once the team finished building the main assembly and confirmed that it fit properly into the car, we proceeded to painting. Early on, we asked Lisa what color she would like. She preferred it if the scooter lift matched the color of her car to the best of its ability, so it was painted blue.
When painting the arm of the assembly make sure to avoid painting the part that gets placed inside the sleeve bearings. If this is painted there is some friction between the bearing and the paint as well as the paint wants to rub off. If painted accidentally just take sandpaper to it and sand it off.
Step 10: Scooter Mounting


The loop clamps are used along side the galavanized steel to to be connect to the lift to allow our scooter lift to have a mount to the scooter. We connected the smaller loop clamp on the connection under the chair as shown the picture, and the larger one on the main metal bar.
The galavanized steel are connect with the loop clamp as you put a quarter inch bolt (3/4" long) through each one. You could use 1 galavanized steel if you do not plan on ever disconnecting your chair, or two as shown the picture that you can just connect to each other.
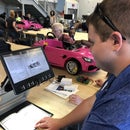
Step 11: Delivery


Lisa came to campus for the final installation and testing. She was thrilled with what we had created for her and gave it a try. The custom lift system easily lifted and lowered Lisa’s scooter for her, without much effort on her part. Now she will be able to travel anywhere she needs to without the worry of finding someone to help her load and unload her scooter!


