

Introduction: Custom Wooden Door Handles


The front door is the first thing everybody sees when entering. What better way to blow your guests away than by having your own, super cool, custom door handles!
In this Instructable, I will take you through the process of designing, making and installing your very own wooden handles. These particular handles were commissioned by a local Taekwon-Do Dojang in Cape Town. The handles are functional but not mechanical in nature.
Bear in mind that this Instructable merely offers a guideline. One must exercise creative freedom! Feel free to adjust and spice things up. Your advice on better approaches would also be greatly appreciated.
Step 1: Materials and Equipment


Materials:
- Wooden Board - 35mm Mahogany in this case
- 6.00 x 100mm Screws
- Wood Glue
- Wood Sealant or Paint
Tools:
- Scroll Saw or CNC machine
- Sanding Machine / Sand Paper
- Drill with 3 & 6mm Drill Bits
- Countersink Drill Bit
- Safety Glasses
Step 2: Designing the Handles


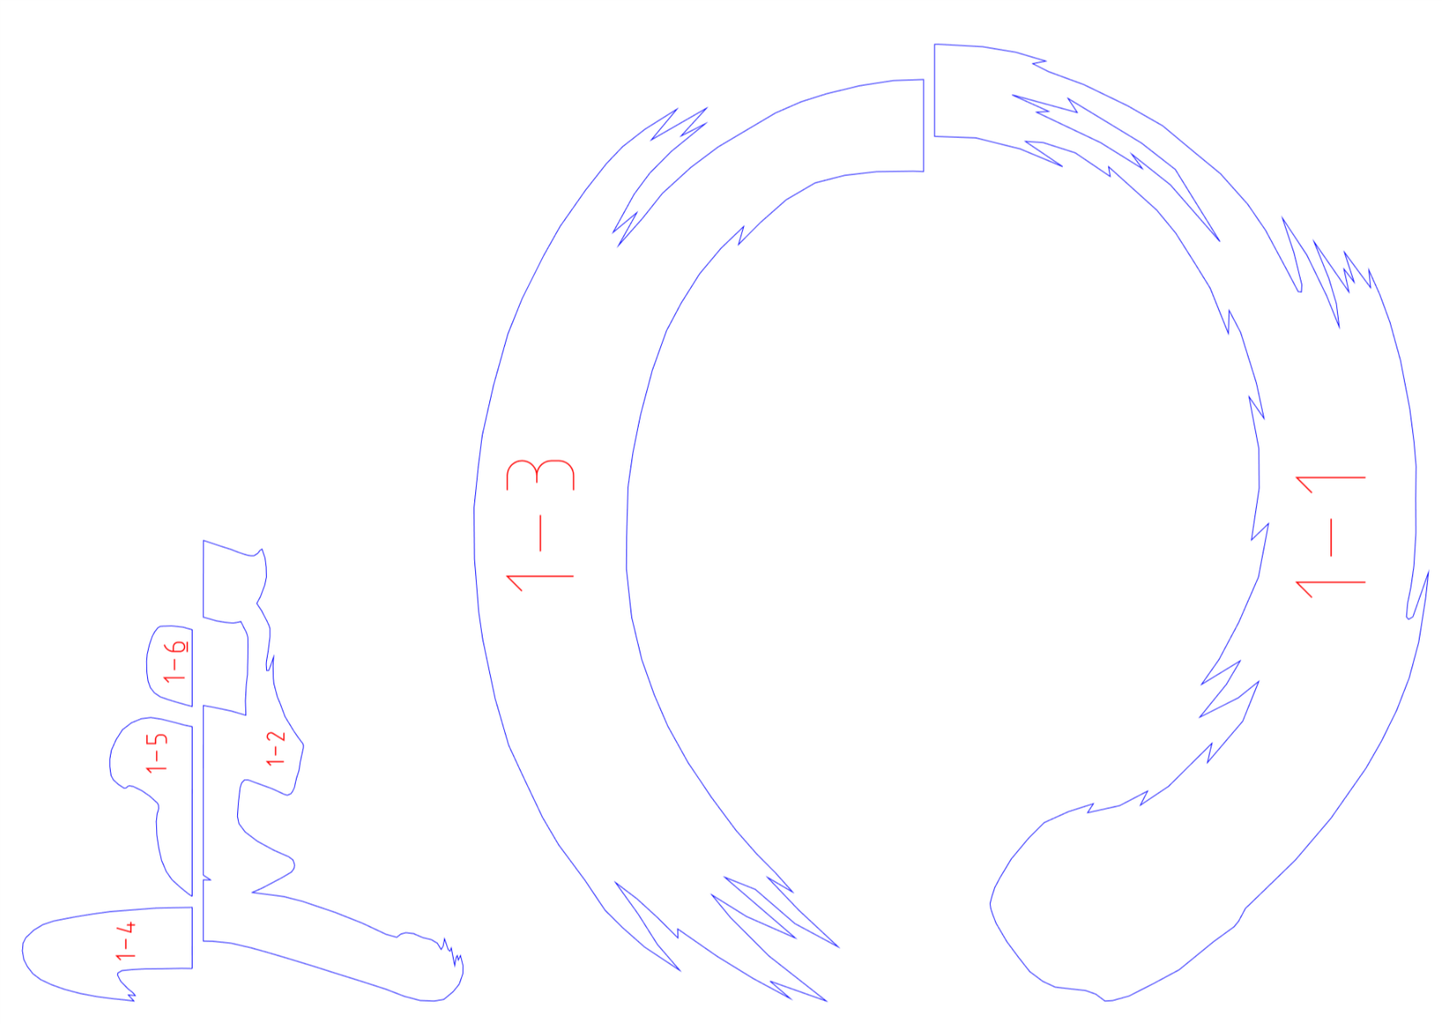

This section will briefly show you how to digitally design the handles of your choice. Later on, I print and cut out the designs and trace them onto the wood, outlining where I must proceed to cut.
Perhaps you might not even need to create digital files of your design. Seeing as this project was for a client, I was required to make the digital designs so that I could generate some renders for the client to evaluate. Having digital files also allows one to use CNC machining or laser cutting etc. Feel free to skip this section if you already have a completed design.
For this project, I used Blender to create the digital drawings and renderings.
First, start out with the image resembling the symbol you wish to recreate. This could be an existing design, or one which you have sketched. Import this image into blender as a background image. Than add a plane by pressing "Shift + a" and hovering over mesh, then selecting plane. This produces a plane with 4 vertices. Go into edit mode by pressing "Tab". By right clicking, whilst holding down the "Shift" key, select 3 of the 4 vertices, then press "x" followed by "Enter" to delete them. This leaves us with a single vertex.
Select the vertex by right clicking on it and press "g" to adjust its position relative to the background image. Once the vertex is on the outline of the background image, press "e" to extrude. Extruding basically generates another vertex that is connected to the parent one. Left click when the second vertex is on the outline of the background image. Repeat this extrusion process until we end up with an outline of the image. Note, to connect the last vertex to the first one, select both vertices, press "Ctrl + v", then click "Merge", followed by "At center". This will merge the two vertices into one, thus closing off the shape.
To fill in a shape, select all the vertices in edit mode by pressing "a", then press "Alt + f" which automatically fills in faces. You could then extrude the 2D shape by pressing "e".
Now we have a 3D model of our design. This could be used for rendering or can be exported for CNC etc. You can export it as an STL file and then open it in slicerforFusion360 where it can be exported as a pdf for printing or machining. This pdf could then be printed and used to trace the shape onto the wood for cutting.
This was just a brief explanation of how to make simple designs in Blender. The internet is filled with tons of amazing resources for designing. I highly recommend exploring them.
Step 3: Preparing and Cutting the Wood


Once we have the designs printed and cut out, trace them onto the wood. This will act as the guideline when cutting the wood with the scroll saw. When ready, put on your safety glasses, and very slowly begin to cut along the line.
NOTE: it is generally not recommended to cut such thick hard wood on a scroll saw. Therefore, make sure not to apply too much pressure when cutting as this might result in a damaged or broken blade.
Alternatively, you could make the handles out of thinner pieces of wood, which you can stack together to get the required thickness. This process could also be replaced using a CNC machine. Check out the Instrutables CNC class for more info.
If you are new to working with the scroll saw, check out the following link to get some advice:
https://youtu.be/upD6Mt86JV0
Step 4: Post Processing the Handles


Once all the parts have been cut out, it's time to smoothen them. Using the sanding machine, or sandpaper, go over all the parts, particularly focusing on getting the edges smooth. Start off with more abrasive sandpaper, then move to a finer one until there are no sharp edges that could potentially cut someone.
Step 5: Painting the Handles


Make sure the parts are free of dust. Shake and stir the wood sealant or paint well before usage. Thoroughly apply the first coat of paint onto the wooden parts. Note that the wood acts as a sponge upon applying the first coat of paint, therefore one would have to apply a few layers. Once the first coat of paint has dried, you must once again sand the parts gently with fine sand paper. I applied another coat, waited for it to dry, then sanded again. Then I applied a final two coats.
My client later decided for the handles to be black and grey, so I sanded them and added a few coats of black and grey wood paint.
Step 6: Preparing the Door


Now that the handles are ready to be installed, we must mark where we will be attaching them. When deciding on placement, take any keyholes or locking mechanisms into account. I positioned the handles on the door and used a pencil to mark where I need to drill the holes. As you shall see in the next step, each handle is attached to the door via two circular wooden spacers. When placing the handles, try get the spacers to end up as close to the center of mass of the handles as possible. This will make the handles much stronger.
Once the markings have been placed, create a pilot hole with the 3mm drill bit. Then increase the hole size using the 6mm drill bit. Finally, using the countersink drill bit, countersink the hole from the inside so that the screw becomes flush with the door.
Step 7: Installing the Handles


Next, we shall drill pilot holes into the handles. I placed the handles against the drilled door frame, and pressed the screws through the other side in order to make visible markings on the handle, indicating where it is I need to drill.
I placed some masking tape onto the 3mm drill bit to prevent me from drilling through the handle. You want the hole to end up about half way through the wood i.e. there should be at least 10mm between the surface and the end of the hole. The pilot hole is necessary to prevent the wood from cracking.
Once the holes are complete, add some wood glue to the wooden spacers, and then screw the handles into place. You should manually tighten the screws at the end. You don't want it to be too tight as this could crack the wood. Make sure to wipe away any dripping wood glue. Finally, you can cover the hole from the inside by either placing a plastic cap over it, or covering it with some filler. You can then paint over it to match the door.
Step 8: Adding the Detail


The final stage of this project was installing the central symbol. I followed the same procedure as outlined in the previous step. Except, instead of wooden spacers, I used a few washers to separate the symbol from the door. Using my Dremel, I had to cut the screws as they were too long. Also note that I could have cut the symbol in half (so that it doesn't stick out) but the client and I decided that, due to the finer details, it would be more aesthetically pleasing for it to be a single piece. Either way, only the door with the logo would be opened so there was no fear of the other door hitting the protruding logo.
Step 9: Final Product


And that's all folks! We have made some really cool custom door handles that will certainly generate some memorable first impressions.
I hope you enjoyed this Instructable! Please feel free to comment and provide feedback.


