

Introduction: DIY Bluetooth Speaker From Scratch!


I've always wanted to make my own Bluetooth speaker from scratch and with my new found free time I decided to accelerate that want into a reality!
The board I designed revolves around the XS3868 Bluetooth module and the 3watt by 3watt Pam8403 audio amp. This is all thrown together with a battery charging and voltage regulation circuit all housed inside of a project box I got off Amazon. The focus of this board was to make it as modular as possible to accommodate any type of housing for it. The end result is a pretty decent audio amp that has only one flaw and that is the Pam8403 IC. While the amp outputs a clear enjoyable sound it can be overloaded if the input volume climbs too high which will lead to a skipping sound. This can be mitigated by adjusting the volume either from the device connected or by tuning the volume on the XS3868.
In my opinion this project is still a success even with this one flaw. The speaker can still be enjoyed but won't blow you away or out perform all speakers. This project was just for fun and is acting as a stepping stone for the next version! I plan on redesigning this board but with a more powerful amp.
All that being said, I have included all the files necessary to reproduce this very board. If you replicate this project I would like add that you do it at your own risk as I haven't fully explored the performance in depth.
The BOM txt file contains all the parts for the board and their package sizes.
I'm running into issues uploading a zip file with the Gerbers so you can find the Gerber files for the board here https://www.dropbox.com/s/d88rf8r3q92yxlb/Bluetoot...
Lets get started!

Step 1: Watch the Video of the Build!
I am still trying to get better at editing video coverage of my projects so any criticism as long as its constructive is welcome! Subscribe if you feel so inclined :)
In the video you can hear the amp in action. I also show the skipping flaw that I mentioned earlier.
https://www.youtube.com/watch?v=TaQhDTnqHi0
Step 2: The Schematic and Board View.
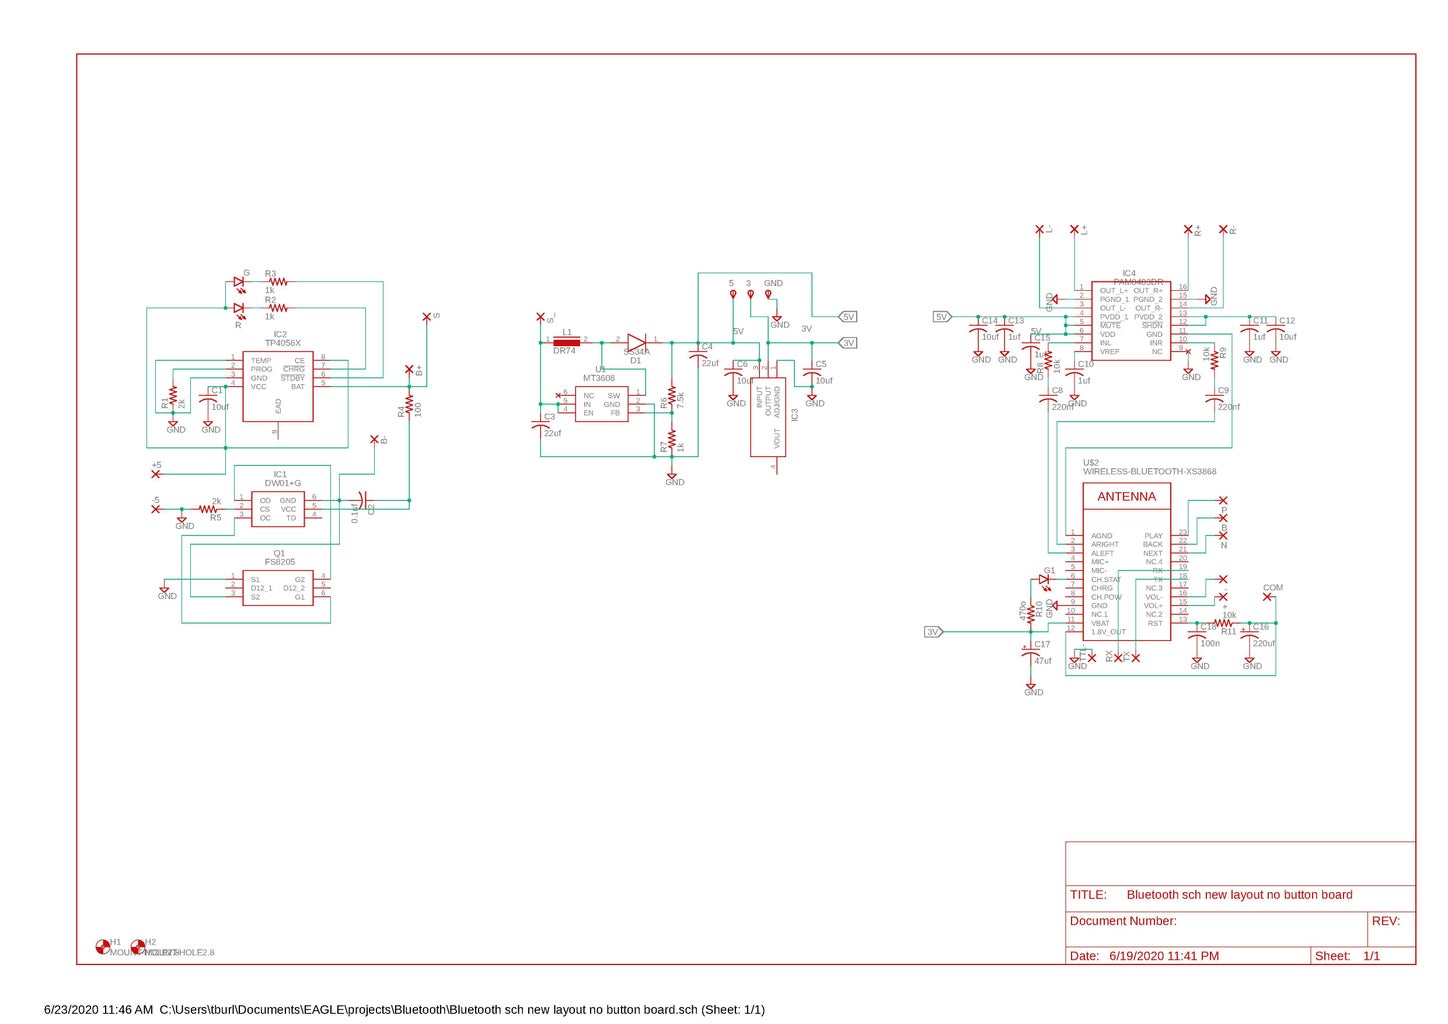


The schematic is pretty simple. It can be broken down into three parts.
Starting from the left we have the very common TP4056 battery charging IC that charges the battery safely. In the middle we have a voltage boosting circuit that takes the battery voltage and boosts it up to 5 volts for the Pam8403, the 5 volts is also run through a 3.3 volt linear regulator. The 3.3 volts is used to power the XS3868 module. This voltage is kind of not needed due to the fact that the XS3868 can run off of battery level voltages. I added the 3.3volt regulator only because I don't like the idea of powering the module using a changing voltage source but after some research it appears to work just the same. The final part of the circuit on the right is the Bluetooth and audio circuit which consists of the Pam8403 audio amp and the XS3868 BT module.
I included a PDF of the schematic so you can view it in higher quality than the image provided.
All of the connections to the board are made via surface mount pads.
Attachments

Step 3: Assembly.


I designed this board with the smallest parts being sized at 0603. This is a pretty small part size so it may not be ideal to solder for beginners but with practice you can easily achieve soldering small SMD components.
I ordered my boards from JLC PCB. All the parts were sourced from several sites including mouser, digikey, ebay and lcsc. The hardest part to source can be the XS3868 BT module. It can be bought from Ebay with shipping from china and sometimes you might get lucky and find them on Amazon. I recommend ordering a few XS3868s at a time to avoid having to wait if you happen to damage one.
After soldering all the parts to the board I tested it to make sure it charged and discharged as well as powered the amp BT module. To my surprise it all worked without any modifications needed which normally doesn't happen.
I used this clear project box to house everything. I mounted two pc standoffs for the board to screw into, a wireless charging tag to charge the battery, five unmarked command buttons, an on/off button and two speakers, I wired everything according to the schematic.
I don't have a 3d printer so I designed this board to be as modular as possible to fit in a wide variety of housings.
Step 4: Programming the BT Module. (covered in Depth in My Video)


You can actually use the BT module as is but if you want to take the project a step further you can program it using a TTL to USB. On the board I included a TX and RX pad as well as a TTL gnd pad so you can interface a TTL device. On my board I don't have the TTL gnd pad, I added one in the shared version so you can program it easier without having to ground it somewhere else on the board. I cover programming the module in my video but I did find a well documented instructable from user UtkarshVerma and that can be found at this link
https://www.instructables.com/id/Change-Bluetooth-...
In their instructable you can download the software to program and learn a bit more about the XS3868 BT module.
Attachments
Step 5: That's All!

Thanks for checking out my instructable on how I built a bluetooth speaker from scratch. If you have any questions leave them below and I will do my best to answer them. Hopefully you will stick around for the next version of this Bluetooth speaker!

Participated in the
Audio Challenge 2020


![Tim's Mechanical Spider Leg [LU9685-20CU]](https://content.instructables.com/FFB/5R4I/LVKZ6G6R/FFB5R4ILVKZ6G6R.png?auto=webp&crop=1.2%3A1&frame=1&width=306)


