

Introduction: DIY Plant Inspection Gardening Drone (Folding Tricopter on a Budget)


At our weekend house we've a nice little garden with a lot of fruits and vegetables but sometimes it's just hard to keep up with how the plants change. They need constant supervision and they're very vulnerable to weather, infections, bugs, etc...
I had a lot of multicopter spare parts from old projects laying around in my toolbox so I decided to design and build a drone which can do plant analysis using a Rasperry Pi Zero W and its NoIR PiCamera. I also wanted to make a video on this project but that's pretty hard next to the university so I'll just upload the raw footage.
The Theory behind Near Infrared Imaging
I recommend to read this Wikipedia article. Long story short, when plants function normally they reflect infrared light coming from the Sun. A lot of animals can see IR light, like snakes and reptiles but your camera can see it too (try it with a TV remote controller). If you remove the IR filter from your camera you will get a purplish, washed out image. If you don't want to break your camera then you should try it with the NoIR PiCamera, which is basically the same as the standard PiCamera but does not have a built in IR filter. If you place the infrablue filter under your camera's lens you'll get only IR light on your Red channel, blue light on Blue channel, green and red are filtered out. Using the normalized difference vegetation index formula for every pixel you can get a very good indicator on your plant's health and photosynthetic activity. With this project I was able to scan our backyard and identify an unhealthy plant under our pear tree.
Why a Tricopter?
I like tricopters a little bit more than quads for example because of their efficiency. They have longer flight times, they're cheaper and you can fold them which probably the single best feature when it comes to DIY drones. I also enjoy flying with this tricopter, they have a somewhat "airplane-ish" control which you'll experience if you build this drone along with me. When it comes to tris David Windestal's name is probably the first in a Google search, I recommend to check out his site, I'm using his folding frame design too.

Step 1: Flight Footage
This was my second test flight where the copter was already tuned and ready to do plant analysis. I have some onboard recordings from my action camera, you can check out our beautiful surroundings from a bird's eye. If you want to see the NDVI recordings go to the last step of this instructable. Unfortunately I had not time to make a full how to guide video on this tricopter, but I've uploaded this short flight test video.
Step 2: Required Tools and Parts


With the exception of the wooden booms and the paint spray I had every part laying around in my toolbox, so the total cost of this project was around $5 for me but I will try to find eBay or Banggood links to every part I used. I highly recommend to look around for the parts, maybe you can get a better price than I did.
Tools
- Soldering Iron
- Dremel Tool
- 3D printer (I don't have one, my friend helped me out)
- Cutting Tools
- Wire Cutter
- Super Glue
- Zip Ties (a lot of them, in 2 sizes)
- Paint Spray (with a color of you liking - I used black)
Parts
- ArduCopter Flight Controller(I used an old APM 2.8, but you should go for a PixHawk or PIX Mini)
- GPS Antenna with Magnetometer
- MAVLink Telelemetry Module (for ground station communication)
- 6CH Receiver + Transmitter
- Video Transmitter
- Servo Motor(at least 1.5kg torque)
- 10" Propellers (2 CCW, 1 CW + extra for replacement)
- 3 30A SimonK ESCs (Electronic Speed Controller) + 3 920kv Motors
- 3S Battery 5.2Ah
- Raspberry Pi Zero W + NoIR PiCamera (comes with infrablue filter)
- 2 Battery Straps
- Vibration Damping Mounts
- 1.2cm Square Shaped Wooden Booms (I bought a 1.2 meter rod)
- 2-3mm Thick Wooden Lamina Plate
- Action Camera (I used a 4k capable GoPro clone - SJCAM 5000x)
These are the parts I used for my drone, feel free to modify it to your liking. If you're not sure about what to use leave a comment and I'll try to help you out. Note: I used the discontinued APM board as a flight controller, because I had one spare. Flies well, but this board is no longer supported so you should probably get another flight controller that is ArduCopter compatible for great GPS features.
Step 3: Cutting the Frame


Download the frame file, print it, and cut it out. Check if the printed size is correct then use a pen to mark the shape and the holes on the wooden plate. Use a saw to cut the frame and a drill the holes with a 3mm bit. You'll need only two of these, I just made 4 as spare parts.
Step 4: Assemble the Frame


I used 3mm screws and nuts to assemble the frame. I cut each boom 35cm long and left a 3cm long one to the front of the frame. Don't overtighten the joints, but make sure that there is enough friction so the arms wont fold. This is a really smart design, I crashed two times and nothing only the arms folded back.
Step 5: Drilling Holes for the Motors


Check the size of your motor screws and the distance between them then drill two holes into the left and right wooden arms. I had to drill a 5mm deep and 8mm wide hole in the arms so that the shafts have enough room to spin. Use a sandpaper to remove those little splinters and blow out the dust. You don't want any dust in your motors because that may cause unnecessary friction and heat.
Step 6: Folding GPS Mount


I had to drill to extra holes for my GPS antenna for a good fit. You should place you compass up high so it does not interfere with the magnetic field of the motors and wires. This is a simple folding antenna that helps me to keep my setup as compact as possible.
Step 7: Painting the Frame


Now you have to unscrew everything and do the paint job. I ended up choosing this matte deep black color spray. I hooked up the parts on a thread and simply painted them. For a really good result use 2 or more layers of paint. The first layer is probably going to look a little bit washed out because the wood is going to drink up the moisture. Well, that happened in my case.
Step 8: Mounting the Vibration Damping Platform


I had this gimbal holder platform which in my build doubles as a battery holder too. You have to mount this under your frame with zip ties and/or screws. The weight of the battery is helping to absorb a lot of vibration so you'll get a really nice camera footage. You can also mount some landing gears on the plastic rods, I felt like it's unnecessary. This black color worked out well, at this point you should have a nice looking frame and it's time to set up your flight controller.
Step 9: Setting Up ArduCopter


To setup the flight controller you'll need an additional free software. Download Mission Planner on Windows or APM Planner on Mac OS. When you plug in your flight controller and open the software a wizard helper is going to install the latest firmware on your board. It is going to help you calibrate your compass, accelerometer, radio controller and flight modes as well.
Flight Modes
I recommend to use Stabilize, Altitude Hold, Loiter, Circle, Return to Home and Land as your six flight mode. Circle is really useful when it comes to plant inspection. It is going to orbit around a given coordinate so it helps to analyze your plants from every angle in a very precise way. I can do orbit with the sticks, but it's hard to maintain a perfect circle. Loiter is like parking your drone in the sky, so you can take high resolution NDVI pictures and RTH is useful if you loose signal or loose the orientation of your drone.
Pay attention on your wiring. Use the schematic to plug in your ESCs in the correct pins and check in Mission Planner the wiring of your input channels. Never ever test these with props on!
Step 10: Installing the GPS, the Camera, and the Flight Controller


Once your flight controller is calibrated you can use some foam tape and install it on the middle of your frame. Make sure it's facing forward and have enough room for the cables. Mount the GPS with 3mm screws and use zip ties to keep your camera in place. These GoPro clones come with all the mounting utilities so it was quite simple to install this one.
Step 11: ESCs and Power Cable

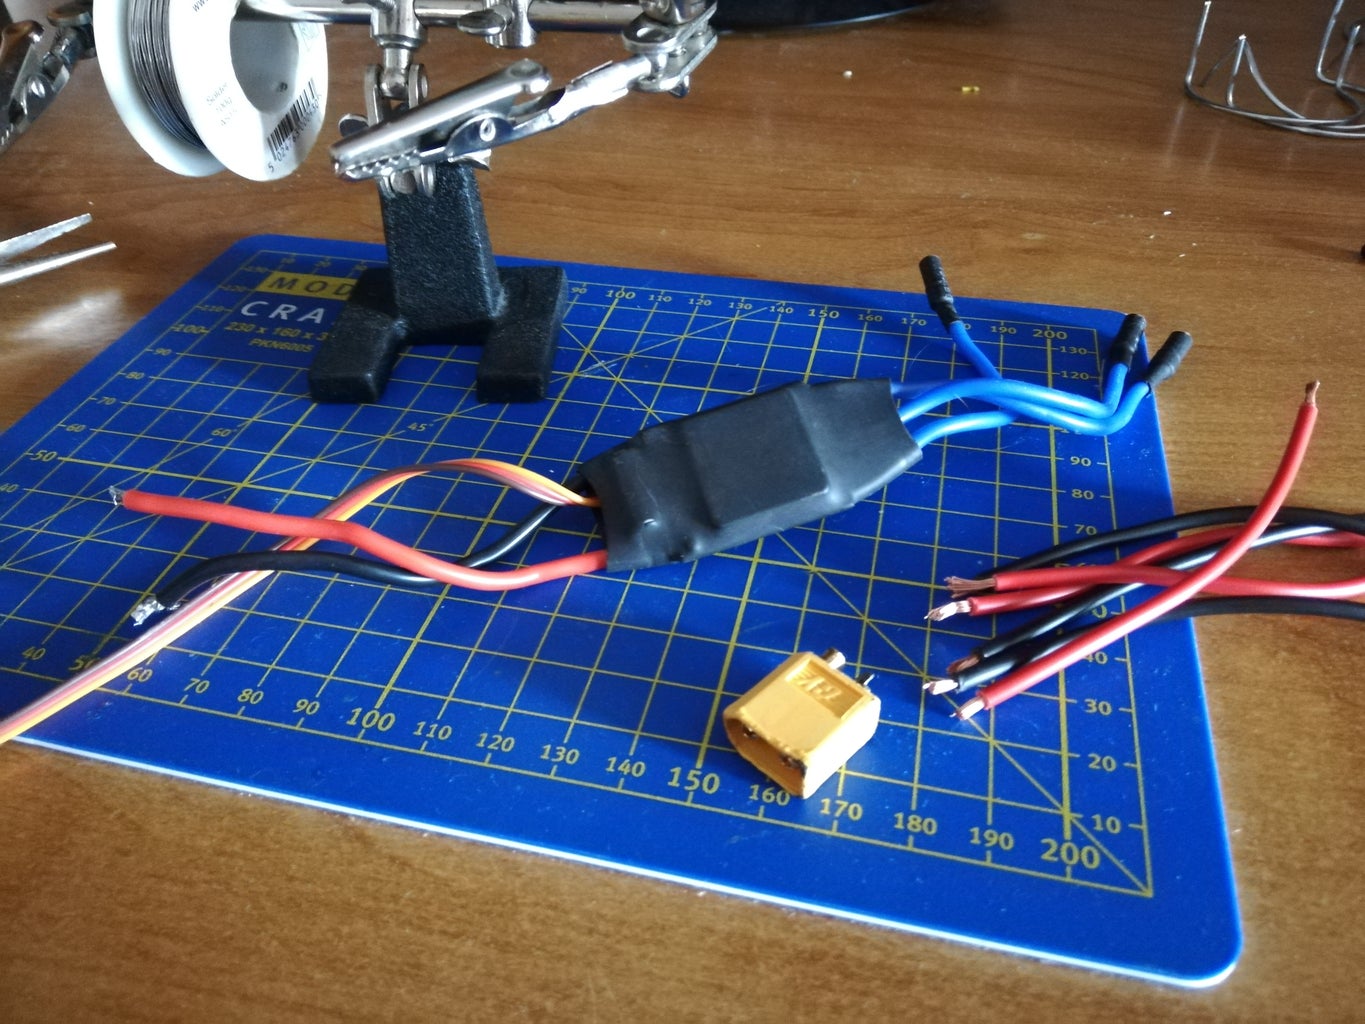

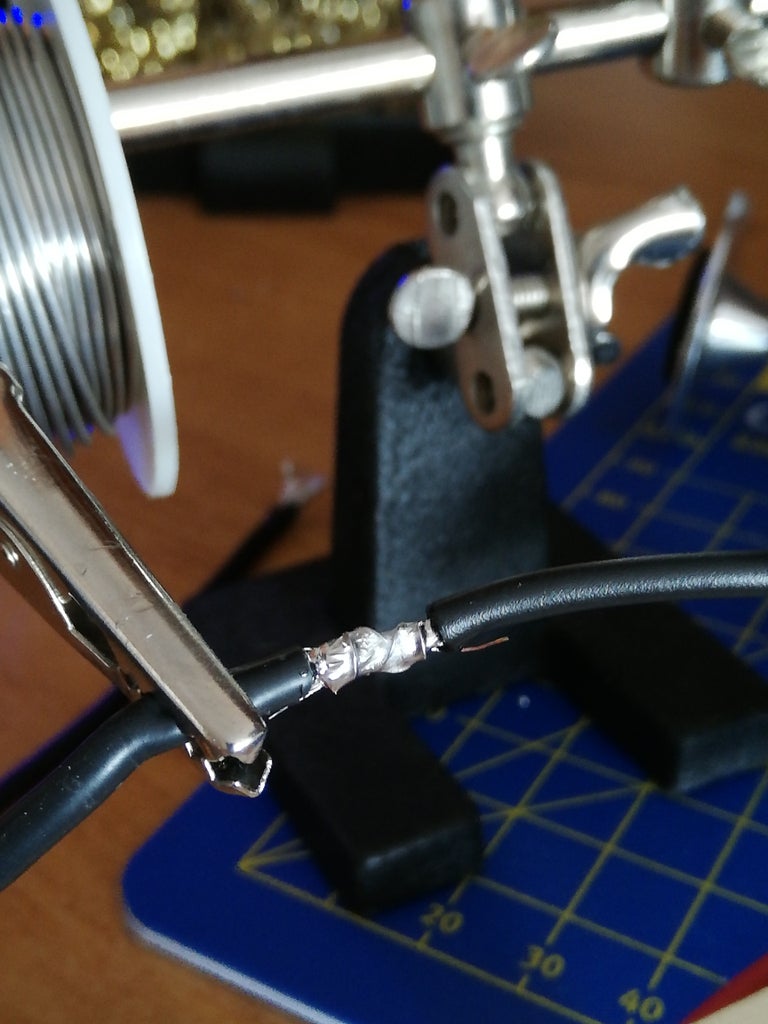


My batteries have an XT60 connector so I soldered 3 positive and 3 negative wires to each pin of a female connector. Use some heat shrink tube to protect the connections against shorting them (you can use electrical tape as well). When you solder these thick wires rub them together and fix them a copper wire then add a lot of molten solder. You don't want no cold solder joints especially at powering up the ESCs.
Step 12: Receiver and Antennas


To have a good signal reception you have to mount your antennas in 90 degrees. I used zip ties and heat shrinking tubes to mount my receiver antennas on the front of my drone. Most of the receivers come with cables so and the channels are labeled so it should be easy to set it up.
Step 13: The Tail Mechanism


The tail mechanism is the soul of a tricopter. I have found this design online so I gave it a try. I felt like the original design was a little bit weak but if you reverse the mechanism it works perfectly. I cut the excess part with a dremel tool. On the picture it may seem like my servo motor is suffering a little but it works flawlessly. Use a little drop of superglue when tightening screws so they won't fall off because of the vibrations; or you can zip tie the motors like I did.
Step 14: Doing a Hovering Test and PID Tuning


Double check all your connections and make sure you won't fry anything when plugging in your battery. Install your propellers and try to hover with your drone. Mine was pretty smooth out of the box, I just had to do a little yaw tuning because it was correcting way too much. I can't teach PID tuning in this Instructable, I learned almost everything from Joshua Bardwell's video tutorial. He explain this so much better than I could.
Step 15: Choose a Raspberry and Install Raspbian (Jessie)


I wanted to keep this as light weight as possible so I went with the RPi Zero W. I am using Raspbian Jessie because the newer versions had some problems with OpenCV which we use to calculate the vegetation index from the raw footage. If you want a higher FPS rate you should choose the Raspberry Pi v4. You can download the software here.
Installing Dependencies
We're going to use PiCamera, OpenCV and Numpy in this project. As an image sensor I chose the smaller 5MP camera which is only compatible with the Zero boards.
- Flash your image using your favorite tool (I like Balena Etcher).
- Boot up your Raspberry with a monitor connected.
- Enable Camera and SSH interfaces.
- Check your IP address with ifconfig in terminal.
- SSH into your RPi with the ssh pi@YOUR_IP command.
- Copy and paste the instructions to install the required softwares:
sudo apt-get update
sudo apt-get upgrade
sudo apt-get install libtiff5-dev libjasper-dev libpng12-dev
sudo apt-get install libjpeg-dev
sudo apt-get install libavcodec-dev libavformat-dev libswscale-dev libv4l-dev
sudo apt-get install libgtk2.0-dev
sudo apt-get install libatlas-base-dev gfortran
sudo pip install numpy python-opencv
python (to test it)
import cv2
cv2.__version__
You should see a response with the version number of your OpenCV library.
Step 16: Testing the NoIR Camera and NDVI Imaging


Turn off your RPi board, insert the camera and then we can try to do some NDVI imaging with it. You can see on the flower (the one with a red background), that the greener parts inside show some photosynthetic activity. This was my first test, which was made with Infragram. I learned all the formulas and color mapping on their site to write a fully functional code. To make things more automatized I made a Python script that captures frames, calculates the NDVI images and saves them in 1080p on the copter.
These images are going to have a weird colormap and they will look like it's from another planet. Make a few tests, change some variables, fine tune your sensor before the first mission.

Step 17: Installing the RPi Zero W on the Drone


I installed the Pi Zero on the front of the tricopter. You can face your camera forward as I did or down as well. The reason mine is facing forward is to show the difference between plants and other non photosynthetic objects. Note: It may happen that some surfaces reflect IR light or they're warmer than the surroundings which causes them to have a bright yellow color.
Step 18: Adding a Video Transmitter (Optional)


I had this VTx laying around as well so installed on the back arm of my copter. This has a range of 2000 meters but I haven't used it while making tests. Only did an FPV flight for fun with it. When I don't use it the cables are removed, otherwise they're hidden under the frame to keep my build nice and clean.
Step 19: Doing Plant Analysis


I did two 25 minute flights for a proper analysis. Most of our vegetables seemed to be okay, potatoes needed some extra care and watering. Going to check it that helped in a few days. They look pretty green on the picture compared to the orange and pink trees.
I like to do circle flights so that I can examine the plants from every angle. You can clearly see that under the fruit trees some vegetables don't get enough sunlight which makes them turn blue or black in the NDVI images. It's not a problem if one part of the tree is not getting enough sunlight at a time of the day, but it's bad if the whole plant turns into black and white.
Step 20: Fly Safe ;)


Thank you for reading this Instructable, I hope some of you will try to do experiments with NDVI imaging or with building drones. I had a lot of fun making this project from zero out of wooden parts, if you liked as well you may consider helping me out with your kind vote. Oh, fly safe, never above people and enjoy the hobby!

First Prize in the
Make It Fly Challenge


