

Introduction: DIY Train Crossing Bell


Step 1: Required Parts

Note all the parts for this project were sourced off my workbench. Most parts can easily be substituted with other values if needed.
1x dual screw terminal block (optional)
5x 1N4002 diode
1x 1000uF 35V electrolytic capacitor
1x 78L05z regulator (to-92 package)
1x 100uF 16V electrolytic capacitor
1x 22uF 50V electrolytic capacitor
1x 5.1k Ohm resistor 1/4W
1x 22k Ohm resistor 1/4W
1x NE555 timer IC
1x 8 pin dip socket
1x 100nF 50V ceramic capacitor
1x 120 ohm resistor 1/4W
1x 5mm red LED
1x 1k Ohm resistor
1x 2N3904 NPN transistor (to-92 package)
1x 10k Ohm resistor 1/4W
1x IRF640 N channel FET (to-220 package)
hookup wire
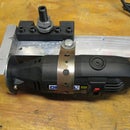
bell**
Note for the bell you want a non repeating electro-mechanical type. Easiest place to find these is in the doorbell isle of your local home improvement store. Most have a display where you can test the bells. Look for one that strikes a single note when the button is pressed and held down. One that continues to ring when held down will not work for this project. Also note most bells have connections for two buttons. Usually the "front door" button will strike two different chimes where the "back door" normally strikes a single chime. Other than that pick the bell that sounds best to you. Also if you need or want to you could make a bell from scratch you will need a spring loaded solenoid rated at the nominal voltage of your train transformer (~18V works for most O gauge stuff) and a bell or metal strip to strike.
Step 2: Circuit Operation


The driver is actually a very simple circuit based around a 555 timer. There are 3 main parts power supply, timer, and output stage.
The power supply is made up of the following parts:
4x 1N4002 diodes as a full wave rectifier to turn the AC from the train transformer into DC.
1000uF 35V capacitor to filter the unregulated voltage.
78L05Z 5V regulator IC
100uF 16V capacitor to filter the 5V dc supply to the 555 timer.
The timer section includes:
NE555 timer IC
5.1k Ohm resistor, 22k Ohm resistor, and 22uF 50V capacitor which set the frequency (1.5Hz) and duty cycle (55% high)
100nF 50V capacitor set point filter cap
120 Ohm resistor and LED output indicator
The output section includes:
1k Ohm resistor, 2N3904 NPN transistor, and 10k Ohm resistor as a voltage translator to take the 5V timer output and raise it up to the unregulated input voltage level.
IRF640 N channel FET output current driver
1N4002 diode (D5) back EMF snubber (without this diode the feedback from the bell coils can damage Q1)
In my testing I have found the circuit to work fine from 9Vac - 25Vac as well as 6Vdc to 25Vdc. Though that entire voltage range the bell speed was constant and even. (NOTE depending on the bell you choose the operating voltage range may vary)
Step 3: Circuit Assembly


There are no critical nets in this design so any point to point wiring method will work fine.
Due to time constraints I built mine up on a scrap of proto board I had laying on my workbench.
I did a quick board design in eagle as shown. Note this is untested but should work. If anyone is interested in a raw card or two drop me a email and I can get a quote from my card supplier.
Once the circuit is assembled attach a bell to the output terminals (PAD1, PAD2). Note if your bell is polarized PAD2 is positive and PAD1 is negitive. Attach a power supply to the input terminals (PAD3, PAD4). Note there is no input polarity so you can hook up the input wires either way.
At this point the bell should start dining at a rate of about once a second. If not check the led if it is blinking then the failure is somewhere in either the output stage or the connections to the bell. If the LED is not blinking the error is in the input, timer, or power supply connections.

Participated in the
Full Spectrum Laser Contest

Participated in the
123D Circuits Contest


