

Introduction: Daft Punk Helmet (Guy Manuel: in Progress)


Last year I REALLY wanted to make a Guy Manuel helmet for Halloween. Didn't happen. But, a few days later a found a prop maker, Volpin, online who gave me a very large amount of inspiration. If you see this, thank you! Anyways, this year I decided to make one. I'm not getting all fancy with molds, but I am using Bondo and other materials. The main challenge for me was the lights, but I decided to scrap the idea of making my own, and just try and find a circuit. After a few hours of searching, I finally found BasicMicro , which has a 12 light LED sequencer with multiple modes already programmed. One of the guys there was a huge help and put up with my stupid questions (yes, I know, no questions are stupid, but these were). I am going to order 2 of these, totaling 30 dollars, which i think is a fair price, and will swap out the SM leds for 5mm leds.Anyways, this is my WIP of the Helmet!
I also suggest, if you can, making a mold and making this either fiberglass or plastic, as This does get a bit tricky for a one time use. I am not using a mold, as I had to finish this in a very short period of time. Its also more of a work log, as I am still working on it as people are reading this.
EDIT:
well, bummer. I accidentally entered this in the props contest instead of either of the costume ones. Dang.
Step 1: Parts! and Tools!
Warning! this consists of a lot of parts!
On the other hand though, most of these you can find around the house
Parts and materials:
Carboard
Spray Foam
Air dry clay
Bondo!
A sheet of clear plastic
Miscellaneous wires
Plastic tint
Clearish foam
LED chaser(Sorry, cant help if you want to make your own)
Gold spray paint
Tools:
Vacuum Former
Drill and drill bits
Power Sander
Many types of sandpapers
Soldering iron
Serrated knife
Thats about all i can think of right now
Step 2: Shaping


First step is obviously getting your head dimensions. You're not going to get anywear if you are just going by guessing, even though I am doing some on the final sanding and clay, you need to fit all the electronics in, too. I put my dimensions on a piece of cardboard and roughed out the shaped from online pictures. I then attached them together in a profile and front and back view, making 4 quadrants. Then came the spray foam. This was tricky considering that there could be NO air bubbles, and if there was, there would be tricky spots to fill in with clay. Anyways, once the foam was dry I cut down to the cardboard level and started smoothing it out with a basic kitchen knife. Make sure its one that your not afraid of ruining, because I don't know if it will live or not after this. One last tip, Make it very rough, because if its not, it could end up dipping too much in and cause the shaped to be deformed. And if your thinking this takes long, wait for the next step: Clay
Step 3: The Dreaded Clay


By far, the longest. Step. Ever.
This includes first layer of clay, second layer, sanding, filling in holes, and everything else I will be explaining. I just started at the top, and slowly worked down on each quadrant. Because its foam, its not going to be perfect, so there will be spaces and holes needing to be filled in. Then I just slowly worked at it with sand paper and smoothed it out as much as i could in the areas needed. Also, if you have a tool to measure the curves, they help. I do not have one, and im going against i just said, and im guessing and eyeballing to get the shape right. To me, mine looks pretty darn symmetrical, and im hoping it will stay that way. One other this to remember is try and keep the sanding down as much as possible, or like me, you will run into the foam and cardboard, and it will mess things up. Also, pay the most attention to wear the Bondo will be going, as you want that part to be a smooth as possible
Step 4: Bondo Time!


This was actually a fairly easy step, considering that Bondo drys pretty quickly, and is pretty easy to work with, even though its my first time and doesn't look too pretty. I was decided between trying out Bondo or having a first go and fiber glassing, but considering my dad had more knowledge about the Bondo, I decided to go with that.
So now that all the clay is dry, you need to mix the appropriate amount of hardener and Bondo to get the right consistency to apply. I am guessing that too little, it will crack, and too much, it will be hard to work with, is this right? because this is a learning experience for me, I will be asking questions along the way about Bondo. Anyways, i just filled in the main shape outline along the clay, and made it VERY rough, considering that I will be sanding it down a lot. You will also need to use 80 grit before applying the Bondo, or else it may not stick and will come right off.
EDIT: This first picture is just me testing out the Bondo to see how well it stuck and usability.
Also, like I have said before, this is kind of like a work log, and this is where I am as of 10-20-11, 9:54 PM
I will continue updating, so it is not over! and wont be for a while!
Step 5: Final Helmet Steps


Once the bondo is dry, the fun part comes once again. Sanding.
I would highly suggest using a power sander, as long as you dont press down too hard, as it may crack the clay. Your goal is to get it as smooth as possible (as always...) and keeping the layer of bondo thick enoughIf you don't, it will start cracking and be VERY delicate. Once I had the sanding done, The visor section has to be pulled off. Don't try and pull it off with just a clay layer... I tried this, and it brock and cracked at many places. Use a layer of bondo on top of it to pull it of correctly. To break the seal between the visor and the helmet, I just used a combination of a hacksaw, a pocket knife, the bread knife, and my dremel, but if you have them, cut off bits are very helpful in the section because you can be a smooth and good cut. I did not have any left over, and because I live on an island, There are only two hardware stores, and neither of them had the right sizes. Anyways, once it was off, I started doing a combination of sanding down the visor mold, and making clay ear pieces for the finishing. These used up the rest of the clay, and must be made right so that the will be smooth along the edges, which mine were not the best. I also pulled the rest of the foam out of the mask, and tested it out. Along came a test paint, and on it goes.
EDIT: I forgot to mention the wiring pattern on the sides. Just lay out a design in sharpy and cut it out with a engraver tip for a dremel.
Step 6: Visor and Lights


This was actually a side project from the actual helmet, because we made a vacuum former for the visor. A big thanks to my dad is needed, and I do not know how I would have finished it without him. He worked on it while I was at school to get it finished for me. Thank you so much.
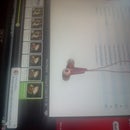
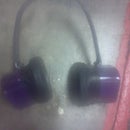
Anyways, for the visor, its pretty much as easy as 1-2-3 for vacuum forming, and then afterwards you have something your hopefully proud of. This was not the problem for the project. the biggest problem in this step was the tinting of the windows. We checked both of the hardware stores on the island, and neither had it, so, i decided to try and make my own. It went OK, it wasn't too bad, but because i had 2 visors i decided to try it out anyways. It was a mixture of clear coat and black spray paint, which i then brushed on the visor. This was also primarily a test visor for the lights. Sadly, because my camera on both my phone and my other camera died, I could not get any pictures with the lights in it. They are scrolling lights, just like in the real helmet, with some other modes that can be chosen. The ear pucks are also lit up with sound reactive leds that connect to a speaker set in a jacket, connected to my phone ( I used to have a pink ipod mini, but it finally broke because of magnets...).
IN conclusion, i believe that this was a fairly successful project of mine, maybe 6 out of ten. It wasn't too high quality, but its fine with me, and it has that level of visual difference to where you know that it is homemade. There are definitely changes I would like the change next time, like using fiberglass instead of bondo, for a smoother finish. Also painting during the fall isnt too good of an idea, especially in Washington. I would really like to do the other helmet with a mold, also, instead of having just a single blank. That all for now, and hope to be more successfull next time!
EDIT: also, the picture with the Folgers Aroma Seal lid is because my dad and i had to make a last minute fix for our shop vac, in case you were wondering.

Participated in the
4th Epilog Challenge

Participated in the
Make It Glow Challenge

Participated in the
Halloween Props Challenge


