

Introduction: Developing for PICs Using a Mac : Friendly UI


Frustrated by the fact that you have to mess around in the Terminal just to compile and download PIC programs? I was too.
I am a long-time Mac user (or as long as you can be for a 16 year old), and when I started to experiment with embedded systems, I had to do quite a bit of reading around before I came up with a pleasant toolchain and workflow. This instructable will show you how to develop for PICs in a friendly, native-UI way (no terminal involved — apart from during set-up). Please note that, with a bit of tweaking, these steps apply just as easily to Atmel AVR programming, as I believe that command line compilers and programmer software is available for these popular MCUs.
Before we start, here's a rough outline of how we're going to do this: Using AppleScript and a customisable text editor we automatically perform compilation and download of code through a native Aqua UI, displaying any error messages along the way. We will also offer extra abilities, depending on the compiler/programmer software you're using.
On to the first steps!
Step 1: Gather the Tools and Software
Programmer
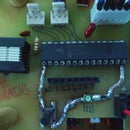
You'll need a programmer — for those who are new to this, a programmer is a little device that plugs into your computer and your circuit, and transfers your compiled program onto the PIC/AVR. There are plenty of 'official' and unofficial programmers — I'm using a PICKIT 2 clone by Sure Electronics (They're an amusing Chinese company who print "Have fun with us" on their product boxes"), but you can use almost any programmer. The important thing is that it has a terminal interface, i.e. you can control it via the terminal. Examples of this include usbpicprog, which looks like a great little low cost PIC ICSP programmer.
For the PK2, this software is called pk2cmd, and can be downloaded from the 'Downloads' section of Microchip's PK2 Page .
Install whatever software you need for your programmer. You'll probably have to use Terminal for this section (Applications/Utilities/Terminal ). Follow the instructions in the readme or install files, and you can always post a comment if you get stuck!
Compiler
You'll also need a compiler. This is a piece of software that turns your assembly language or C into machine code (raw hex values) that the MCU can understand. I'm using gputils's gpasm , an open-source clone of Microchip's mpasm. I hear that mpasm can be run on OS X, as can student versions of Hi-Tech C's C compilers.
Same deal as with the programmer software — download whatever compiler you want from respective websites (I can recommend gputils, and I'll be using that for this tutorial) and follow the installation instructions. I'm not going to go over every single problem that could occur, so post a comment if you need a hand.
Editor
You'll need a plain text editor that you can customise to run AppleScripts through a menu or button. Textwrangler is great because it's free, allows you to add AppleScripts to a menu, and is fully scriptable, which gives benefits you'll see later. It also does some syntax highlighting. Unless you know your way round AppleScript, use TextWrangler.
Progress Check:
At this point you should be able to compile and download a program. If you can, check now and solve any problems before moving on to the next stage. At the very least, try to run both programs from the Terminal (by typing their names and pressing return. For example, "pk2cmd", and "gpasm".
Step 2: Putting the AppleScript Together


What you need to do now is add AppleScripts to TextWrangler that automatically detect the model of PIC, compile your code and burn it to the PIC. If you're using TextWrangler, gputils and pk2cmd, you're in luck, because I've already written them for you! Download the attached files "01)PK2 Compile and Download" and "02)Cut Supply".
TextWrangler allows you to add your own AppleScripts to the scripts menu (Little Scroll Icon). To do this, you need to move the AppleScripts you've downloaded into the folder ~/Library/Application Support/TextWrangler/Scripts/. Put The Compile+Download script straight in, and put the Cut Supply script in a new folder called "02)PK2 Supply".
The numbering system forces the scripts to appear in a particular order. Scripts in folders appear in a sub-menu.
You might want to move any example scripts away from the Scripts folder. I moved them into ../Example Scripts for future reference.
Open up TextWrangler. Your Scripts Menu should look like the second screen shot.

Step 3: Try Compiling/Downloading a Program


Now you have a bare-bones system set up, give it a go. Plug in your MCU board, or ICSP header to a breadboarded PIC circuit, load up a simple program (LED Flash, motors forward, that kind of thing), and try the PIC Compile and Download menu item. If all's well, it should ask you if you want to supply power to the circuit via PK2 (second screenshot) — up to you. If you do, use the PK2 Supply -> Cut Supply menu item to cut the supply.
Note: I sometimes get a strange bug where, on trying to compile/download, TextWrangler instead opens the script, in AppleScript Editor. if this happens, just quit it and try again. I have yet to figure out how to fix this, but it's still more convenient than messing around in the terminal.
There are a whole bunch of things that could possibly go wrong here. I wrote all of the Applescripts for my system, and haven't had any problems, but if something consistently goes wrong, let me know. If I find that there are common problems, I'll add fixes.
Step 4: Other Scripts

If you've successfully managed to download a program, fabulous! Well done!
I have two more scripts that you might find useful… One which supplies 5v through the PK2 without having to compile, and another which tells textwrangler to open the PIC's include file (if you're using gputils installed to the default location) for reference. They are attached, just pop them in TextWrangler's Scripts folder as before.
Step 5: How It Works
If you've managed to get that working, fab! Here's an overview of how the Applescripts work, for those who wish to modify them.
Compile + Download Script
On being run, this script first uses TextWrangler's search methods to find the list declaration in the current file. It uses the lineLength and index to set 'picType' to the serial number of the PIC being used, e.g. 16F886. It then tells TextWrangler to save the current file.
We've finished with TextWrangler — now the script uses the do shell script method to compile the current file. This is a fairly simple command, but it makes sure the filename is suitably quoted, and also uses a try/on error block to alert the user to any errors that occur.
Next, another do shell script one-liner. This one works in a similar way, quoting the compiled hex filename into a pk2cmd command-line statement that tells the PK2 to download that file. Notice two things: We have to export a path to the $PATH variable, and we have to specify the model of PIC we're using.
There is then a commented-out section that I intend to use to clear any extraneous files created by this process to their own folder. I haven't figured that out yet, but left it in just in case anyone else managed to!
Finally, the script displays dialog box asking if we want to run a command which sends 5v out of the PK2. This voltage can be changed if you have a preference for 3.3v circuits.
Other Scripts
Now I've explained how the largest script works, the others are all fairly similar, and use copy/pasted blocks of code to do similar things.
If you make any improvements, adapt these scripts for different programmers/compilers, etc, please let me know so that other people can benefit! I'd love to see what you can do to these.

Participated in the
Microcontroller Contest


![Tim's Mechanical Spider Leg [LU9685-20CU]](https://content.instructables.com/FFB/5R4I/LVKZ6G6R/FFB5R4ILVKZ6G6R.png?auto=webp&crop=1.2%3A1&frame=1&width=306)


