

Introduction: Digital Manufacturing: Fretless Trash Banjo


Don't have a raccoon hide? We'll use polyethylene plastic from a food tray.
don't have expensive timber? we'll use plywood, scraps of which are easy to get.
don't have frets? no problem.
even better, it's digitally fabricated -- that is, you fabricate it with your ~ten digits. your fingers.
I made this goofy instrument from free, locally obtainable materials in a weekend.
Step 1: Drum Frame


a banjo is not a guitar. a banjo uses a drum with a thin, tightly stretched head as a resonant chamber. A guitar uses a wooden box with thin walls.
I made the frame of my drum from plywood. I gave it nine sides. Using degrees makes sense for the number 9 because 360 divided by 9 is a nice friendly 40. Each side of a regular nonagon must contribute 40 degrees of turning action.
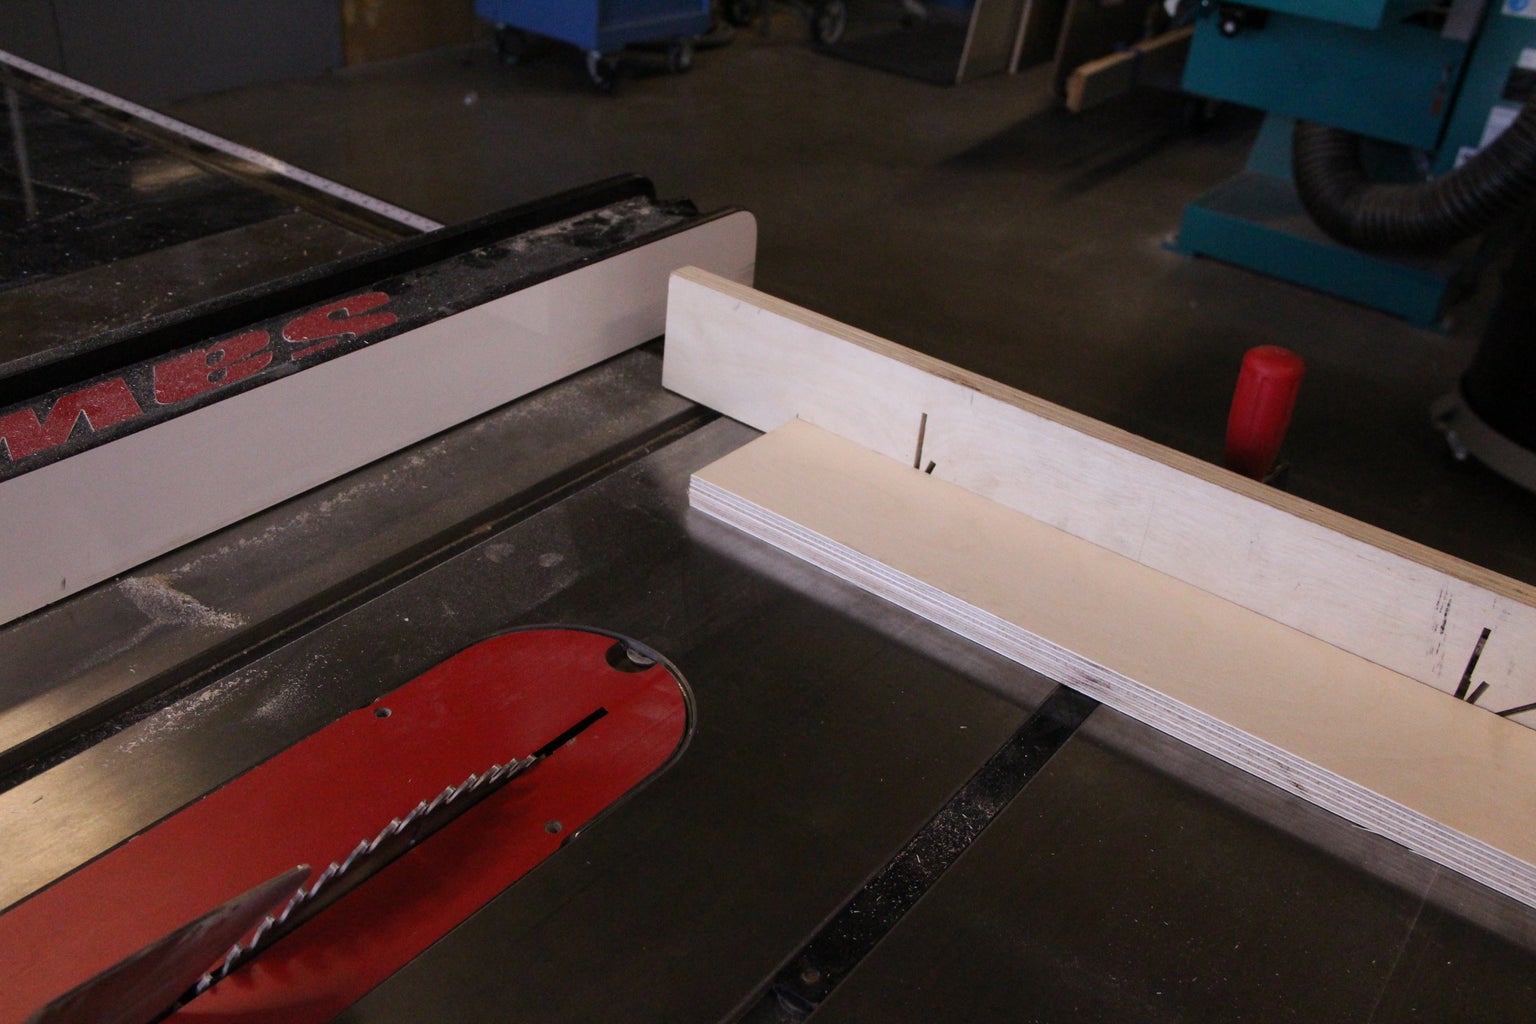
I found a strip of 3/4" plywood about 4" wide that had been cut from a 4'x8' sheet. I set the bevel gauge on a table saw to 20 degrees and cut pieces of approximately equal length using the crosscut sled. I flipped the stock over between each successive cut to make trapezoidal sections.
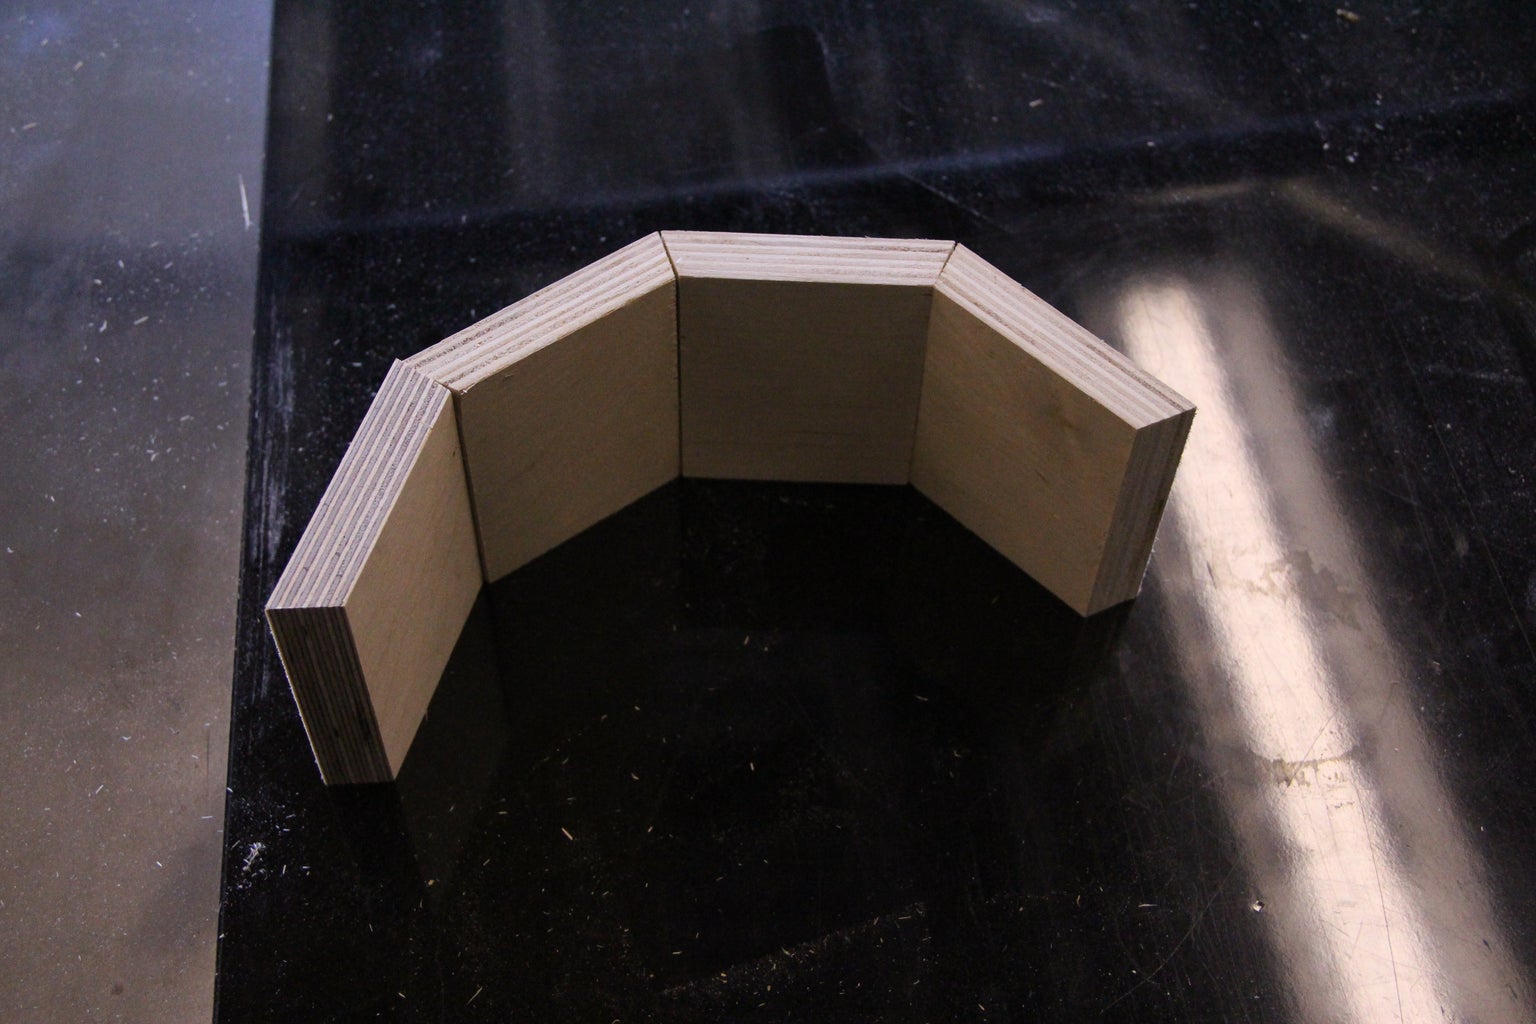
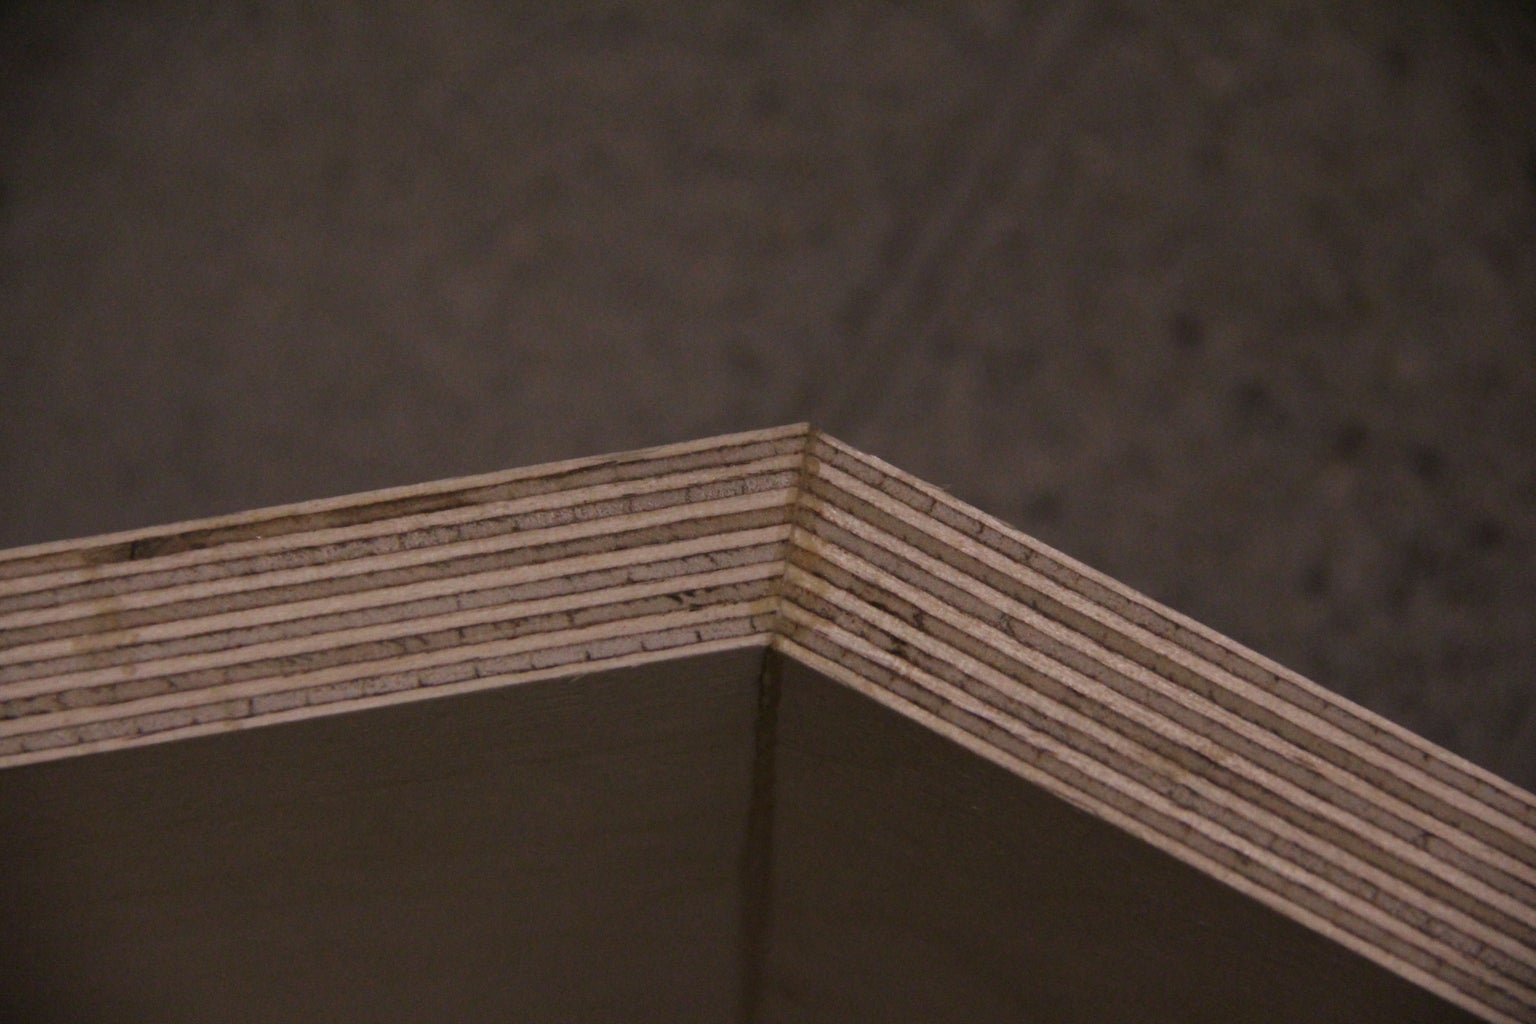
I made sure my pieces went together at a pretty darn good 140 degree angle, using a trial and error approach until the fit was right.
I glued them together, applying glue to both sides of each joint. The wood glue stiffened up a bit as I went around the ring adding each piece. That made it easier to wrap the ring with a long strip of bicycle inner tube. This big rubber band, available for free at any bike shop, is a very useful tool. Cut it open lengthwise to make a strip. I cut the strip in half to make two smaller strips. I wrapped the glued assembly gently at first and then more tightly. It's difficult to wrap tightly from the beginning without collapsing the wet glue joint.
After that cured, I traced out a mating nonagon from some thinner plywood and glued that to the back. I decided to cut a hole in the back after looking at pictures of Stanley Hick's banjo in Foxfire 3 around page 140. Search for a .pdf of the foxfire books or get them from your library. They have plans, pictures, and text that are much more useful than most things on the internet.
You could choose a less troublesome shape to make the frame for your drum.
The mongolian horse head fiddle, the morin khuur has a four sided resonant chamber. I learned from a member of Alash that the morin khuur used to use a four sided wooden box with skin stretched over the front and back as its resonant chamber. During communist occupation, it became standard to make all sides of the box from wood. He said this made the instrument louder and easier to keep in tune -- better for playing in groups. He compared the sounds of the new and old instruments to snowballs. The sound of old instrument was crumbly like dry snow, spraying a complex note. The sound of the new instrument, he said, was like a hard packed wet snowball, hitting each note very loudly and clearly.
Don't want to make a box? Use a metal ring like instructables user underkill did.
I learned from a friend that good drum frames have rounded edges so that they maintain only tangential contact with the drum skin.
Step 2: Neck


I made the neck from plywood. I started by sketching out a shape on my piece of plywood and tweaking it until it looked like it might work.
the angle the neck makes with the drum head should be a few degrees. A slight tilt. The strings make a straight line from the nut to the bridge. The harder the bend at the bridge, the more pressure the strings exert on the drum head. Some pressure is good, too much is bad. Read about bridge pressure and mandolins here.
design the root of the neck so that it doesn't contact the drum head when it inevitably sags. This could mean taking a scoop out of it, or having it offset from the rest of the neck.
I thought the two sheets of 3/4" ply were a bit thin when stuck together, so I stuck in a piece of that thinner stuff that I made the back of the drum frame out of. I left it out of the pegbox and the root of the neck where it wasn't needed. When I glued it all together, I butted the fingerboard side of all the pieces against a flat surface to keep it flat. I put a dowel through the tip of the headstock to strengthen the glue joint there. When all that was clamped together, I clamped the the two pieces on the tip together and similarly pegged them with a dowel.
Step 3: Rounding, Flattening, Fingerboard


After the neck lamination set, I shaped it with my knife and a set of rasps. Plywood can be unfriendly to traditional woodworking tools because the grain doesn't all run one way. Rasps work well.
I made the fingerboard section approximately "D" shaped, rounding the bottom and sides. The plywood I was using had some voids in it, so I attached a fingerboard: a thin, smooth strip of hard wood. I used a piece of (maple?) I found in the trash. It was quite hard and slightly oily. It was quite straight and smooth already, so I didn't bother planing it.
It can sometimes be easier to plane a fingerboard before gluing it to the neck. However, if the fingerboard is thin, it will take on the contours of the neck.
I smoothed the mating surface on the neck with a belt sander, using a straightedge to find the gaps and high spots.
I gave the handle part of the neck a quick sanding and put on some linseed oil - just a bit rubbed in really well. It makes the neck more pleasant to handle. Don't put it up near where the pegs go.
Step 4: Fitting


plug neck into drum.
To do this, we measure the cross sections that will poke through the drum frame. There's one near the end of the fingerboard and another at the tip of the neck spike. Mine were approximately rectangular, so I recorded those dimensions and transferred them to the drum frame. I tapered the spike so that it would seat snugly.
Next, I drilled a bunch of holes on the inside of each transferred rectangle. With the holes drilled close enough to one another, the core can be popped out, and a rasp can be used to smooth and further enlarge the area of the hole.
This is the final adjustment of neck tilt, so place the holes accordingly. I made the bigger hole first, then inserted the neck until it touched the inside wall on the opposite side of the drum frame. Then, the angle can be adjusted slightly and the distance from the top of the drum frame to the spike can be measured and recorded.
I enlarged both holes with a rasp until the fit was snug
Step 5: Drum Skin


Find a piece of thermoformed polyethylene plastic. When heated to its glass transition temperature, thermoformed polyethylene has a tendency to "relax" to its original shape. A similar repurposing of consumer packaging is using polyethylene soda bottles to protect large battery packs.
I used a cover from a large plastic food tray that I found in a recycling bin.
I cut it out and used short screws with fender washers to attach it to the frame. I made it as tight as I could while putting the screws in.
When the 'skin' was secured, I used a heat gun to evenly heat the whole unit. I started at the edges, allowing them to tighten before working inwards. I think the opaque white areas around the fringe are evidence oxidation from where I heated the plastic too much.
I tapped on the drum as it cooled and heard the pitch increase as the 'skin' tightened.
Lastly, I trimmed the plastic where it interfered with the holes.
Step 6: Pegs and Holes


I used my tapered reamer to enlarge the peg holes and a peg shaver to make the pegs. Here are instructions for those.
Tim Anderson has a similar and arguably betterway of getting the same thing done.
Nothing fancy here, just four strings, four pegs. Position the pegs so they won't interfere with one another.
Step 7: Nut, Bridge, Strings


I carved a nut from a piece of hard wood. I made mine approximately right-triangular in cross section so that it nests nicely with the end of the fingerboard. I didn't bother gluing it in because the strings will hold it down.
The bridge is made from the same wood that I used for the fingerboard. It wasn't very wide and would likely fall over. This creates a satisfying and usually benign pop after which horrified onlookers think you've destroyed your instrument. It's slightly inconvenient, so I made a slotted nesting piece to enlarge its footprint.
The strings I got from a local guitar store. Ask if they change strings, and if they'll give you a handful of old strings. Usually they're clipped, so they might be hit and miss for putting on your guitar. For an instrument with a shorter scale length, they're perfect!
The strings I got looked practically new. If yours need de-gunking, I've heard that boiling works well.
make v-grooves in the nut and bridge where you want the strings to sit.
I attached the strings by looping a particularly fat guitar string through the gap in the spike a few times, then pulling the loop out the rear of the banjo. All of the playing strings were fastened to that loop. If you're lucky enough to get ball end strings, they can be cinched around something by passing the end of the string through the ball to create a loop.
If you're not in a hurry, you could also shape a proper tailpiece like I did here.
Step 8: Playing a Fretless Banjo


The first time I made a fretless instrument, I scribbled markings where my fingers felt the frets should be. That's something done by ear. I marked out some common ones for guitarists like 5 (fourth), 7 (fifth) and 12 (octave). After those markers are down, it's not difficult to interpolate between them. By the time the pencil markings smudge away, you won't need them any more.


