

Introduction: Distance Sensing With the Micro:bit and Sonar (HC-SR04 Module)


This week I've spent some time playing with the fabulous BBC micro:bit and a sonic sensor. I've tried a few different modules (over 50 in total) and I thought it would be good so share some of my results.
The best module I've found so far is the Sparkfun HC-SR04 module, I picked mine up from Kitronik in the UK, and in the USA they are of course available from places like Adafruit (only kidding Sparkfun, here is your link). The reason this one is the best, is that it seems to work about 95% of the time on the 3V provided by the BBC micro:bit, where it can fall down is when you have other sensors and outputs running on your setup. However when using the onboard LED display on the micro:bit you'll probably be fine.
As I was just tinkering, rather than embedding the sonic in a project I used a breakout board and breadboard that was included in the micro:bit starter set I picked up from Kitronik in the UK.
Step 1: Setting Up the Hardware


Setting up the ultrasonic sensor is quite simple, especially with the Sparkfun sensor as it runs ok on 3V. It only has four pins. Left to right these are VCC, Trig, Echo and GND. VCC and GND are for power and Trig, Echo and GND are for your signal. I included GND in with the signal set since it's needed for a baseline. One of my common early mistakes with sensors and things like smart LEDs was not connecting all components to a common ground. I've included a picture and a schematic of my set up.
The easiest pins to use on the micro:bit are 0, 1, and 2. So I used 0 for Trig and 1 for Echo.
If you find that you're not getting readings from your HC-SR04 it might be that it's not getting enough power, if that's the case you can add power to the module as shown in the second picture. Using 3 x AA batteries gives you 4.5V, which should be enough. Hook it up as shown here with that common ground. Don't attach the 4.5V to your Micro:bit though, that could kill it!
Step 2: Setting Up the Software


The micro:bit is programmed in the browser, you can head to https://makecode.microbit.org/ to start programming your sonic sensor. First you'll need to add a new package to the standard set. I've used a package called Sonar.
Add the Sonar package to your blocks and set up your code as is shown in the fourth image.
Here we're using the bargraph command to display the sensor data (the variable called item). More info on bargraph can be found here: https://makecode.microbit.org/reference/led/plot-... Although amazingly I had to look at the code on GitHub to find out that leaving the bottom value as 0 allows it to auto adjust. You can change this to set your maximum point that you want to measure. It will give data in whole numbers (integers) and in the units you select. I believe the sonar block is doing the conversion calculations for us. I found that by switching to print the sensor data to screen (as shown in the fifth image) I was able to get a feel for the distances I wanted to measure and code for. If you're following along you'll have noticed that there are a lot of zero values, which cause a flickering of bar graph or other output. I thought it was easiest to filter these out with an if statement (found in logic). This was also the easiest way I found to work using LEDs like NeoPixels. An example of this is shown in the sixth image here.
Step 3: Add Some More LEDs Find a Project!
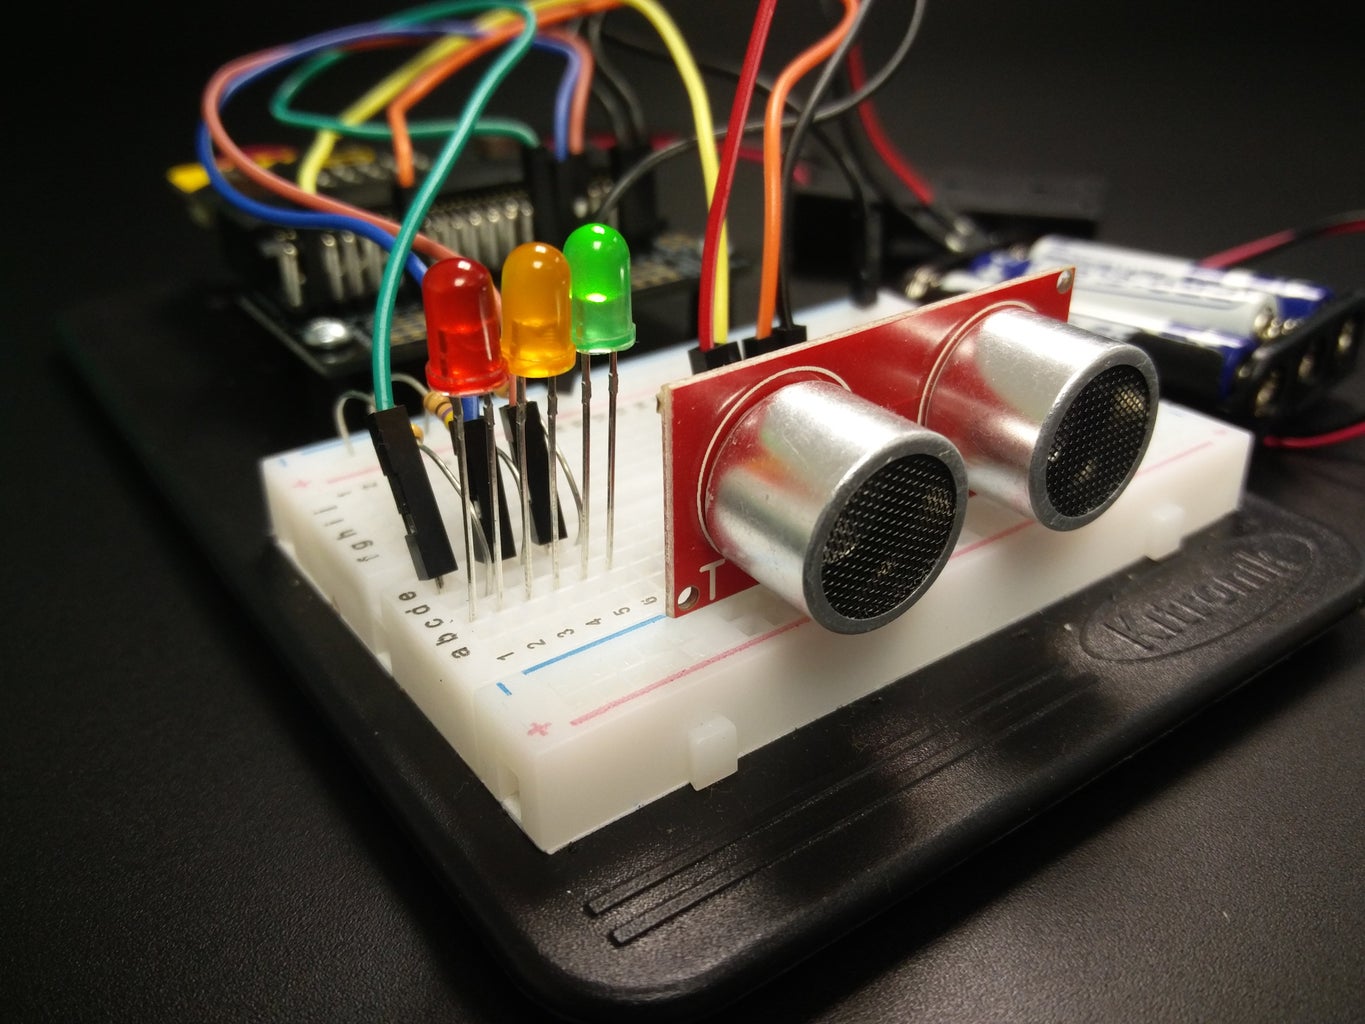


It's nice having the LED output directly on the board, but to make the sensor feel somewhat more useful I used a couple of versions with external LEDs. Some images and code are below. For these I needed extra pins, so the Kitronik Edge connector breakout board was really useful!
Setting up the board like the first image I decided to make a sort of traffic light system for when things get too close. The Green LED is for good, Amber for getting close buddy and Red is for too close now, how about you back off. I wonder if this might be a good practical use for close passes on a bike. Linking to a display on the front of the bike would give good visual feedback to drivers on whether their pass was ok. The distances would be changed in the real life example, as a 12 inch pass by a cyclist is not ok!!


