

Introduction: ES8266 Data Logger - Temperature Monitor


Hello! This project, I will guide how to make data logger for ESP8266 with Google spreadsheet. The data will updated by internet real time. You can access the data anywhere. Furthermore, you can access the data, save it into Excel for further analysis of your research, or just save it in month, year to monitor something like temperature, humid.
Also in this instruction, I will show to add more and more variable for your need.
Supplies
- ESP8266 https://amzn.to/3ZfjXVp
- Sensor BME280 https://amzn.to/3xTrvzR
- Wifi router with Internet
Step 1: Make a Circuit
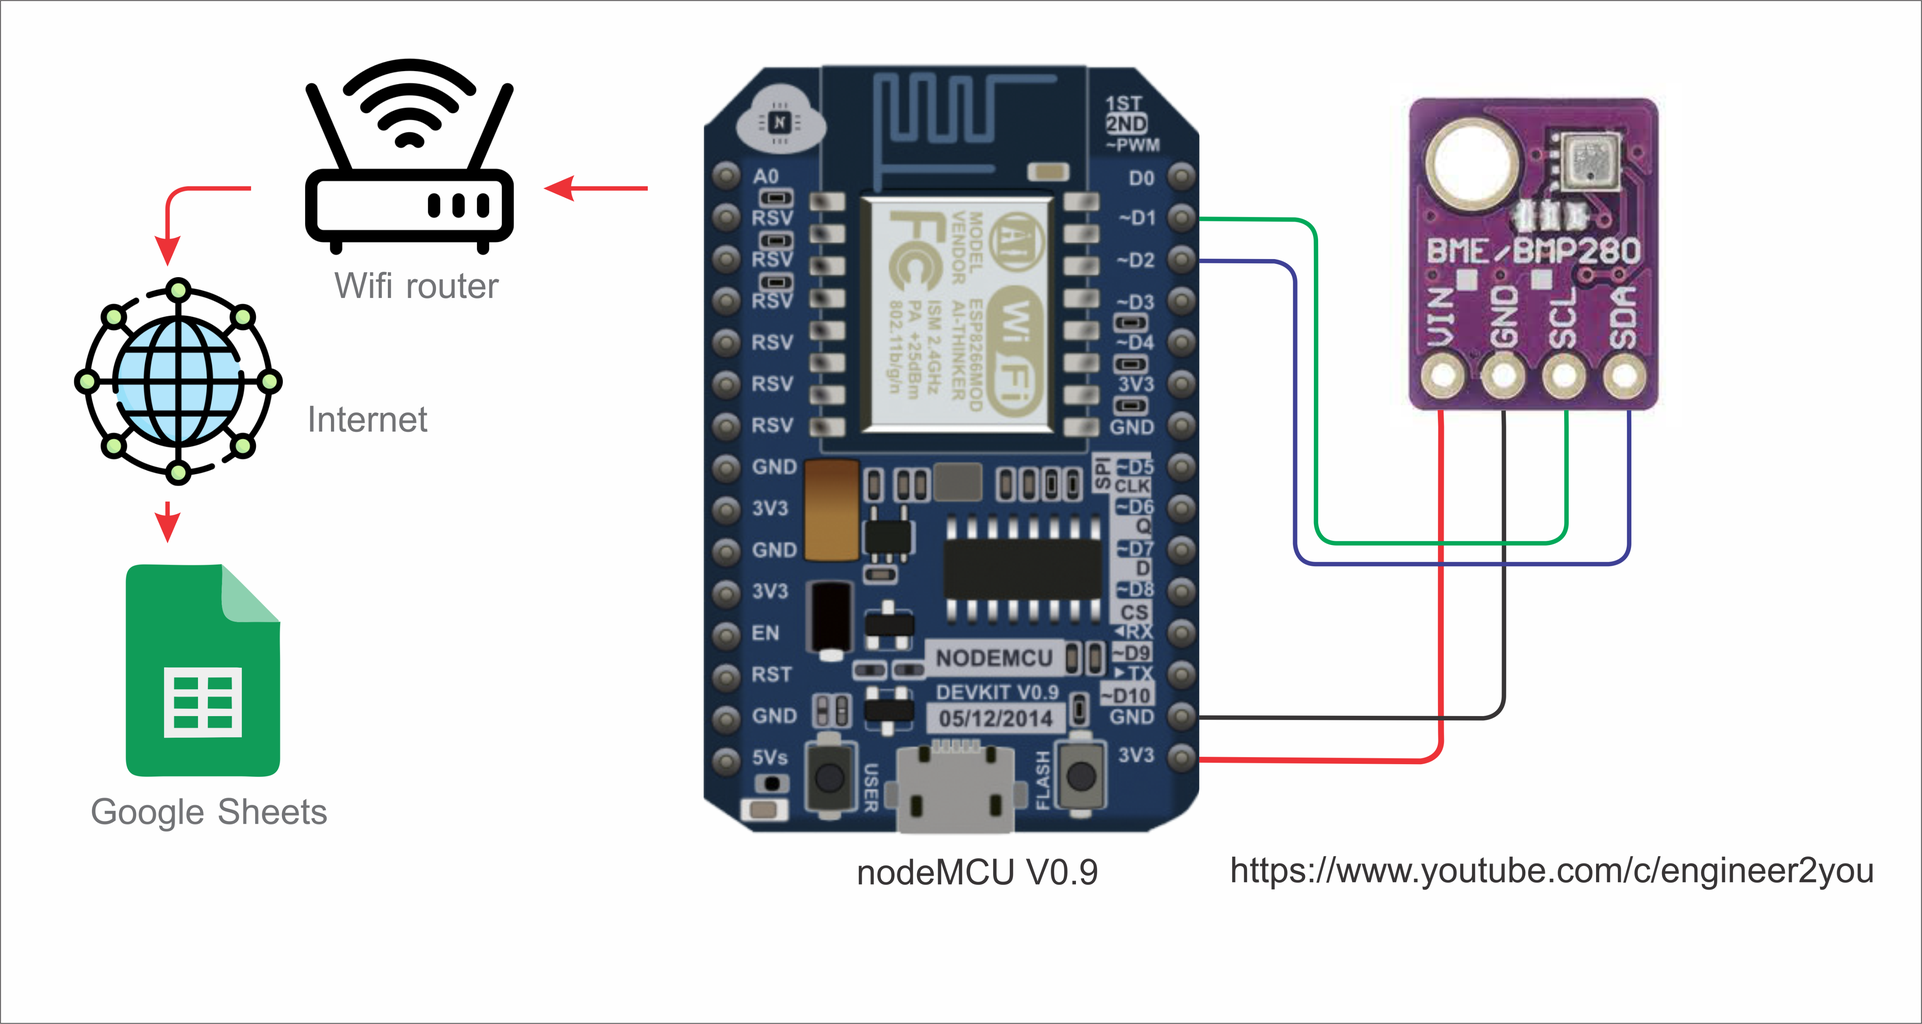
This is very simple circuit. ESP8266 connect with sensor temperature BME280 by I2C network, you only need 4 cable to handle this.
Look at diagram, we can see how it works: ESP board will read temperature, humid, pressure (of ambient atmosphere) and send to Google Spreadsheet by Wifi router of your home.
Step 2: Make Google Speedsheet


If you have google account, then access Google spreadsheet at link https://docs.google.com/spreadsheets/u/0/
Make new spreadsheet and paste the code to Apps script
The code can be download at http://bit.ly/3IqK8Sk
This code will get data from ESP8266 and paste them into each column
Step 3: Update Your Sheet ID


copy sheet ID of your spreadsheet and update it into Apps script
Step 4: Deploy the Code


Deploy the code to allow it getting data from ESP8266
At the end, copy the "Deployment ID", then paste it into Arduino code in next step
Step 5: Update Arduino Code


The Arduino code can be download at http://bit.ly/3IqK8Sk
Then, update "Deployment ID" into Arduino code. The ESP8266 will connect with the spreadsheet by this ID
Remember, modify wifi name and password as YOUR HOME wifi router.
After that, upload the code for Arduino. During starting up & connection to internet, the LED on ESP8266 board will blinking. If it is successful, the LED will OFF. We can open COM PORT Monitor to see the process of data sending.
Step 6: Check Result on Spreadsheet

Return to Spreadsheet, we can see the data is uploaded there.
Congratulation to us! We can use mobile phone, install Google spreadsheet from Apps store (iPhone) or CH Play (Android) to view the file anywhere with internet!
Step 7: Add 1 More Variables
What if you need to add 1 more variable to the spreadsheet?
I will show how to do:
(1) Update the arduino code for 1 more variable -> upload the code to ESP8266 board
(2) Update the Apps script to allow it get 1 more variable -> make new deployment
Step 8: Update the Arduino Code for 1 More Variable


at the beginning, I make code to send data of Temperature and Humid only. As checking on monitor screen, we can see structure how ESP8266 send those data. Follow that structure, we make 1 more for Pressure.
By this principle, you can send as much as data you wish
Step 9: Update the Apps Script to Allow It Get 1 More Variable


update the Apps script to get 1 more variable. After that, deploy new code for it. Return to the spreadsheet, we will see the new data of pressure was updated. By this way, we can add more and more variable for data logger as our wish.
Step 10: Finish

At the spreadsheet, we can add the Graph to view data in real time.


