

Introduction: Easy Brass and Copper Rose

This is my own take on a project I learned when I first started learning about metalworking, that has been around for a very long time. A very simple concept, and basically every part of this project is very forgiving (other than the edge of the sheet metal!). I have a lot of tubing offcuts that just sit around because they're too small to be very useful, but too big to justify throwing away, so I thought of this project as a way to get rid of it. Everything needed to do it is very simple, no big powertools of special tools other than a drill. And if you're not a pack rat like me but still want to make some pretty things, chances are you don't want to pay for sheets of brass or copper that you will likely not use all of. Just go to your local hardware store and ask for offcuts of tubing and you'll have more than you need. The project itself is just cutting out some shapes, putting them on a center rod, and bending them. Thats it, get cuttin and make a flower!
Supplies


Tools
- Drill and bits
- Ball-peen hammer
- 1/2" steel chisel
- Tin snips or Aviation snips
- 2 pairs of pliers
- Hacksaw
- File (optional dremel tool or bench grinder with wire wheel, these are just for cleaning up edges and buffing if desired)
Materials
- Brass and or copper tubing ( to cut to make sheet metal)
- 1x 4-40 x 3/4" panhead brass screw
- 2x 4-40 brass nuts
Step 1: Templating and Material Prep


The very first thing you'll have to do is draw up a template. You can find one online, but I prefer to just make them myself as I need them as its a lot more custom. Draw a few circles, at least 5 is generally a good rule of thumb, but you can add more if you want a bigger flower. Make each circle about a 1/2 inch bigger than the last, then mark the centers. Next start drawing out the lobes. The smallest I divide up into 4 lobes, and the bigger circles I divide up into 5. The largest circle should have fairly large lobes, as that helps it to look better when it is bent into shape. If you want a very full, blooming rose, make the lobes larger, and if you want more of a closed rosebud look then you can make the petal lobes a little thinner.Then you want to draw the leaves and sepal. For the sepal just draw a star about the size of the second smallest circle, and mark the center. The lines don't need to be very straight, and the points don't all need to be the same size as it adds to the organic feeling. The leaves I make 2 of and essentially just draw a pointed oval.
Moving onto material prep, you should have some brass or copper tubing. I like to mix metals, making the petals from one, and the sepal and leaves from another, but it isn't required I just think it looks nice. The brass tubing tends to be a bit thinner and larger in diameter, so you can cut it in half lengthwise with the shear. While wearing gloves open up the tubing a bit, enough to grab it with pliers or a vice, then slowly bend it flat while moving where you grab it until you have a mostly flat sheet.
The copper tubing will be smaller and thicker, so you will probably have to cut it up one side with a hacksaw. Repeat the bending/flattening process until you have a sheet of brass and copper. You can use the flat side of your ballpeen hammer to make it a little flatter as needed.
Step 2: Cutting and Drilling


Redraw or trace the shapes from your template onto your metal. You can drill the holes for the stem while the metal is still whole, or after cutting out the petals, leaves, and sepal. Drill a hole big enough to let the 4-40 screw pass through easily, I believe I used a 7/64" bit. Be sure to center punch your parts before you drill so the bit doesn't wander.
Cut out your shapes, being careful not to cut too close to the hole. The petals and sepal should have the holes in the center, and the leaves should have the hole on the side. Clean and round all your edges so they aren't sharp and look natural. You can use just a file and sandpaper, but if you have a dremel tool or bench grinder with wire brush they can make the work a lot quicker. If you want to polish it now would be the time. Use high grit sandpaper; 320 grit up to at least 1000, then buff with compound for a bright finish.
Step 3: Leaf Bending


Take your leaf blanks and chisel and lightly make a line across the center of the leaf, then make small lines branching off from the center to the edge at an angle. Next bend the leaf about 90 degrees along the center line, with your lines on the inside. Using the round side of your ball peen hammer peen the leaf until its nice and round. If you're going for highly polished you may want to buff the leaves again.
Step 4: Assembly


By this step you're ready to put it together. Pass your 4-40 screw through the petals, smallest to biggest, then the sepal, then the leaves. Put the first nut on and tighten until the center is tight and the parts don't spin, then add the second nut to lock it in place. If you want to add a stem you can tap a brass rod to 4-40 and just screw it on.
Step 5: Bending


With a gloved hand bend the layers up one at a time, setting it up so on a layer each petal is under one over one. You will be bending the rest of the way with pliers, so you can add tape or heat shrink tubing to the jaws so they don't scratch the metal as much. Bend each petal in half vertically, making very small bends so the slope is round. When each row is tight bend a small lip on the edge of each petal. As you get to about the 3rd or 4th row you can bend the petals farther back so the flower is blooming. The wider you made the petals the further you can bend them out while still having it look natural. The outer rows you can bend the edges so they form a bit of a point. It's helpful to look at a picture of a real rose while working. Last just bend up the sepal around the outer row of petals.
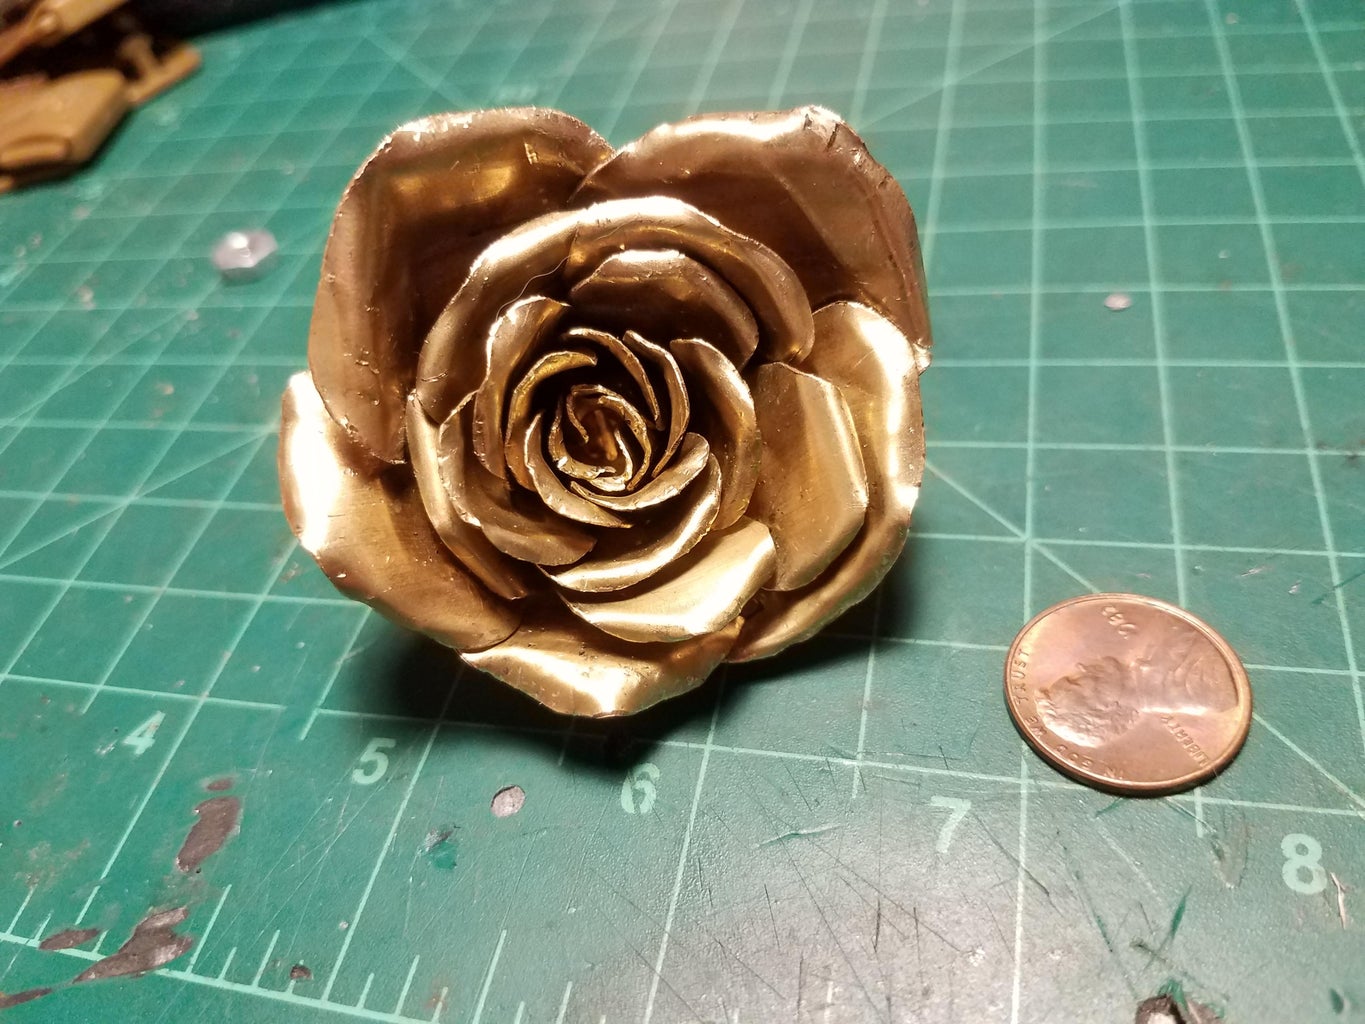
Step 6: Thats It

You should now have a nice looking rose. You can tweak the petals as you like to make it fit your liking and the amount of bloom you want. You can even use the 4-40 stem to attach a proper stem or mount it on something.

Participated in the
Metal Contest


