

Introduction: Esp8266 Firebase Connection


To start with this project, You need the following components:
- esp8266(NodeMcu v3 Lua)
- google account (firebase)
You can buy a esp8266 from here:
Step 1: Setting Up Arduino IDE, Install Esp8266 Board:


Install esp8266 Board:
Open Arduino IDE > File > Preferences > additional Boards Manager URLs > "http://arduino.esp8266.com/stable/package_esp8266c...> OK
Tools > Board: > Boards Manager > esp8266 > install
Step 2: Setting Up Arduino IDE, Install Arduino Json Library:
Step 3: Setting Up Arduino IDE, Install Firebase Library:

Install Firebase library:
Download latest stable build HERE > unzip in "Documents\Arduino\libraries"
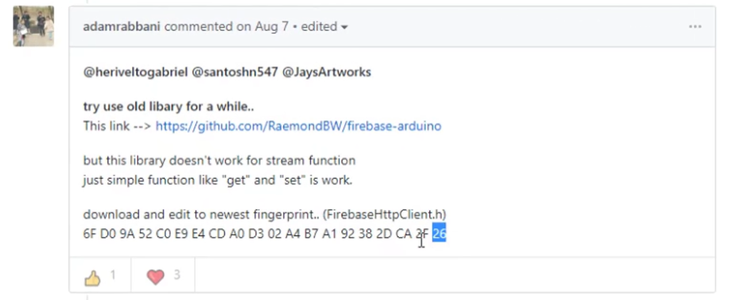
NOTE, There is a bug in "v0.3 Bi-directional streaming support" > update fingerprint CLICK HERE FOR INFO
Step 4: Firebase, Create Project:
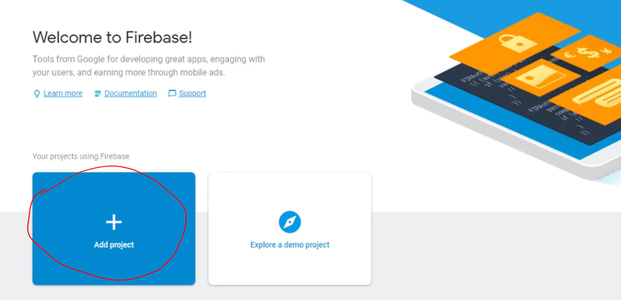

Create Firebase Project:
Step 5: Firebase, Project Rules:

Project rules:
Database(Realtime Database) > rules
{
  /* Visit https://firebase.google.com/docs/database/security to learn more about security rules. */
  "rules": {
    ".read": true,
    ".write": true
  }
}
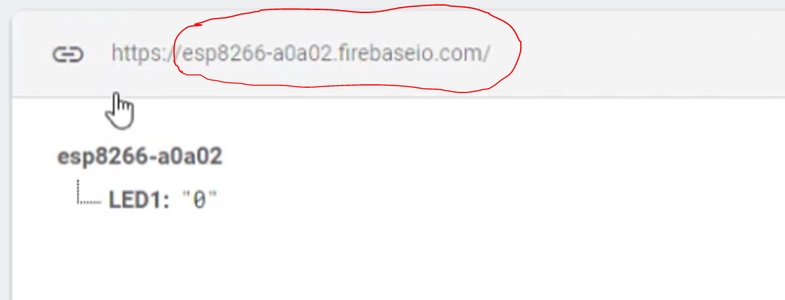
Step 6: Firebase, Realtime Database Data:

Realtime Database data:
Database(Realtime Database) > Data
Add: "LED1" > " "0" "
Step 7: Code:
#include <ESP8266WiFi.h>
#include <FirebaseArduino.h>
#define WIFI_SSID "SSID" #define WIFI_PASSWORD "WIFI PASSWORD" #define FIREBASE_HOST "?????????????.firebaseio.com" #define FIREBASE_AUTH "AUTH KEY"
int LED1 = 4;
void setup() { Serial.begin(115200);
pinMode(LED1, OUTPUT);
delay(2000); Serial.println('\n'); wifiConnect();
Firebase.begin(FIREBASE_HOST, FIREBASE_AUTH);
delay(10); }
void loop() { Serial.print(Firebase.getString("LED1") + "\n");
analogWrite(LED1, Firebase.getString("LED1").toInt()); delay(10);
if(WiFi.status() != WL_CONNECTED) { wifiConnect(); } delay(10);
}
void wifiConnect() { WiFi.begin(WIFI_SSID, WIFI_PASSWORD); // Connect to the network Serial.print("Connecting to "); Serial.print(WIFI_SSID); Serial.println(" ...");
int teller = 0; while (WiFi.status() != WL_CONNECTED) { // Wait for the Wi-Fi to connect delay(1000); Serial.print(++teller); Serial.print(' '); }
Serial.println('\n'); Serial.println("Connection established!"); Serial.print("IP address:\t"); Serial.println(WiFi.localIP()); // Send the IP address of the ESP8266 to the computer }
Step 8: Code, Personal Info:

personal info:
SSID > name of your wifi network
WIFI PASSWORD > password of your wifi network
FIREBASE HOST > something like "?????????????.firebaseio.com". You can find it in the "Data" tab of your Realtime Database.
AUTH KEY > Project settings > Service accounts > Database secrets
Step 9: Esp8266 Drivers:
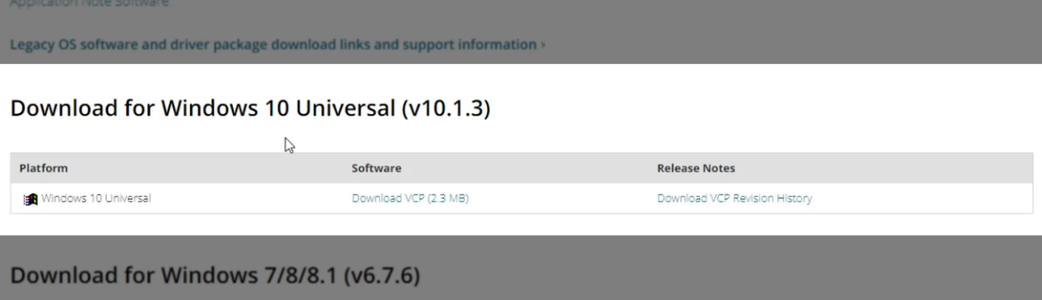
Download:
Click HERE > unzip and install
Step 10: Test the Code:

Upload code:
use esp8266 module in board manager > click "ESP-12E module".
Open serial monitor and set it to "115200".
And you should get the same data as in your database.


