

Introduction: "Factory" Reset Your Intel Edison/Troubleshooting Connection Problems


Aren't electronics great? I certainly think so. I do, however, get annoyed whenever they decide to not cooperate with me. I recently received an Intel Edison and IoT Dev Kit, and was enjoying the tinkering. I ran into a snag part way through, where I was not able to do anything with the Edison, from uploading Arduino sketches to SSH through the COM or Network. I believe a file was corrupted in the process of one of my uploads (oops).
After exhausting all of my resources, I decided I needed to reset the Edison. I could not find a single resource that could explain how to "factory" reset the Edison. I guess there really is no "factory" state, other than a fresh boot image.
This instructable is for anybody who wants a fresh Edison install, whether the reason is a lost password, corrupt files, or just a clean computer.
*Note* I am not liable for any damage (software or hardware) to your Intel Edison/Galileo. You are following my advice at your own risk.
Before going any farther, I want to thank Intel and Instructables for being awesome by selecting me along with 249 others to receive a Dev Kit. That was very surprising to me, and I am very grateful for it. Thank you!
Step 1: Is Power Causing It?

These next few steps will contain bits that might save you the hassle and time of actually re-flashing the Edison. If you want to flash without going through these checks, skip to step <>.
Something you want to make certain is the amount of power that feeds into the Edison. Because the Edison is housed on the Arduino breakout board, you can power the entire board like you would an Arduino: with a 9-v battery. You can also use a 9 volt wall-wart, but make sure the barrel plug is center-positive. Center-negative will fry the board (thankfully, almost all wall-warts are center-positive.)
Some signs that you are not receiving enough power include:
- Nothing lights up
- Anything meant to be controlled by the Edison is not working
- Uploading to the Edison fails
- You cannot SSH into the Edison
- The board keeps resetting
I am using a wall wart from Adafruit which can supply 2A; more than enough for what we need.
Step 2: Is Your Computer Seeing the Edison?

It is important to have the computer see the Edison; after all, you can't talk to somebody if the phone line is snapped.
To find out if the computer sees it, you'll need to go into your device manager. Go to the control panel, and click System. From there, you'll see Device Manager on the left with the Administrator shield beside it. Click on that, and now you can see everything that is connected to your computer. Look under Ports (COM & LPT). You should find "Intel Edison Virtual Com port ()" and "USB Serial Port ()". For me, it is COM7 and COM4, respectively. If you are not seeing anything there, you'll need to troubleshoot.
First, make sure the switch is in the position towards the micro USB ports. This sets the Edison in Device mode, instead of Control mode (essentially, it tells the Edison which USBs to use.)
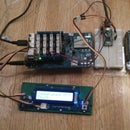
If that didn't fix it, make sure everything is plugged in. Check out the Edison image above for the description of the ports. Only the Upload port supplies power to the device. If you are uncertain of whether the USBs are supplying power, try swapping them. If both turn the device on when in the Upload port, they are working. Still not seeing anything? Try changing the ports the cables are plugged into in the computer.
Step 3: Is Your Memory Full?
I once (as in, yesterday) had a problem where I copied over too many files and my MMC became full. That called for reflashing. Other problems may ensue where you'll need to clear up space but don't quite know how. If you haven't gone too far since your last backup, you can just reflash and restore from the backup.
Step 4: Preparing for the Reflash
You need the Yocto image from Intel. You can download that from here. Do not unzip the .zip when the download is finished! You will later extract it directly to the Edison.
Connect your Edison to your computer, using the USB port closest to the switch on the board. You should see the Edison in "My Computer" or "This PC" (if on Windows 8). Go to this directory, and delete everything you see. This will not clear the MMC because Windows cannot see most of Linux's operating system files. After you delete the files, you may now extract the Yocto image to it. Make sure that when you extract it, the E: drive (or whatever letter your Edison is) has a whole bunch of files and not a single folder.
You are ready to move onto the next step!
Step 5: Reflash

Connect the COM USB to your computer. That's the USB farther from the switch. SSH into your Edison (making sure you're using the correct settings. Check out this step in another instructable I made.) The only way to reflash the Edison is to do so before it actually boots. With the SSH terminal up, reboot the Edison. After a little, you will see (check out the image above to see it.):
- Press any key to stop autoboot: 1
Press a key to keep the Edison from going any farther. Now you will see the following:
- boot >
This is a prompt. Type:
- run do_ota
And let the Edison work. Once it's done, your Edison is fully reset, and you have a clean OS! You should feel very happy because you're done, or frustrated if you still have to restore old settings. Enjoy!


