

Introduction: From Chromebook to Kiosk


My school recently began using SmartPass as a new system for monitoring our halls, and its pretty cool. Instead of paper passes, students can sign out to go to the restroom, or their locker, or water fountain via an app on their chromebooks. Staff can then monitor the halls, as well as call students or schedule passes through their own portal on their computers.
One challenge I've run into is that my students often do not have their chromebooks with them, or their devices are not charged, or just not working. This can place many challenges on our instruction, but it now also prevents them from being able to autonomously sign and out of class as well. As a test, I placed a chromebook in the front of my room and enabled SmartPass' "kiosk" mode to see if it would aid in the autonomy of the class. This allowed students to sign out with their own devices if available, or use the kiosk station instead.
After success with the simple chromebook station, I decided I would make a more permanent solution by creating a kiosk station to mount the chromebook to the wall. Through this instructable, I will share the designs and steps I took to create this simple yet awesome resource for my classroom!
Supplies
I used the following items, programs, and machines throughout the project:
- An old chromebook with a touch screen
- Two 40 mm 5v cooling fans
- An old USB cable
- Lock
- Flap Hinges
- Magnets
- Double-sided Adhesive
- Three 24"x12" sheets of birch plywood
- Adobe Illustrator
- Laser Cutter
- Wood Glue
- Bar Clamps
- Drill
- Dremel
- Bandsaw
- Screws / Anchors
- Hot Glue Gun
- Styrofoam
- Zip Ties
- Paper Transfer tape
- Wire Raceway
Step 1: Preparing the Chromebook


To create this kiosk, I am using an old Dell chromebook that has a touch screen. An alternative (and far simpler) route would have been to use a tablet, or an iPad, but I worked with what I could find. As this model chromebook does not have a lay flat hinge, I needed to do some modifications before moving forward.
I started by opening the chromebook's back cover and removing the hinge so the screen would be separated from the keyboard / CPU section. With the hinges off, I could flip the screen around and lay it flat over the back of the device to make a tablet-like device. When flipping the screen around, it's important to be careful with any wires and cables that may get pulled or twisted. On my device, there was a ribbon cable for the screen, as well as a thin cable for the wifi antenna. Many cheaper chromebooks do not have connections that are designed to be taken apart, so handle these cables with care.
To be able to replace the back cover, which would now be below the screen, I needed to cut away some material to allow the cables to pass through. Using a bandsaw, I cut away the corners of the back cover without cutting into the mounting holes so it could be reattached.
This model chromebook has an interesting hinge design that extrudes from the face, again preventing the device to be flush mounted as I desired. I removed the hinge from the screen housing, which was actually part of the screen frame so it needed to be cut off using a Dremel. I then cut the extruded / bevel sections off of the housing to allow the screen to and bezel to be flush also using a Dremel.
Lastly, the back of the chromebook was reattached and sealed, and the screen was attached to the back using double-sided adhesive tape.
Step 2: Designing the Box

Now that the chromebook tablet was created, I could take accurate measurements to design a box that would house it, as well as the charger and cooling fans.
For security, the box has a lock and key to keep it latched shut, as well as hinges that are placed on the bottom and no exposed screws to prevent tampering. Hiding the hinges and latches would also create a cleaner, enclosed box appearance. The box would open through a front / bottom piece that is attached to a side / side / top / back piece with hinges.
Using Adobe Illustrator, I created a box that has dovetail like joinery to fit together. In addition to the main enclosure, I created shelves and tabs to hold the chromebook in place and to support it while in use. Additionally, I created vents for cooling fans to be fitted so the device would not overheat.
The enclosure design is below in both .ai and .svg file formats. If you are looking for a free alternative to Adobe Illustrator, check out Gravit Designer which is a super powerful web-based application that works on Macs, PCs, and Chromebooks. i have tutorial videos for Gravit on my youtube channel and discuss Gravit and other vector design programs in this Instructable I wrote a while back.
The dovetail joints are created to have the same depth as the material they are cut into in order to create a seamless overlap. My design has been created for 1/4" plywood, but you could easily add or remove how much the joints extrude for a different material thickness. Additionally, I did not include holes for the hinges in the design as it may be more accurate to mark and drill them by hand. This enclosure design is also quite generic and should fit a variety of 10" devices, I left plenty of room for plugs and chargers as I figured I would swap devices overtime.


Step 3: Cutting


Using my 40 watt Universal CNC laser, I was able to cut the enclosure design out of 1/4" birch plywood. The design was split across three 24"x12" sheets, though larger sheets could be used if a larger machine was available.
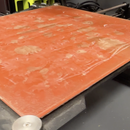
I find my laser tends to scorch the wood when gutting through 1/4" material. To prevent scorching on outer pieces that would be visible after assembly, I used paper transfer tape to mask the wood on all outer sides, top or bottom. This tape was then peeled after cutting and created a clean look without the need for sanding or further finishing.
Step 4: Assembly


To assemble the main part of the enclosure, I used wood glue to adhere each dovetail joint together, then bar clamps to hold the enclosure in place as the glue dried. In addition to gluing the sides of the enclosure together, I also glued in the main shelf and supporting tabs that would support the chromebook during use, all using wood glue.
As mentioned earlier, I chose not to laser cut holes for the hinges but instead drilled and mounted them by hand during assembly. This allowed for me to align them more precisely after initial gluing and ensure proper functionality. Using short machine screws, I first secured the hinges to the back plate. I then drilled through the bottom after marking holes through hinge and attached the bottom / front piece using M4 machine nuts and bolts.
The latch mechanism consists of three parts; a lock and key, hook, and magnets. The lock and key installs easily into the laser cut hole on the left side. The hook, which catches the lock when closed, is glued into the front panel using wood glue. And the magnets are used to ensure a flush and tight fit when the box is closed. As the chromebook will lean against the front, I didn't want all of the pressure to be on the lock hook as I thought it would not close fully. Magnets glued to the crossbeam and the front panel ensures the box remains closed during use, and even when not locked.
Lastly, I hot glued foam and wood tabs to further support the chromebook and hold it in the right position. I decided to wait until the entire box was assembled to do this, rather than attempt to laser cut grooves so I could ensure a better and more precise fit after getting hands on with everything in place.
Step 5: Cooling


Enclosing any electronic device has its challenges, one if which is keep it cool. As this device will run all day in a solid wood box along with its charger, I was concerned about making sure it stayed cool.
In addition to laser cutting vents, I created a pass-through cooling system that would be powered by the chromebook's usb ports. I first cut the end off of an old usb cord and stripped away the insulation. The only wires we need are the power connections, which are red and black and operate at 5 volts. I soldered two 40 mm 5v fans to these wires ensuring there was enough cable to span across the enclosure during installation.
I then installed the fans into the precut holes on either side of the enclosure using M3 nuts and bolts. The fans are oriented so one fan pulls air in while the other pushes it out. This ensures that cool air is constantly passing through the enclosure and right past the chromebook's own cooling fans and vent system.
Step 6: Mounting


The enclosure has three holes precut into the back panel which made installation a breeze. After positioning the kiosk on the wall and ensuring it was where I wanted, I marked the holes using a sharpie.
After removing the enclosure, I drilled into the cinder block wall using a concrete bit, then installed concrete wall anchors into each hole.
Lastly, I used the screws that came with the anchors to securely mount the kiosk box to the wall.
Step 7: Cable Management


As this is a school, I am limited on where outlets are located and even more limited when wanting to change positions of power and things. Fortunately, there was an outlet in the general area I wanted to kiosk to be so I was able to order a 10' charger power cord to reach it.
Rather than letting the cable hang, I bought white cable raceway that I installed to guide and conceal the cable along the wall. If this was my home, I would have fished the wire through the wall, but as this is my classroom, and the walls are cinder block, cable raceway was the best option. Raceway could, and potentially should, be mounted using screws in high traffic environments, but I attached the raceway using the adhesive it came with instead. I also used a bandsaw to cut sections of the raceway to length for a custom fit.
The shelf that the chromebook is resting on was designed to allow wire to pass through without colliding with the front panel when the enclosure is closed, while also allowing for excellent hidden storage. I mounted the charger to the underside of the shelf using double-sided tape, as well as coiled any excess wire using zip ties without getting in the way of the chromebook.
Step 8: Final Installation


Once all cables were installed, I placed the chromebook in the enclosure and plugged it into the charger and fans. By holding the chromebook in place, I was able to close the front panel around it to support the chromebook and seal the enclosure. I was worried about it being difficult to close, or the chromebook falling out while closing, and even considered attaching the chromebook to the front panel instead, but thought this would be the simplest route without placing too much strain on the front panel or hinges.
After closing the front panel, the magnets held the enclosure shut allowing the kiosk to be locked with ease
Step 9: Setup and Implementation

The final step was to setup the device and begin to implement! In the chrome os settings, I disabled the auto sleep function so the screen would always stay on and the device wouldn't lock. I also enable the onscreen keyboard to auto appear so students could type their names while signing out through the SmartPass app.
SmartPass already has a kiosk mode, so that was easy to enable. I also like that if kiosk mode is exited, which can be done easily, it automatically logs out of the account. This means that if a student tries to exit the pass kiosk for another purpose, the device will be logged out and disabled until I log back in.
One thing I didn't do but considered, and am still considering, is an external usb port. If I need to access the keyboard, or wanted to connect a flash drive or something, I need to open the enclosure and realistically remove the device. This hasn't been a problem yet, but I am considering adding a remote and mountable usb along the bottom of the kiosk if I see a need for it after extended use.
In conclusion, I am really pleased with how this kiosk turned out! It looks great in my classroom and matches many of the other things my students and I have created throughout our makerspace. Additionally, it's another functional example of what the resources in our makerspace can be used to create, something I am always working to provide more and more examples of. I hope you enjoyed this instructable and that the resources and methods I provided are helpful for you, thanks for reading and happy making!


