

Introduction: GITD Pachinko Black Light LED Enhancements


Hi all, So one of the reasons I haven’t posted any new Instructables for almost going on two years is not because of Covid, but it surely didn’t help much, its just prior the beginning of Covid I started working on restoring my fathers Pachinko Machine. See picture Nishjin - No More War machine. It had been collecting dust in my shed for over 20 years. I remember it had been working at one time.
As it turns out I had such a fun time researching and restoring it I ended shopping around for another machine so my kids wouldn’t fight over the one. And I was warned by fellow Pachinko People that I needed to be careful because once you start Pachinko restoration they tend to multiply. And I can confirm this theory as I now have 8 machines. 1-3 100% fully restored. 5-8 machines waiting to be worked on.
Anyways this Instructable is not about any of those machines. I’m currently working on #4 and I had discovered early on with the other machines, I restored, that they have some variance of black light glow on some of playing field parts. So I thought I would upgrade the lighting system on this particular machine. Plus enhance some of the play field parts with Glow in the Dark paint.
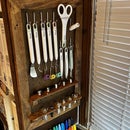
Supplies
- Glow in the Dark Paint, Paint Brushes, Toothpicks
- Chrome & Gold Touch up paint
- LED lights
- Wiring
- Various Cleaning Products
- Various Cleaning Swabs
- 9v Battery
- Soldering Irong & Solder
Step 1: Cleaning


First off I’m not going to go through my rigorous restoration process. Mostly because depending on the machine, it can be as simple as cleaning and polishing the surfaces or a full bore strip down to the raw wood and build back up even replacing missing parts process. For this Instructable I’m focusing on getting the parts to be enhanced cleaned and ready for improvement.
Plus changing the original E10 light bulbs, used in virtually all pachinko machines, to brighter LED bulbs.
Now to clean the parts throughly I usually remove them from the playing field. (Note for you first time restorers out there, be very careful doing so as the plastic on these machines are over 50-70 years old and can be quite brittle. If it looks like it might not be and easy off then I’d leave alone and take to using q-tips or cotton swabs to clean it.
I use Gel Gloss (available on Amazon) for cleaning the plastic parts. Resist the temptation to hose them down if still attached to the machine. I find spraying a small amount into a plastic cup or old plastic Pringles container gives me enough to work with in small areas. For metal parts, such as the pins or other shiny metal surfaces I use Blue Magic buffing compound (available on Amazon). Warning: Highly recommended you use plastic gloves, FYI a little goes along way. Apply liberally let an let set for a couple of minutes then wipe off with cloth or cotton swabs. I've found if I cover a piece then move on to another piece and cover it by time I come back to the first piece its long enough to get a good clean on it.
Note: another tip for you first time Pachinko restorers out there, I use old cotton tennis shoe laces to rub and polish the pins. Simply wrap around each pin and give a seesaw motion to get the stems a high gloss shine. The heads of the pins I'll use a dremel (at the slowest speed) to really get a shiny result.
For the pics in this section I’m showing you how dirty these tend to start out and the finished cleaned version. You’ll notice the "4 Element" centerpiece, as this one is called, doesn’t look to awful before it was cleaned but after it really looks pretty good.
Step 2: Rewiring With LEDs


I’m going to swap out the old E10 light bulbs for brighter more colorful LEDs in certain positions on the playing that are located behind various plastic parts. Plus I’m going to add more lights than what are typically on a traditional Pachinko Machine. Normally there are just a few lights if any on these vintage machines. A ball out light that indicates there are no more balls available to continue playing. And 1 maybe two jackpot lights, again usually behind one of the plastic pieces or the centerpiece jackpot.
First let me explain the basics. The E10 lights, and the LEDs for that matter, can all be powered by a single 9 volt battery.
In the first pic you can see the wiring system stripped off a previous machine. A simple setup really, Battery wired to a relay switch when compressed to make contact will light the the ball out light. A second set of wires going to another relay switch when the circuit is closed will light the jackpot (in this case) two E10 lights. The LEDs I like to use are Chanzon brand you can get on Amazon. 6 different colors in a variety pack. These are ready to go with built in Diodes. Just wiring together with a power source and Bingo you have Light.
Based on this machines configuration there were only 2 lights being used on the original machine. After examining the playing field and the plastic parts I determined I could enhance the lighting effects of the game by adding more jackpot (green) LED lights and extra ball out (red) LED light. I drilled additional holes in the playing field strategically placed behind the parts I wanted to illuminate.
When I first started working with LEDs I knew the existing E10 light holders wouldn’t work with the smaller LEDs to hold them in place. So I designed a series of LED light holders to fit various situations on specific machines. I made sure they would accommodate the LEDs with the built in Diodes. 3D.STL file attached.
I tested all my various LED colors trying out each color behind the parts I’m going to illuminate and decided the Green worked best behind the 3 rows of Green spaces plastic that wrap around playfield portions. The first and original ball out light was in the top left corner behind the circular feature. I added another Red LED behind the opposite side circular feature.
I matched the width of the other original holes with a drill bit. Then carefully drilled through the playfield, I added the LEDs through my 3D brackets. From the back the top right two (left Red)(right Green). With the wires left out to complete circuits later.
The two on the top left are actually hidden behind the ball ramp. So sorry in my excitement I neglected to get a pic of their placement. Same goes for the other win light on the bottom left. But on both of these new holes you can see the wires poking out.
The last LED is a Yellow one which went into the never used center Jackpot port. Again you can see the wires poking out.
A quick word about relays (switches), the original leaf switches are insanely simple. Two separated thin strips of metal suspended near a toggle device that when pushed together complete the circuit and light the bulb. Funny story I bought some micro switches, and I do mean micro, and they were not what I was expecting. But rather than send them back I gave it the old college try and made them work. Just had be be a little more creative with their placement. So added my switches and completed my wiring. All powered by one 9 volt battery. One of these days I'll figure out Millimeters.

Step 3: Paint Parts With Neon Colors


After thoroughly cleaning the plastic parts I make sure to remove any flakey or loose paint that didn’t come off, when cleaning, with an x-acto knife or tooth pick. This way the paint I add will adhere better.
The neon paint I use is glow in the dark as well. So a good dose of LED light lights them up pretty well. And they really pop under Black Light.
In some of the more detailed areas I find using a toothpick again and helps by dropping a small pool of paint into the spot I’m filling. Then carefully moving the drop to spread the paint with the toothpick gives me better control than a tiny paint brush.
For the most part in the pics I’m showing the before painting and after paint then a Black light pic.
Another product I’ve found useful are paint pens. Particularly the Metal or Chrome. They’ve come in handy for detail parts the have since lost their original chroming effect.
The best Chrome paint pen I’ve found is Molotow Liquid Alcohol Chrome Paint Pen. They come in various nib sizes. As you can see in the pictures it really makes the items pop. Note: the paint pens are plunger based meaning you push down on the tip to get the paint flowing. I typically get a good stream to the nib then use a very very light touch in applying the paint.
Step 4: Final Results


Lastly is the process of reassembling the machine. Putting all the parts back in place. Testing the lights via the switches which tells me it will work when actually playing with balls. Some final cleaning of playing field or parts that may have gotten dirty from reassembling. And of course final play test after adding the balls.
In the first two pics you can see the jackpot lights (all three corners green, and center yellow) In the third pic you can see the Jackpot lights and the Two upper corner Ball Out Lights (red) lit up. And lastly the machine under black light.
The playing field parts really pop under black light. I haven't decided yet but I may go back and add a black light LED strip around the metal ring on the outer edge. I'm pretty happy with it as is at the moment.
After having all my lights rewired and adding the Neon/Glow in the Dark paint gives this Pachinko machine game play an extra something special, even in the day light. But turn the lights off and fire up the Black Light and wow it takes it to a whole new level.
When time allows I'll create a short video of game play both with and without the black light effect.
Hope you light the results.

Participated in the
Make it Glow Contest


