

Introduction: Getting Started With the Raspberry Pi 2 (LabVIEW)


This in-depth guide will go over the steps required to connect the Raspberry Pi 2 Model B (RPI 2) or Raspberry Pi 3 Model B to LabVIEW using LabVIEW MakerHub LINX. LINX is used to interact with common embedded platforms like Arduino, chipKIT, Raspberry Pi 2, Beaglebone Black, and myRIO.
LabVIEW is a graphical programming syntax that makes it simple to visualize, create, and code engineering systems.
If you need help or would rather watch videos, check out this page for all the information and videos you'll need to get started.
With both the Raspberry Pi 2 Model B and the Beaglebone Black, you can actually deploy your LabVIEW VIs to the board and run with a computer to visualize your data or run headlessly. You can also set your VI to run on startup so that each time you power on the RPI it will run your VI without a computer!
Digilent sells a bundle that includes the Raspberry Pi 2 and LabVIEW HomeBundle called the Raspberry Pi 2 Physical Computing Kit. Feel free to check out some of the other Instructables I have made to see some of the things you can do with LabVIEW and LabVIEW MakerHub.
Step 1: Materials


Step 2: LabVIEW Installation

The first step is to download LabVIEW or use a physical copy. If you do not own a version of LabVIEW, you can download the free trial from National Instruments.
If you have LabVIEW Home Bundle, you need a specific version of LabVIEW. Check out this Instructable for step-by-step instructions on how to install LabVIEW Home Bundle.
Next, install LabVIEW. Once LabVIEW is finished installing, restart your computer. Now we need to install NI VISA.
Step 3: Install NI VISA

Next, install NI VISA. NI VISA is utilized by LINX in order to communicate with microcontrollers and other supported boards. The download has an installer that will guide you through the installation process.
Step 4: Install LabVIEW MakerHub LINX


To connect with LabVIEW, LabVIEW MakerHub LINX is used. LINX provides multiple LabVIEW VIs ranging from a basic analog read to setting up different communication protocols and more.
Check out the video series linked above if you want to use a video guide to get started!
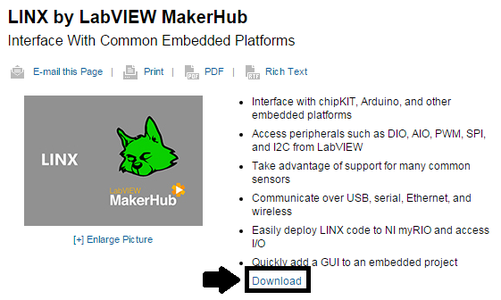
If you're having trouble, a detailed installation instruction video can be found on the LINX main page on the LabVIEW MakerHub website by clicking on "Getting Started."
Download LabVIEW MakerHub LINX here by clicking on download from the attached page. Click download toolkit after clicking download. This is a VI Package Manager link so click launch application to open the VI package manager. Make sure if this isn't your first time with LabVIEW to update your VIPM so the newest LINX builds can be shown.
Choose your version of LabVIEW in the upper left corner of the window that pops up and click install. The list of packages will be listed...just click next. Accept the license agreements. LINX will now be downloaded and installed. Once the installation is finished, restart LabVIEW and close all of the VIPM windows.
Step 5: Setting Up the RPI2
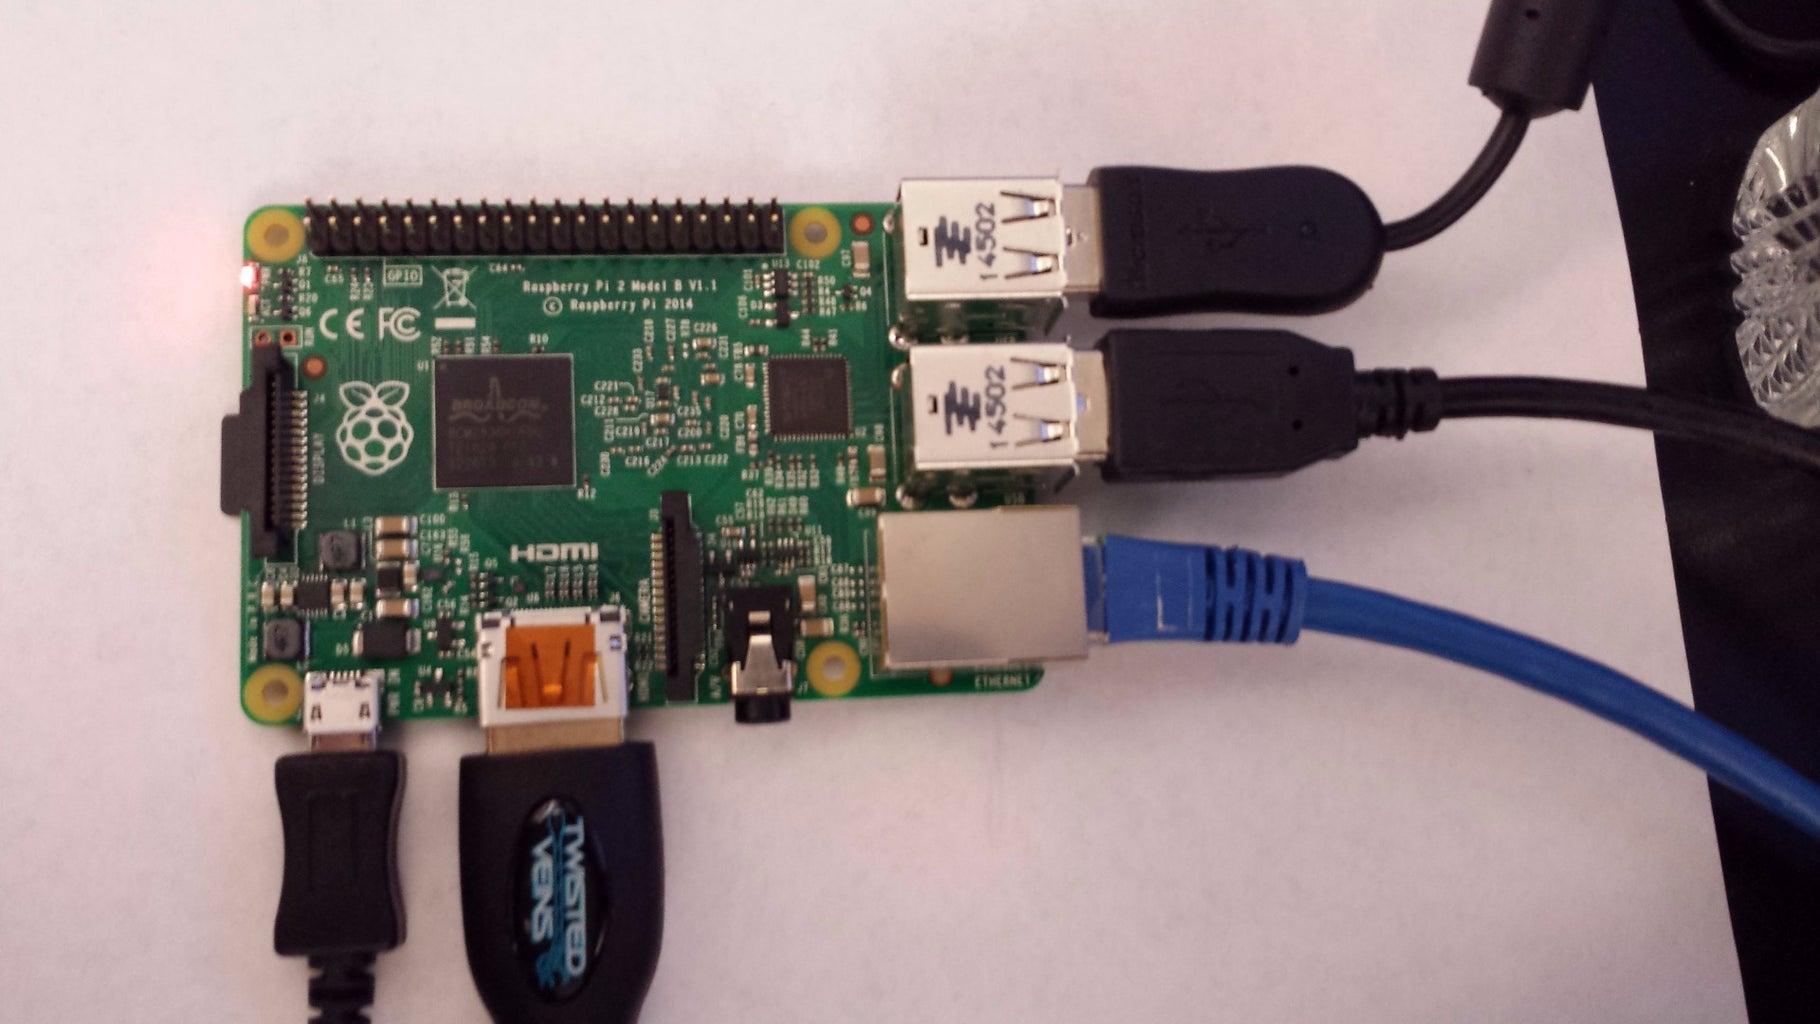


First off, you'll need to install a Raspbian image to your microSD card to run on your RPI 2. If you have a microSD that came preinstalled with raspbian, it might be a good idea to install the latest version. Follow the youtube video guide on how to get the image and put it on your microSD card. Make sure when you boot the raspberry pi that you have your Ethernet cord plugged in.
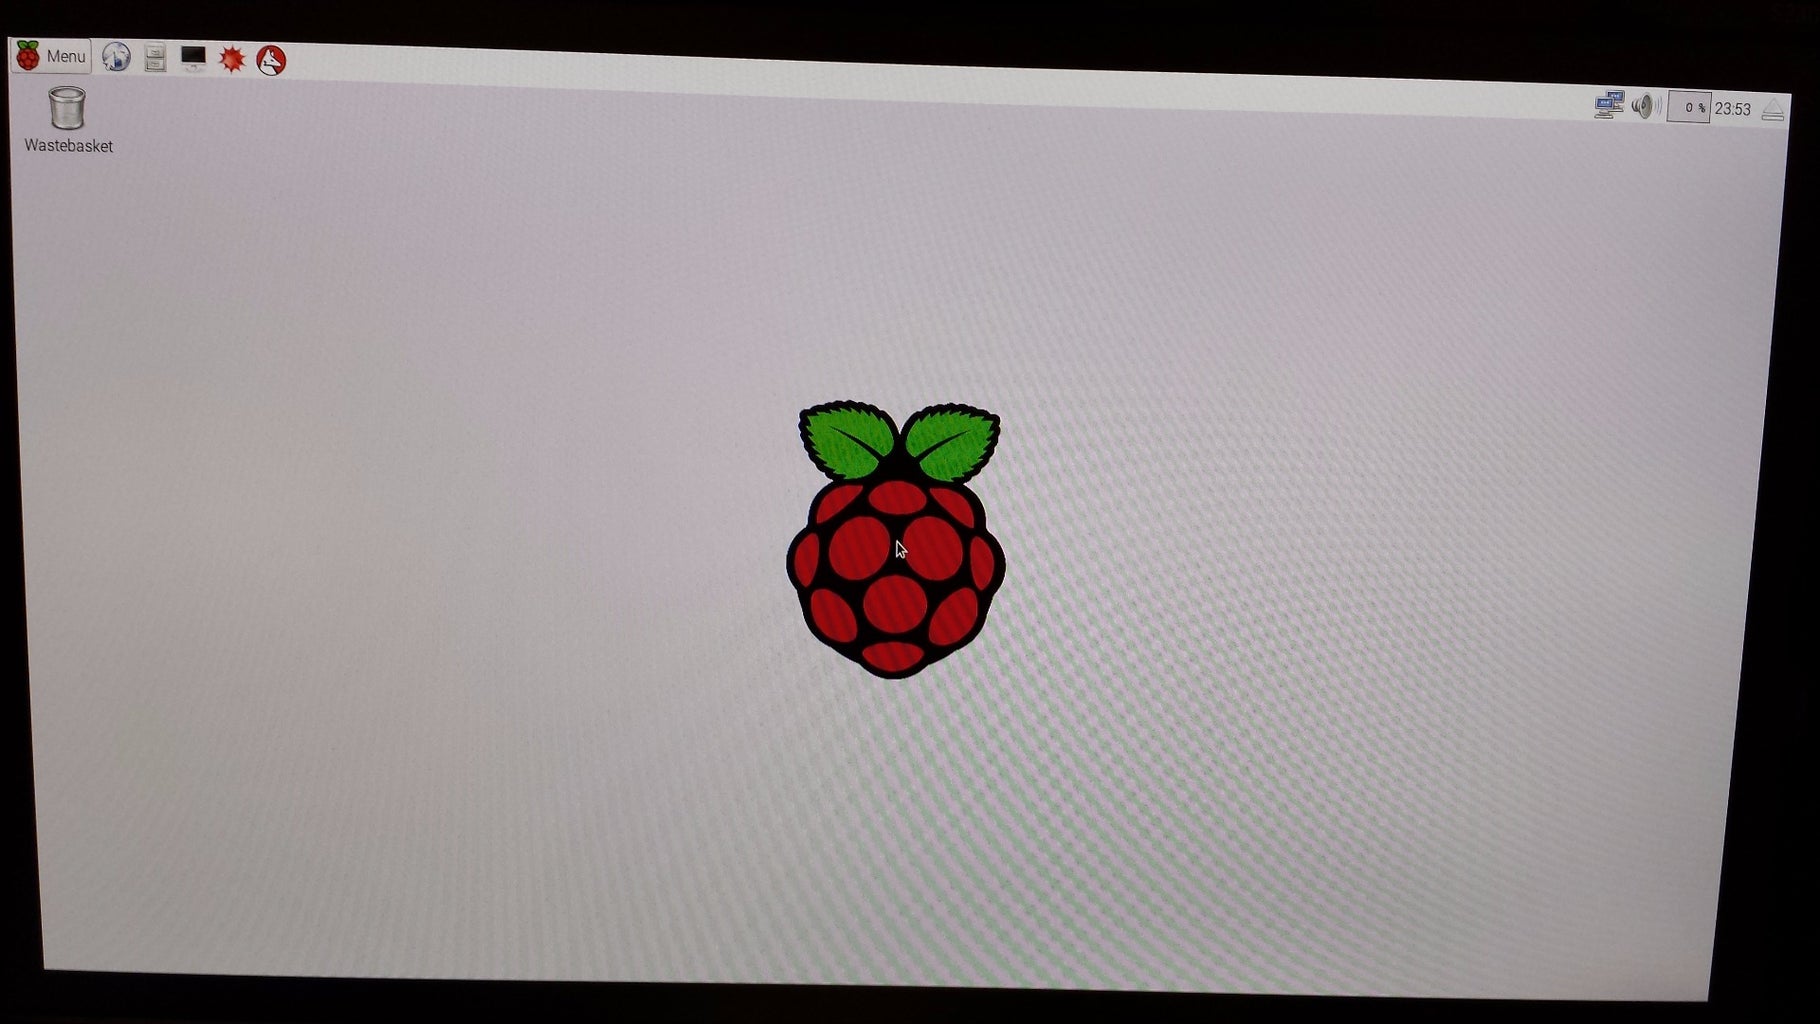
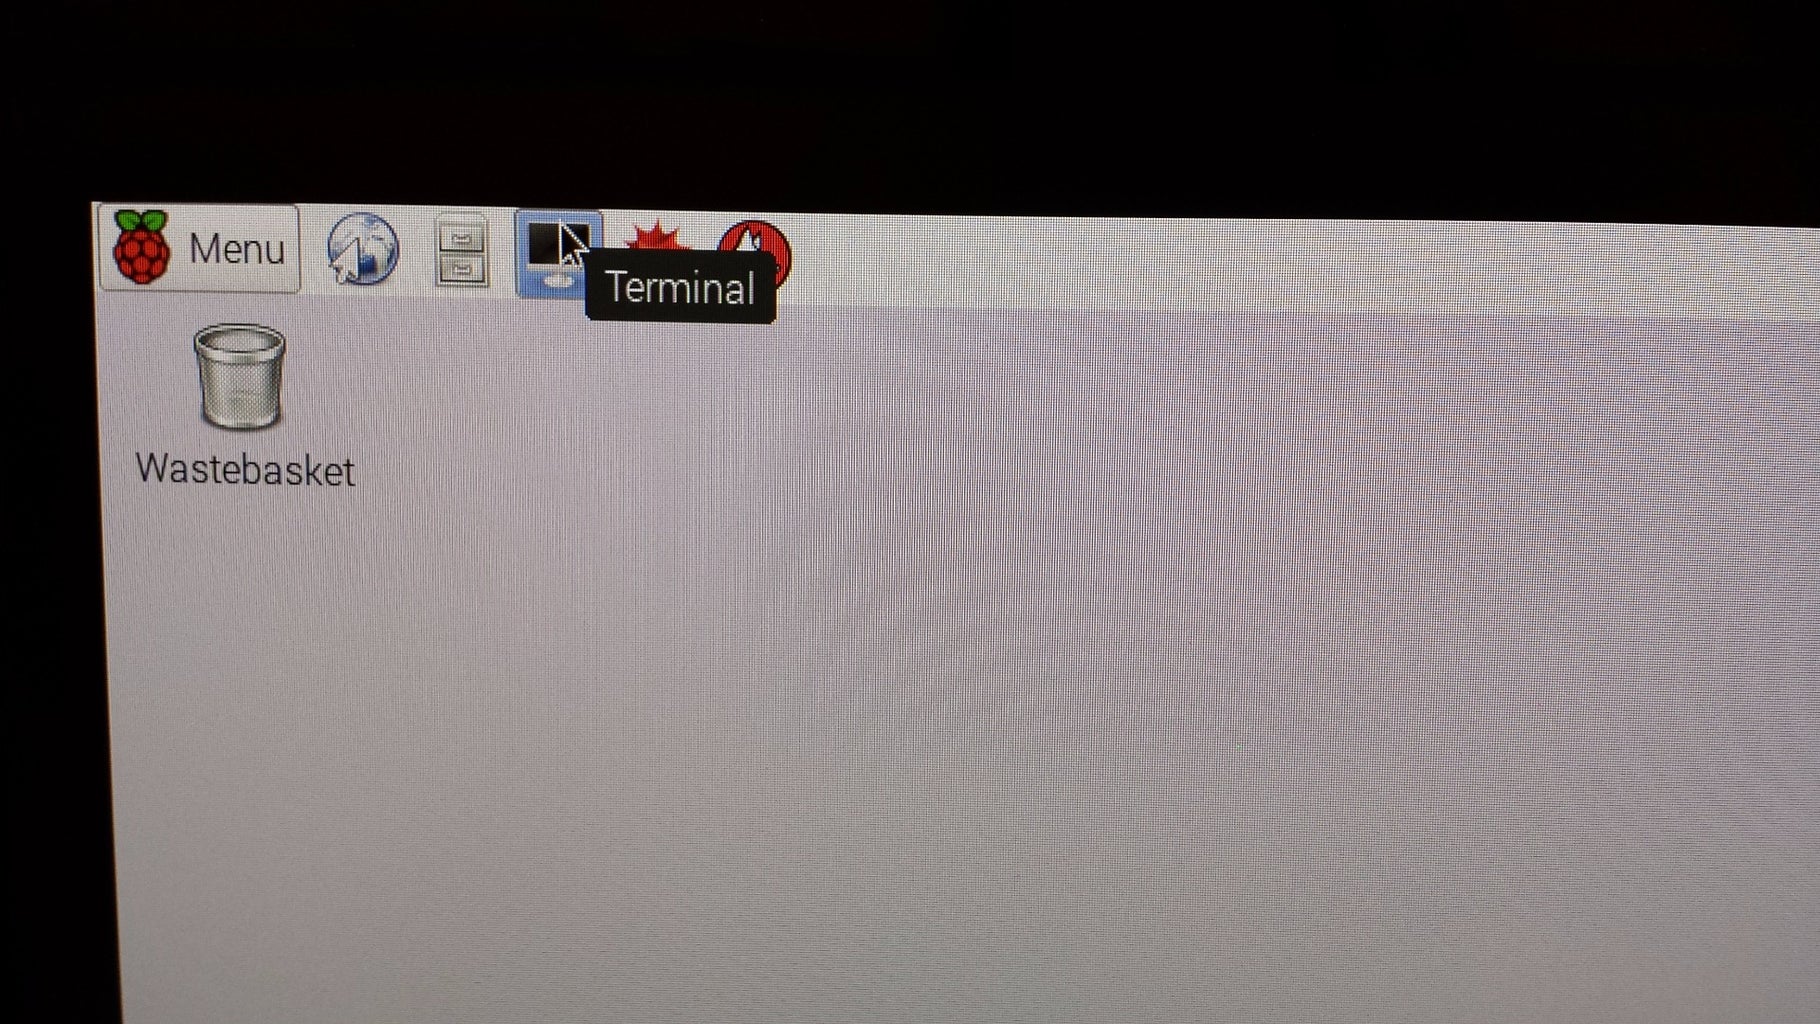
Next we need to figure out what IP address was assigned to the RPI. Connect your RPI to your monitor via HDMI cable and connect a mouse and keyboard. Then boot the RPI. It will start in desktop mode. Once the desktop loads, open a terminal and type "ifconfig" without the quotes (pictured above). This will print a ton of information but all you need to find is inet addr: which is the IP address assigned to your RPI.
After you have the IP, shut down the RPI and disconnect everything but the USB power and the Ethernet. Restart your RPI!
Step 6: Installing LabVIEW on the RPI2

With the RPI2 back on, open a command prompt and try to ping it to make sure that it is connected on the network. Type ping "IP Address Here". In my case, I type "ping 192.168.1.239" without quotes. If you get a response you're good! If not, give it some time to finish booting and try again.
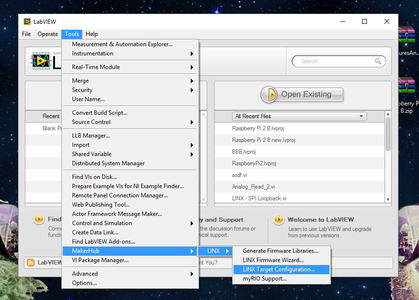
Now open LabVIEW and go to Tools -> MakerHub -> LINX -> LINX Target Configuration. This will open up a window like the one pictured above. Enter the IP address you found in the Hostname or IP box. For the Raspberry PI, the default username is "pi" and the default password is "raspberry". Enter that information and click connect.
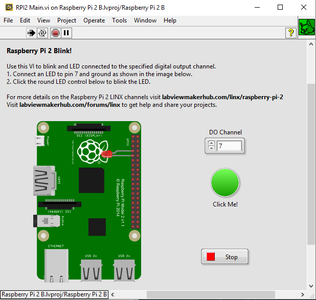
The indicator will show the installation information. Once it's done connecting, Go to the install software tab and click install. Once the install is finished, a blink example will open.
Step 7: Run an Example

Here is the Pinout for the RPI2 that MakerHub uses.
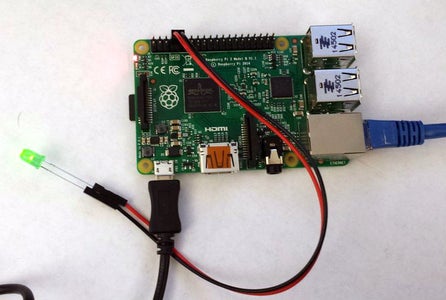
With the example open, attach an LED to digital pin 7 and ground. Run the VI and notice that when you click the LED on the front panel, the LED you connected to the Raspberry Pi will blink as well!
You're done with setup! Below I have some useful information on creating new VIs and the basics of LabVIEW coding.
Step 8: Adding New VIs
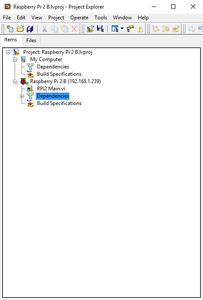

You may have noticed the LabVIEW project that opened up with the RPI. This is where all the VIs you make for your Raspberry Pi will live. To add a new VI for your RPI, open the LabVIEW project if it isn't already open and right click on the RPI and go to New -> VI.
To reconnect to the PI, you'll need to right click on the Raspberry Pi and click "connect". This will reestablish the connection between LabVIEW and your PI.
Step 9: Extra Resources
Here are some useful resources for learning basic LabVIEW coding and LINX.
1. RPi and BeagleBone Black Guides
2. LabVIEW Basics from LabVIEW MakerHub
If you have any questions, feel free to comment or you can post LabVIEW and LINX related questions on the MakerHub Forums.


