

Introduction: High Power LED Rechargeable Torch


Hello friends.This Instruct-able is very useful for adventurers.I like LEDs. And I like torches. I have always been looking for a torch that can light up to 3 to 4 hours, and finally i made it.
Do not underestimate the effort of desoldering and soldering, though. It took me about a day altogether to finish the project.
Step 1: Project Overview

The torch is a really cheap model, probably you can built it under 3 - 4$ (400 PKR). The wiring include resistors, which means that it cannot be sparked or damage. I simply slapped 7 LEDs with 7 (0.33ohm resistors) in parallel and connected them to the battery via a switch.
As I intend to use the torch mainly with rechargeable batteries, I calculated the following circuit for 9.2 - 9.4 Volts, which is the typical voltage of two batteries.
Most LEDs could be set in parallel and driven with a single resistor, but i use 7 resistors with each LED. All LEDs need 300 - 400 mAh, so I divided them up with one resistor each.
Depending on the types and amounts of LEDs you are using, you may need different resistors. This LED resistor calculator may help you on your way.
Step 2: Gather All the Stuff


I tried to make the project as inexpensive as possible and so I came up with the following parts:
-Heat Sinks (7)
-LEDs 1watt (7)
-0.33 ohm resistors (7)
-0.7ohm 1/8w resistor (1)
-1N4001 50v 1A Diode (1)
-5mm led (1)
-4.7 v batteries (2)
-Charging Jack (1)
-Toggle switch (1)
-Wire roles RED + WHITE (1)
-Fat pin converter (1)
-2 way Connector (1)
For tools I used:
-Solder
-solding wire
-wire cutter
-Heat Shrink Sleeves
-Mini Drill
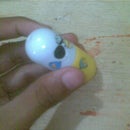
Step 3: Preparing Bottle & Batteries


Wrap the cover of bottle.ahhhhh i done like that cover.Next add power glue to your batteries and combine them.Sold positive to positive and negative to negative.Now the the two batteries are not two, now they do work like one battery.
This will also work for your next projects, and you can charge it from any Nokia Mobile Charger. Isn't it great.
Step 4: Preparing Torch and Charging System


In order to operate the switch, the shaft has to go through right side of the bottle. With a shaft diameter of 1cm, I used mini drill to create a hole that was placed at right side of the bottle.
With the shaft's position thus defined, the wiring would barely fit on top. To fit the switch inside low enough I had to carve away some of the plastic with a sander.Use super glue for adding LED and converter, and then the bottle gets shape something like a funny toy.
But be-careful.Safety First.
Step 5: Adding the LEDs


Make small holes for wires and resistors with mini drill.Connect 0.33ohm resistor with each of the LED, and don't forget to connect them to positive side.......take wires and connect them all to negative.Finally connect all negative wires and sold them, and all resistors too.
Take two wire connector and sold red + wire to resistors and black - wire to all the wires you have sold together.
You have now madded this LEDs part.
Step 6: Testing Torch and Charging Jack


Testing is a very important step while you were making any project, and i simply have done that.you can see pictures below.Just connect the two wire connectors and push the button.Check the timing of torch that how how much it glows and how much it torches up to, or what is the LUMEN'S of torch.This torch lumen's is 600 - 700 and lasts up-to 3- 4 hours.It's great.
Also check your charging jack by inserting several chargers.I have tested it with almost 8-9 chargers ,and it didn't showed up any problem.
You can see that i have also added a 5mm LED to check charging situation.
Step 7: Assembling Torch


Insert all the parts in the bottle.
1-add batteries
2-add button
3-add charging jack with connector
4-add 5mm LED
5-Attach the two way connector
6-add the bottle cap
This is all.it's so simple.
Step 8: All Done


Any thing that you can't understand let me know.
And you have done it all.....enjoy & don't forget to comment.

Participated in the
Weekend Projects Contest


