

Introduction: Home Automation
Introduction:
It is more often than not, that we are snuggled up in the perfect position under our blanket when we realize we have forgotten to turn off the lights in the hall or feel the need to increase the speed of the fan. In order to overcome this everyday hassle we created a mobile application that centralizes the control of all electrical appliances in the house with a very simple and user friendly interface.
In this Instructable we teach you how to make your very own home automation prototype using a Inventron's Bolt Platform.
Step 1: Materials Required
Materials Required:
1) Inventron's Bolt Platform
2) Breadboard
3) LEDs
4) Connecting Wires
5) USB cable and power source
6) Motor (Optional)
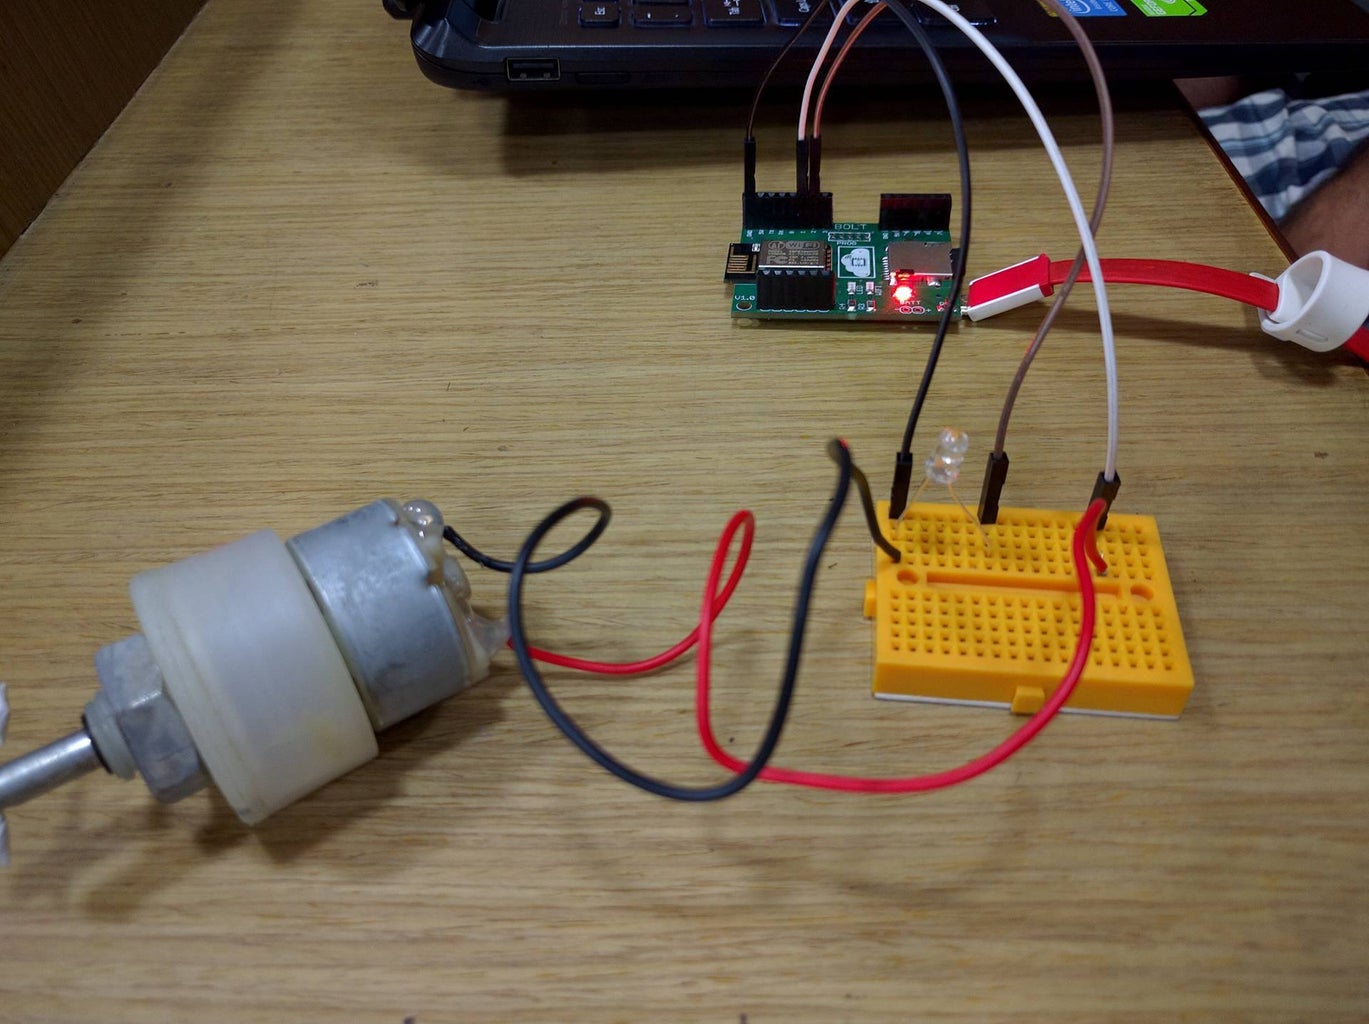
Step 2: Assembly of Bolt Circuit

1) Arrange the circuit on the Bolt as shown in the picture.
2) If you wish to add additional LEDs or Motors connect more wires at terminals 3, 4, 5, 6, or 7
Step 3: Breadboard Circuit Assembly


1) Connect all the negative terminals of the LEDs and motors to the row in which the ground terminal is connected, as shown in the image.
2) Connect the each positive terminal of the LEDs and motors in a separate row along with the wires that are connected to the terminals 0,..,7 of the bolt, as shown in the image.
Step 4: Coding With HTML and CSS for the Bolt

1) Connect your Bolt to a power source through a USB cable.
2) Copy the code from the file "HTML.txt" into the file "index.htm"
3) Upload "index.htm" and "bg.jpg" to your Bolt

Step 5: Running the Application
1)We upload index.htm and bg.jpg on Bolt
2)After restarting, we run the html file by entering the IP of the Bolt.
3) The response to our commands is slow due to the static file (bg.jpg)
i) The fan slider controls the intensity of the fan.
ii) The light slider is a switch to the lights of the room


![Tim's Mechanical Spider Leg [LU9685-20CU]](https://content.instructables.com/FFB/5R4I/LVKZ6G6R/FFB5R4ILVKZ6G6R.png?auto=webp&crop=1.2%3A1&frame=1&width=306)


