

Introduction: How to Make a Matchbox Rocket Launching Kit


Here's how to make rockets, that shoot over 40 feet, with aluminum foil and a wooden match.
These desktop rockets might be tiny, but they’re impressively powerful, and leave a cool trail of smoke. Surprisingly, they’re only powered by one single match head.
Step 1: Watch the Video!
WARNING: Although these rockets are only fueled by one match head, they do get hot enough to burn fingers, and leave scorch marks in carpets. This project should not be attempted without adult supervision, and if done indoors, safety precautions should be in place to mitigate any fire hazards. Misuse, or careless use, may result in property damage. Use of this video content is at your own risk.
Step 2: Some Things You'll Need


In this project you'll need aluminum foil, a wooden skewer, a box of matches and my rocket template, which you can get for free here. You can use green or red “strike on box” matches because they both work the same.
Note: Make sure to set a few matches to the side, because you'll still need a bundle of those, for your kit when it’s finished.
The rockets are powered by one single match head. But they only work, if you get rid of the stick first, so grab a pair of scissors.
And if you try lining your container with something like a sock, the match heads won’t bounce out. Instead they just collect conveniently at the bottom.
Step 3: The Soda Cap Container


Here are all the match heads I got from this box. To store them, I'm using one of these soda cap containers made in a previous project. These things have all kinds of applications, You can see how to make them in the project video below.
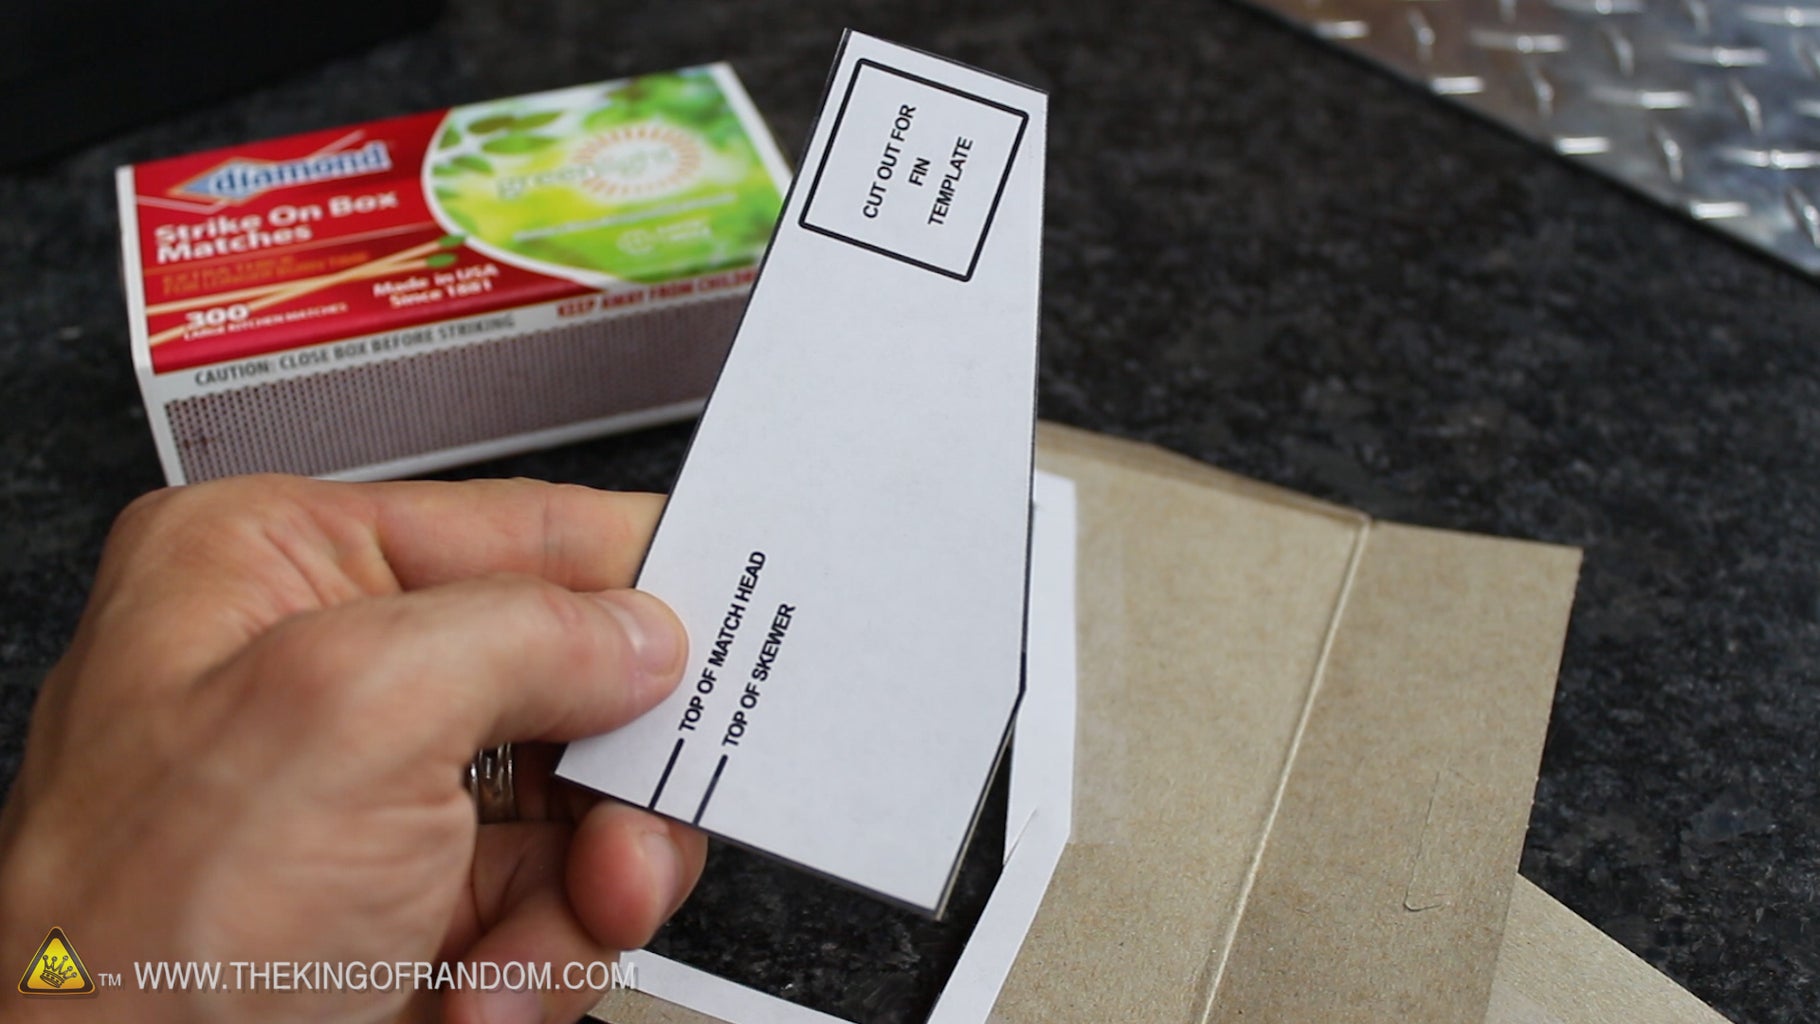
Step 4: Prepare Your Skewer for Tooling


To start making your assembly kit. You're going to need a single bamboo skewer, and this template. Just click on the link below to get that.
Transfer the marks from the diagram onto the skewer, then carefully cut the ends off.
Step 5: Rocket Body Template


If you tape the body template to a piece of paperboard, like the side of a cereal box, and cut the edges as cleanly as you can, you'll end up with a nice tracing template.
Cut a square to use as the guide for tracing the rocket’s fins from aluminum foil tape, which you can find at the hardware store.
Step 6: Point to Point


Each square will make one set of rocket fins, so cut as many as you want, then fold them “point to point” from both directions.
Pinch them at the base and push your fingers together, so that when you crease them down it looks like a little x-wing.
When you snip off the point at the very tip, the rocket fins are ready for application, and by now you should have an idea of how this is going to work.
You can make a whole bunch more and load them into the other side, of the soda cap container, so you have them on hand whenever you need one.
Step 7: The Rocket Bodies


Ok, bust out the aluminum foil, and tear off a sheet to start creating the rocket bodies.
Lay a sheet of paper towel over top, then carefully fold the stack up 3 times, so it’s 4 layers deep and just a bit larger than the cardboard template.
Trace around the edges, then cut the shape out of all the layers, all at the same time.
Normally the edges would stick together after the foil’s been cut, but the paper towel solves that problem, and makes it super easy to separate.
Step 8: The Portable Assembly Station


I tried making 13 pieces at the same time, and it worked. So you can see how quick and easy it is to make a whole stack in no time flat.
The assembly station is completely portable as well!
The patterns, and the template are designed so they fit perfectly inside the matchbox, and there’s a little place for the skewer in there as well.
To finish your rocket factory the only thing left to do is make a small hole in the top of the box, about half an inch from the end.
Now bring back any matches you saved from earlier, and add a candle, you've created a portable assembly station, that you can take just about anywhere.
Step 9: Building the Rockets


Alright, get to work and build some rockets. Here you can see what the finished rocket will look like. It’s light as a feather, but surprisingly stable in flight.
You might have noticed there are two markings on the template that indicate how to roll the body tube.
With the skewer in position, place a single match head on top, and make sure it’s pointing upward, without any gaps.
Now slowly and carefully roll the foil tube, as tightly and neatly as possible.
When you get to the end, pinch the tube right above the match head, then push the foil down flat. There should be about half an inch of foil at the top, and this gets rolled toward the match head.
The most important part here is crimping the tip with something like a pair of pliers. You should crimp multiple times, and from different angles just to make sure it’s completely sealed.
Step 10: Finishing the Rocket


At this point, attach the rocket fins you made earlier, by peeling off the sticky stuff on the back, then pushing the rocket body through the hole in the center.
Work the fins around until they stick firmly in place near the bottom of the rocket, and with that final step, you’re done.
That’s how easy it is, to make a matchbox rocket.
While you’re at it, why not make a few more?
You have the option of building rockets on location as you need them, or creating them in advance so you can just show up and start shooting, within seconds.
I just made 13 of them, in about 10 minutes, and you can see they fit perfectly into the kit as well.
Step 11: Ready for Launch


The rockets get loaded by pushing the tapered end of the skewer into the nozzle, then twisting upward until it touches the match head inside.
Push the skewer through the hole in the matchbox, and now if you push the box together, you can adjust the launch angle to whatever you need it to be.
Light a candle and position the flame just under the tip of the rocket, it will quickly warm the foil until the match head reaches its auto-ignition temperature .. which, will shoot it off with an impressive amount of speed and power.
The rockets leave a satisfying trail of smoke when they blast off, but you do need to be careful because they get hot enough to burn your fingers, and put scorch marks in your carpet.
Step 12: Outdoor Use


Now of course the safer option is to launch your rockets outdoors. But you’ll probably find the flame on the candle won’t hold still in the breeze.
You can use a wind resistant BBQ ignitor to keep a steady flame, which works pretty well.
The rockets shoot from the front porch all the way to the street, and in some cases up to 40 feet away. So it’s important to use common sense, and avoid the temptation to point them at people or property.
Step 13: More Projects

Now you know how use matches and some aluminum foil to make a fully portable rocket factory, so you can manufacture and launch, your very own matchbox rockets.
If you liked this project, perhaps you’ll like some of my others. Check them out at www.thekingofrandom.com

First Prize in the
Burn It! Contest

Participated in the
On a Budget Contest

Participated in the
Explore Science Contest


