

Introduction: How to Build a Fire Breathing Dragon Mask


For Haloween last year, I did this: https://www.instructables.com/id/Fire-Breathing-Dragon-Mask/
A year later, I've revisited the fire breathing dragon mask.
Problems to deal with:
- The mask was flammable
- The igniter took a while to get up to temperature
- The igniter may get cooled down by the butane jet and not perform
- A Butane leak can easily create an explosive atmosphere
- It doesn't always extinguish itself. The butane in the hose is enough to slowly expand and leave residual flames for far longer than is acceptable.
- I wasn't content with the flames. The bar needs to be raised.
Step 1: Re-make the Mask


This time I build it out of aluminium. I chose aluminium because mild steel will rust, and I needed to cut and bend it by hand, so stainless steel would make life hard on me. Also stainless is expensive!
I got a sheet of 0.5 mm 1050A H14. 3m by 1m. I only used about a third of it, tessellating the nets as best I could.
I used aviation shears to cut the nets out. Laser or waterjet cutting would have made life alot easier.
I used some welding clamps to bend it.
The mask was TIG welded together. It was pretty tricky because it was so thin, and the cut edges were serrated.
I made the headband out of cardboard first. Get it about right, then used the templates to cut and bend the aluminium one.
Step 2: Improved Igniter

The Nichrome coil wasn't great. It depended on a stable input voltage; As the battery was full it would be a little too hot. As it depleted, it would get too cold to work.
Spark ignition is better. I considered building one. Then found these high voltage barbecue lighters:
https://www.amazon.com/SUNKEE-Voltage-Generator-St...
I just wired it up in parallel with the fuel, so when ever fuel is being dispensed, the spark is too.
Ultimately, I bent a couple of pieces of welding wire to become the spark gap electrodes. Around 2.4mm diameter. I ground a point on the end of the welding rod for the sparks to propagate from. I bent them in such a way that the spark gap would be in the right position to ignite the fuel-air mixture.
Note: Eventually I expanded this to three fuels simultaneously. To get this to work, you must use diodes. Otherwise when you press one button, all three will activate.
Step 3: Liquid Fuel System


The problem last time, was that the valve was a long way from the end of the hose. In which case it isn't as controllable. The valve could be closed, but it would still leak fuel due to the residual pressure in the hose. This is likely due to liquid droplets in the hose evaporating slowly. To solve this, I need the valve closer to the point of ignition. I also Used a liquid fuel. and Liquids are nearly incompressible.
I used fuel injectors this time. They take 12v DC to turn on/open. They have the nozzle built in to atomise the liquid. they are designed to run with petrol or diesel, in some cases methanol.
I found that a 3mm plastic barb would be a push fit into the inlet of the fuel injector. I cleaned it with isopropanol prior to securing it in place with epoxy resin.
For the fuel line, I used cotton over braid rubber fuel line for petrol or diesel: http://www.ebay.co.uk/itm/Cotton-Over-Braid-Rubber...
With each connection held in place with a clip.
I used a car tyre valve, and a bike pump, to pressurise the system. I found that a 2L PET fizzy drink bottle worked well as an accumulator. Minimising the pressure drop as the fuel is expended. Using a 300ml bottle half full will mean you have to stop and pump up the tank every few seconds.
My system eventually grew to allow me to have three different fuels simultaneously. 200-300ml seemed to be enough. I haven't ran out during a test/demo yet.
Step 4: Coloured Flames


The reason I wanted three fuels, was to do Red, Green, and Blue coloured flames. Separately, and simultaneously.
Methanol burns with a colourless flame, as does ethanol. But Methanol is cheaper and easier to get hold of.
The chemistry is covered in separate instructables. I've had limited success. The first issue is that methanol doesn't seem to burn as well as petrol. It also doesn't seem to atomise quite as well as the petrol. This may be due to the difference in viscosity. If I can up the pressure of the system, then I may be able to get it working. Regardless, the blue mixture in particular seemed to kill the fuel injectors after a single use.
It made pump spray water bottles stop pumping too. I'm guessing this is primarily due to the corrosive properties of these mixtures. In addition to this, they precipitate salts when they dry out, and these solids clog up the spray mechanism.
Don't use fuel injectors for coloured flames, the only one I think might be possible is red, using lithium.
Here are the links to the instructions for those projects:
https://www.instructables.com/id/How-to-Make-Red-Fl...
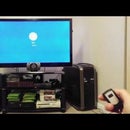
Step 5: Mount in the Mask


I put all the gubbins in a backpack. mounted the igniter and fuel injectors in a piece of wood. I chose wood because it had to be non conductive, and somewhat heat and chemical resistant.Because wood is adsobent, it turns out that if you get it wet, it will conduct enough to make the spark ignition leak current to ground. I'd recommend a different material. Maybe plastic.
I mounted the switches onto a piece of wood. Then used two screws to mount the wood into the masks mouth.
Step 6: Testing
The petrol was pretty straightforward and easy to get working. As you can see in the videos.
The methanol was a bit tricky to get working. It needs a high level of methanol in order to be flammable enough to be ignited by the sparks. It also need a higher pressure in order to atomise.
You can see in the video that it isn't as impressive as the petrol.
There was an air leak in the system when I filmed it in the mask. It meant the fuel didn't atomise as it should have. The methanol seems to be harder to atomise. Presumably due to the difference in viscosity.
Step 7: Conclusions
- Fuel injectors work perfectly for petrol. On/Off like a charm.
- Aluminium Helmet/Mask is AWESOME.
- Spark ignition works perfectly, not sure if wearing a metal helmet millimeters away from 7kV is a good idea...No problems so far!
- Coloured Methanol flames
- Red- Use lithium from Energiser lithium batteries. or Strontium Chloride. Strontium Nitrate is insoluble in Methanol.
- Green- Boric Acid works a charm. Copper Sulphate is cheap and works too.
- Blue- Sulphur, or Copper Chloride II. For Which I've found you need Hydrochloric acid. So you might as well use Copper Sulphate.
- Don't expect your fuel injectors to last very long.
- Have a high (>70% methanol content)

Participated in the
Remix Contest 2016


