

Introduction: How to Program an Arduino Pro Mini With Arduino Uno SMD or DIP
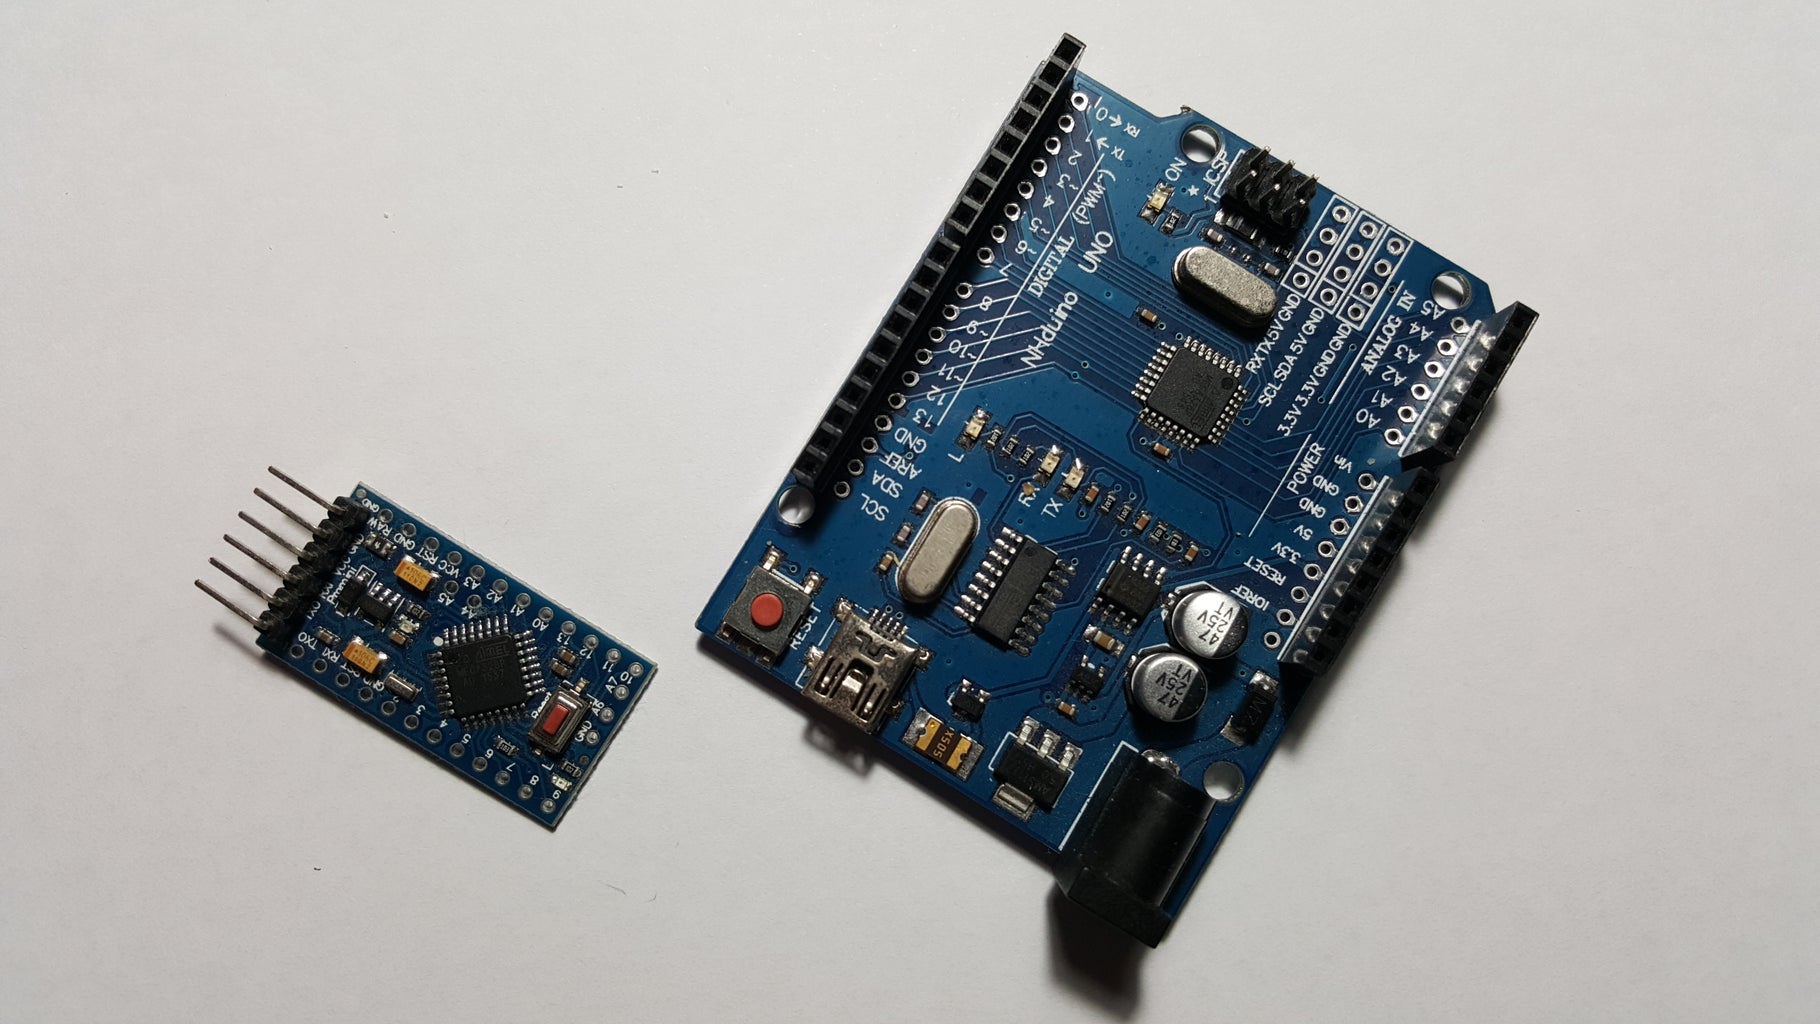


It is very easy to program the arduino pro mini with the arduino one, in my case I used the Chinese clones, so my arduino one is a SMD version. In the online tutorials the DIP version is used.
Es muy fácil programar el arduino pro mini con el arduino uno, en mi caso utilizó los clones chinos, por lo que mi arduino uno es versión SMD. En los tutoriales en hay en línea se utiliza la versión DIP.
Step 1: Connections

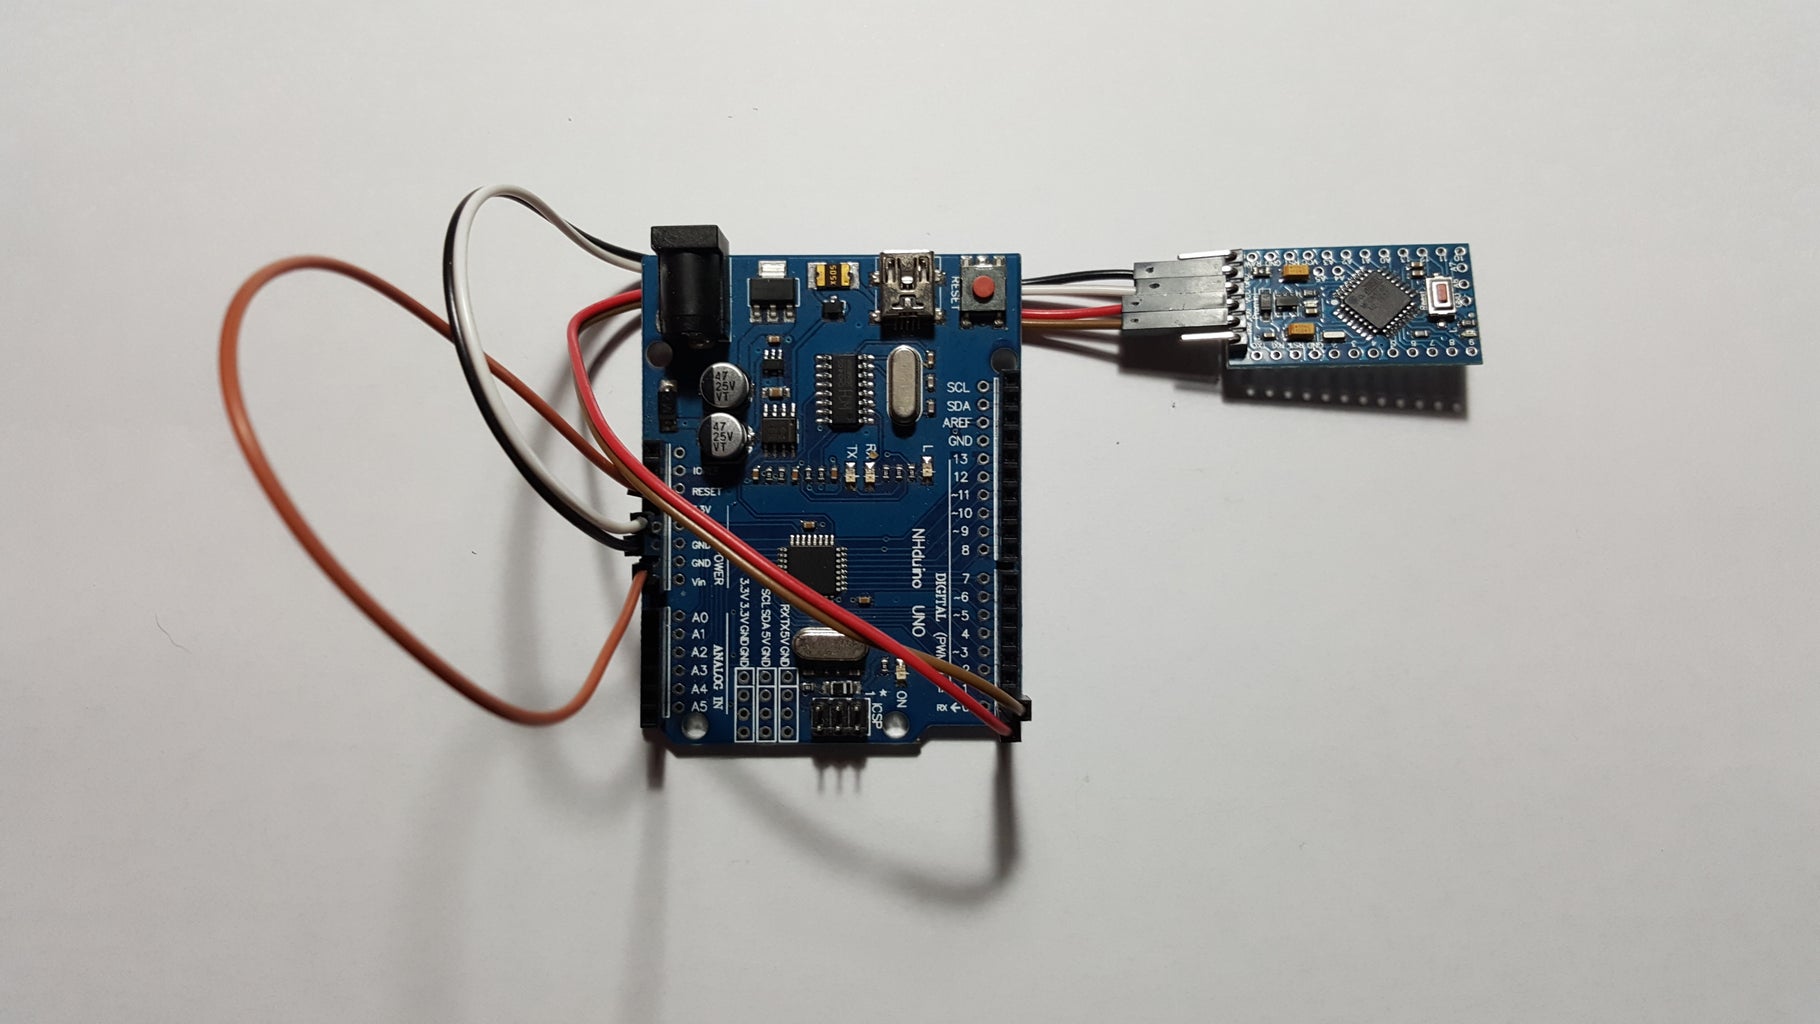
The connections will depend on the version of arduino pro mini that you have, either 5v or 3.3v input. In this guide the version of 5v with the ATmega328 was used and the connections are as follows:
Las conexiones dependerán de la versión de arduino pro mini que tengan, ya sea de 5v o de 3.3v de entrada. En esta guía se utilizó la versión de 5v con el ATmega328 y las conexiones quedan de la siguiente forma:
| Arduino Uno SMD | Arduino Pro Mini 5v |
| 5v | VCC |
| GND | GND |
| RX | RX |
| TX | TX |
Step 2: Arduino IDE

The only parameters that matter are Board, Processor and Port, which should choose the one that suits the version of Arduino pro mini that you are using.
Los únicos parámetros que importan son Board, Processor y Port, que deberán elegir el que se adapte a la versión de Arduino pro mini que estén utilizando.
To load the code in your Arduino do it normally, either by clicking the arrow pointing to the right, in Sketch> Upload or with the shortcut Ctrl + U, when the status bar displays the message " Upload" press the RESET button on your Arduino Pro mini and you're ready to go.
Para cargar el código en su Arduino lo hacen de forma normal, ya sea haciendo clic en la flecha que apunta a la derecha, en Sketch > Upload o con el atajo de Ctrl+U, cuando en la barra de estado aparezca el mensaje de "Subiendo" presionan el botón de RESET de su Arduino Pro mini y listo
Step 3: Posible Errors
"avrdude: stk500_recv(): programmer is not responding"
Is because you did not press the RESET button in time, just try again.
Es por que no presionó el botón de RESET a tiempo, solo hay que intentarlo de nuevo.

Participated in the
First Time Author Contest

Participated in the
Makerspace Contest 2017


