

Introduction: How To: Simple Leather Vambrace


This is the first vambrace I ever made and it's a very simple one. It's easily modified, completely deconstructable, and really easy.
After a creative high caused by wandering around a renaissance faire (how many of my instructables could I, or do I, begin like that? Ha) I decided to make this and was able to come up with a pretty quick design. The end result I came up with isn't much good for deflecting any blows but you could use an armor grade leather and get some tougher results.
Without further ado...
Step 1: Supplies

For this vambrace all I used was:
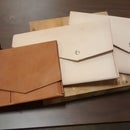
- Leather Scraps (you can find pre-dyed leather scraps in Tandy or the Tandy section of Michael's, Hobby Lobby, etc.)
- A cutting tool (exacto, scissors, etc.)
- A leather punch
- Chicago screws (these are like cheater rivets that just screw together instead of needing to be hammered)
- Buckles
Anything else is purely up to how you want to do it.
Step 2: Planning and Cutting

The pattern for this was pretty simple. I measured around my wrist. I measured how long I wanted it to be. And I measured around my arm at the point it would end. Then I added a little bit for overlap, drew those measurements out on a piece of paper, connected the sides with diagonal lines, and added a curve to either end so it would look right when it was wrapped around my arm.
Once I had the pattern I traced it onto the leather and cut it out. I also made two strips of leather for the straps.
Step 3: Straps


I decided to use chicago screws to attach the straps to the vambrace. If I wanted to change anything down the road it would be pretty easy since they can be removed.
On one end of the straps I cut a slot where the buckle prong would go and then punched a hole on either side for the screw. Here's the buckle inserted with the chicago screw in place:

I punched two holes for attaching it to the vambrace and a few smaller ones on the other end to receive the buckle prong. I also gave them a pointed tip on the end. Ooooo fancy.
It also needs holes in the vambrace itself to match the ones in the strap. This took some creative finagling. If you have a second pair of hands you might want to use them. I basically wrapped the vambrace around my arm, buckled the straps on, marked through the holes in the straps, took it all off, and then punched holes where I marked. Once that's done just attach the straps with the chicago screws and you're done! See, I told you it was easy.

Step 4: Finished


Off your arm it might look kind of floppy and stupid.

Womp, womp.
So put it on! That's what it's for!
As I said before there are numerous modifications you could do to this to personalize it to your tastes. You could use a heavier grade leather, do some tooling, modify the straps, make a lace up version, paint different designs on it, etc. The sky's the limit so go forth and make! And then wear it too, because why not? Fashion shouldn't be boring.
If you do decide to make it remember to click the "I Made It" button and also share pictures in the comments!

Participated in the
Halloween Costume Contest

Participated in the
Leatherworking Contest


